Announcement

Collapse
No announcement yet.

Alex's '42 WC53 Carryall Build Details - Cummins ISB170

Collapse
X
 
  • Filter
  • Time
  • Show
Clear All
new posts

  • #31
    My father in law came down for the weekend while my wife was out of town with her mother and he lent me a hand on some stuff with the truck.

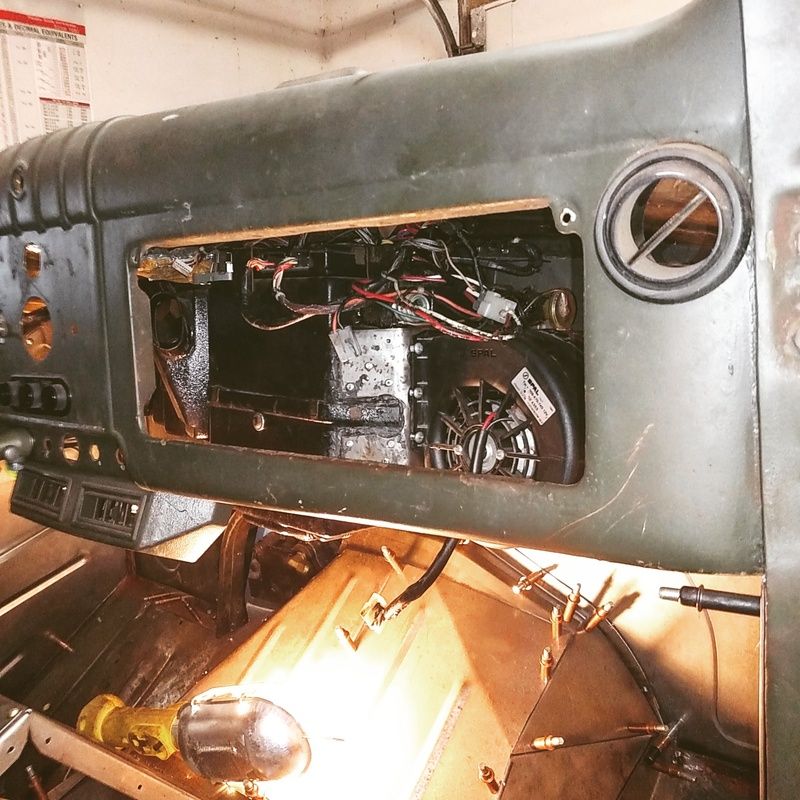
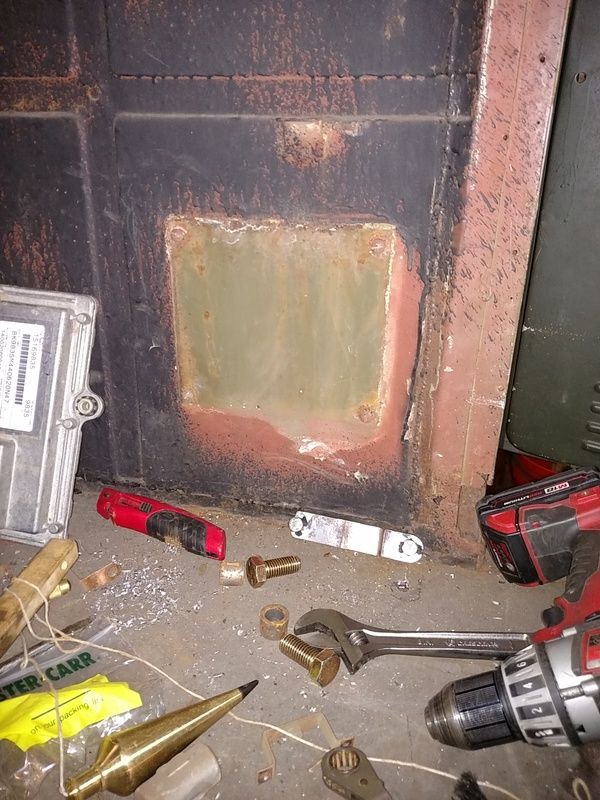
    Since the firewall still isn't fully attached and is just being mocked in with Clecos, I have the ability to remove it and work on it on the bench, which is MUCH easier than standing on my head under the dash.

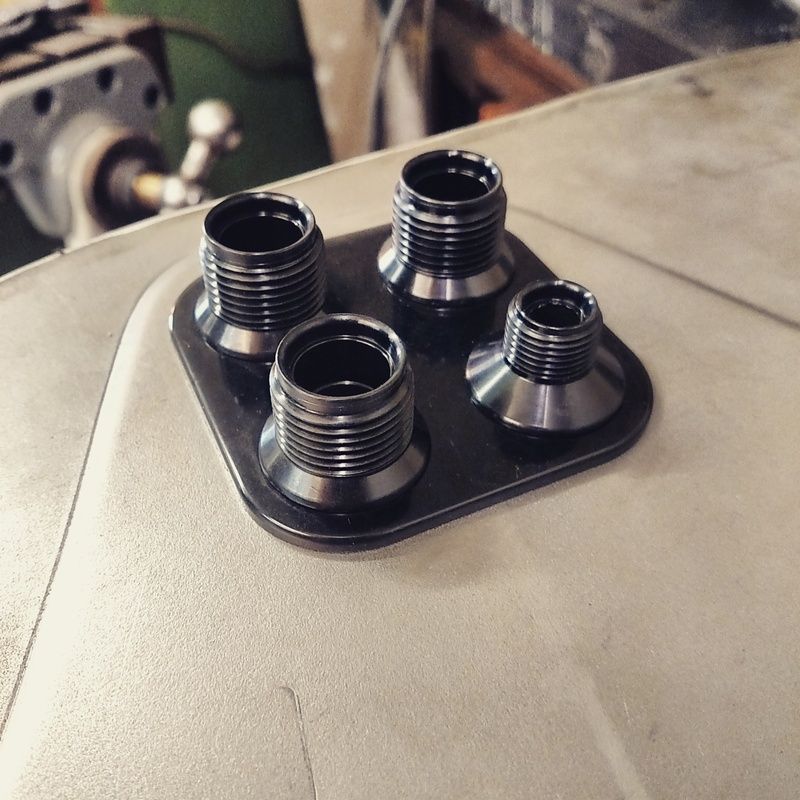
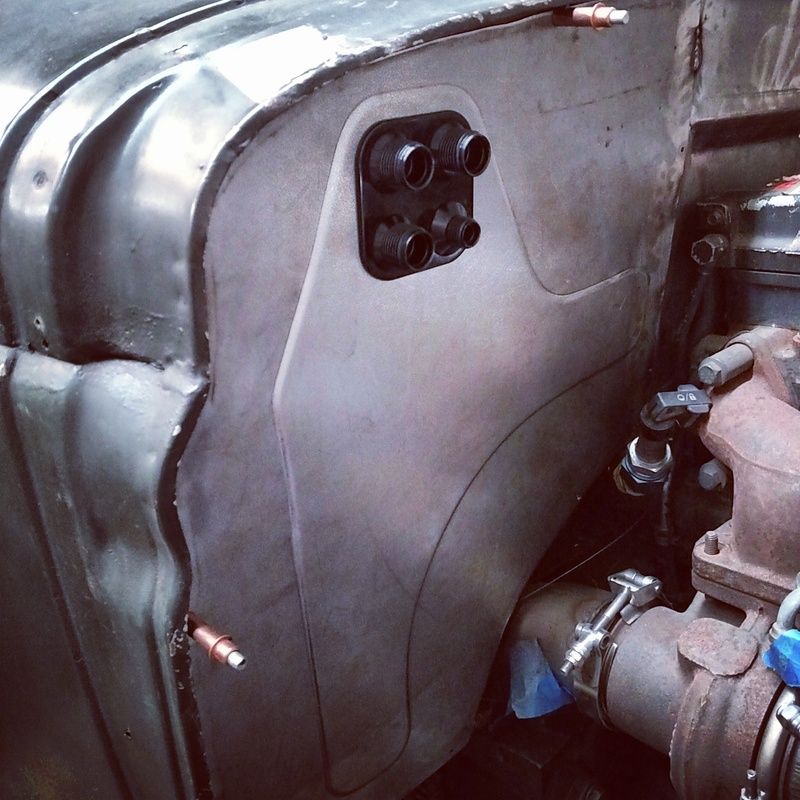
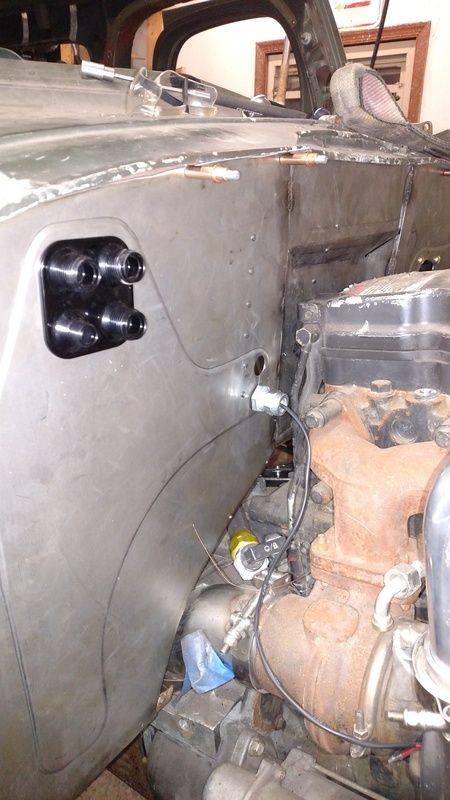
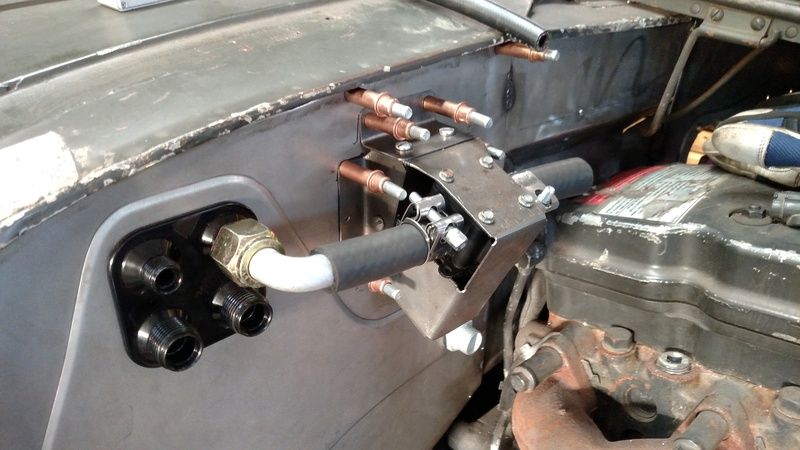
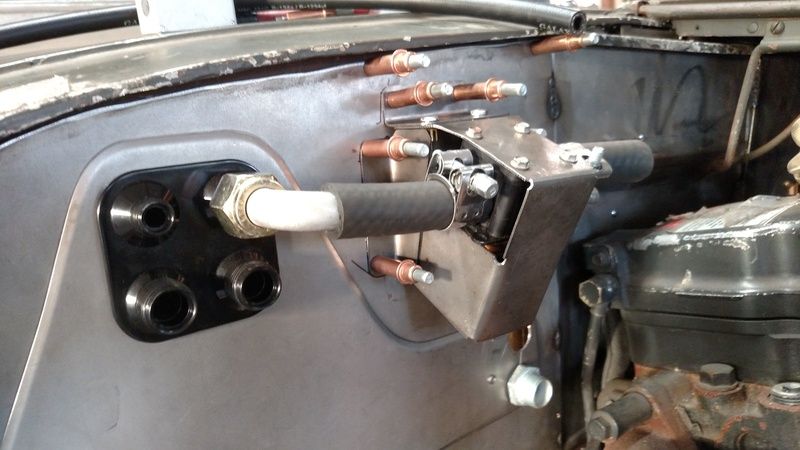
    Example, laid out and installed the bulkhead for the AC system.


    1942 WC53 Carryall in progress.

    Comment


    • #32
      The AC evaporator box came with the truck... and was also subsequently broken... The plastic housing where the blower motor attached is also very close to the location that the firewall attachment bracket mounts and there just isn't enough rigidity in the setup to handle any sort of harsh ride. In a street cruiser, you're probably fine... something like this on a washboard road.. she gone. That being the case, I believe that in the previous owner's application, which were the original leaf springs, being used at a higher speed than ever intended for the truck, the ride was a bit harsh and I can remember watching a video from inside the cab of the truck and you can hear the AC unit incessantly banging under the dash.

      So, I had to fix the broken portion of the unit, and also come up with some brackets to attach this thing to the firewall...


      I'll post pictures of the other side bracket later, I was proud of how clean it turned out as well. Either way, with some Clecos holding all the parts together, its a snug fit under the dash. Disregard all the RTV over the patch panel. Stuff got everywhere and my numb fingers weren't much help as I didn't know I had it on me half the time.

      1942 WC53 Carryall in progress.

      Comment


      • #33
        looks really good , wish i had the sheet metal skills and equipment you do

        Comment


        • #34
          Originally posted by penski61 View Post
          looks really good , wish i had the sheet metal skills and equipment you do
          Thanks! But actually with the sheet metal work, I am just learning as I go. Sheet is cheap so I can afford to make parts two or 3 times. The tools aren't all that impressive either, the trickest thing is the Magnetic Brake, which is totally work it for doing crazy stuff.

          Been tinkering more as I continue to feel better.

          The EGT is an aviation grade EGT / Boost combo unit. It says in about 400 places in the paperwork and on the gauge DO NOT SPLICE and to only use the correct patch cable for extension. The thermocouple is calibrated for the exact length of wires and it even has a calibrated drop for addition of the patch cable. This means I can't splice the system into my bulkhead wiring main cable but rather have to create a hole in the firewall. I also have the heater flow solenoid that I decided would be better outside the cab that will need wires to it. I am trying to avoid as much additional and random wires to things as I can. Was hoping for just the primary cable to the CAN box under the hood, the connections to the ECM, and the engine harness being its own deal that already exists. Obviously some wiring has to sneak back to the transmission as well; but I still didn't want a bundle running along the firewall. So this creates two wire sets that I need outside of the firewall that are separate from the main Amphenol bulkhead. These were the best "old" looking cord grips that were temp rated that I could find, with some paint on them, (and the cap tightened down flush) I think they'll blend in better. The other one is in the mail. I am also going to make a small heat shield that will also hold my transmission dipstick tube extension away from the manifold. I had to add a similar bulkhead on the driver's side for the boost side of the gauge to get a reading but was able to sneak it behind the hydroboost accumulator so its not really evident with everything bolted up.

          Where would be the best place to drill and tap the manifold for the EGT probe on this manifold? I'm not certain if that is a split flange, as I just can't remember. I've been told the last cylinder on the Cummins are the most problematic and typically run the leanest. True?


          Also while fitting up the rear power cell for the CAN system I found some original paint. Something that hasn't seen daylight since 1942. I can't decide if I want to re-use the original box and make a deeper cover or just start from scratch with something new. It needs to house my rear Powercell so there will be wires coming up into it from the floor that I'll hide in a conduit of sorts, or something. Daydreaming the details currently.

          1942 WC53 Carryall in progress.

          Comment


          • #35
            Had to make a cover for the heater valve. It was super plastic looking and this is kinda rough but with a change in hardware and some paint it might look a little better.


            Also, to keep myself motivated I hung a fender and the hood just to remember what I am building...

            1942 WC53 Carryall in progress.

            Comment


            • #36
              Does it help to say 222 Days until the First Sunday of Rally :)
              1967 W200.aka.Hank
              1946 WDX.aka.Shorty
              2012 Ram 2500 PowerWagon.aka Ollie

              Life is easier in a lower gear.

              Comment


              • #37
                Originally posted by Iowanogre View Post
                Does it help to say 222 Days until the First Sunday of Rally :)
                Ugh not much help, but certainly extra stress. I've got some health things in life that keep slowing me down.

                I've been battling with a place to put the air cleaner. I do not want anything mounted to the fender, which I see a lot of the diesel conversion guys do. I wanted to draw a cold air system... not looking too easy as my cowl if FULL from the extra systems.

                Well, that means a canister under the hood mounted to the firewall. Probably easier to post this in pictures so hang with me.


                Step 1, source parts from Bed Bath and Beyond... seriously....


                Step 2, machine said cake baking pans to the dimensions you want.


                Step 3, figure out how to attach a filter that will flow enough air inside the pans. This is upside down from the actual mounting but that is a K&N air filter that has more surface area than what is used in a 7.3 Ford E350 Van or Truck from the Early 2000s, so I figure I'm good on opening. I am using all 3" diameter plumbing on the intake side and then 2" on the pressure side of the turbo.

                1942 WC53 Carryall in progress.

                Comment


                • #38
                  Next process in this chaotic project is to roll some aluminum and put it all together with some rivets so that it is obviously not made from cookware.


                  I found some O-ring / square seals to use between the cake pan lips to seal and the draw spring latches to hold it all closed. Looks like something you could buy, hopefully. With some powder coat on the whole thing I imagine it will blend in well.


                  I still need to build the bottom inlet parts where the tube will attach. Am going to weld a ring to a flange, pass it through, and then rivet that flange to the bottom, however I may make it part of the firewall attachment. Not sure yet. I need to build some hood latch tabs for the firewall first before I finalize my locations.

                  1942 WC53 Carryall in progress.

                  Comment


                  • #39
                    And final view of completed part, but still needs a heat shield and the bottom inlet tube attached to it.


                    1942 WC53 Carryall in progress.

                    Comment


                    • #40
                      WOW! Great use of off the shelf parts with great ingenuity. Wonderful work as always,
                      I drive a DODGE, not a ram!

                      Thanks,
                      Will
                      WAWII.com

                      1946 WDX Power Wagon - "Missouri Mule"
                      1953 M37 - "Frankenstein"
                      1993 Jeep YJ - "Will Power"
                      1984 Dodge Ramcharger - "2014 Ramcharger"
                      2006 3500 DRW 4WD Mega Cab - "Power Wagon Hauler"

                      Comment


                      • #41
                        Nice work Alex. Definitely doesn't look like a set of cake pans anymore.

                        I'm hoping to bring the 6x6 out to Iowa next year, finished or not. I'll probably trailer it there either way, since top speed will be 45 mph.
                        Greg Coffin
                        Unrepentant Dodge Enthusiast

                        1951 Dodge M37 - Bone Stock
                        1958 Dodge M37 - Ex-Forest Service Brush Truck
                        1962 M37-B1 - Work in Progress
                        1962 Dodge WM300 Power Wagon - Factory 251, 4.89s
                        1944/1957 Dodge WM500T 6x6 Power Wagon - LA318-3, NP435, 5.83s, Power Steering, Undercab Power Brakes
                        1974 Dodge W200 - 360/727, Factory Sno-Fighter Package

                        Comment


                        • #42
                          Well, after nearly 3 months, I am back to working on this thing again. Many thanks for the motivating conversations with other members to get a fire lit under me so that I can get something accomplished.

                          No pictures for this update, but I did get some more components ordered for the intake system, and actually did a bit of mockup and some aluminum welding on my charge tubes from the turbo to the intercooler.

                          Does anyone see any major issues in using SCEET aircraft tubing for the charge air tube where I have all kinds of crazy routing problems? The material is not suggested for use in aircraft on the intake system for the sake of "If" the material delaminates it can cause an engine failure in flight. In my case it could possibly cause clogging of the intercooler and thats about it. Plus, it is going to be on the clean air side of the engine. I am not using regular SCAT but the double lined stuff.
                          1942 WC53 Carryall in progress.

                          Comment


                          • #43
                            i used aluminum bends and rubber silicone fittings from vibrant performance on the 65 town wagon with 12v

                            Comment


                            • #44
                              Originally posted by penski61 View Post
                              i used aluminum bends and rubber silicone fittings from vibrant performance on the 65 town wagon with 12v
                              Yea, I've been using their stuff as much as possibly but I have to sneak my intercooler tubing between the AC compressor and side of the hood and its a very very very tight fit.

                              Unfortunately, what I thought I had given myself enough room for, I didn't fully take into account the overall size of these 3" silicone couplers and where they force the can to be located for the sake of hood clearance. I don't care for the proximity of the air cleaner box to the hot side of the turbo. The whole point was to pull cooler outside air for the engine and this is nothing but a burrito oven if I mount it here. I guess I'll move it to the other side above the powersteering box and the AC dryer and possibly a wiper fluid res can mount back in here. I already have to cut the drivers side inner fender up since it had a battery box bump in it that interferes with my strut tower so I can go ahead and create the opening and intake box for the air cleaner there too. Not going to be too exciting in here in the nearish future but I'm hoping I can slowly get back to normal stuff and really cover some ground here again.


                              Even with a heat shield this is too close for my liking and blocks a lot of heat into a compact area.


                              There should be enough room to run a jumper tube across the top of the valve cover and over to the turbo inlet. I had ordered some 3" SCEET tube to use for a flexible routing intake tube, but I guess I can use it elsewhere or hold onto it for whatever for now.. Brake vents.. ha ha.

                              The square box there is the front harness relay center that powers all the headlights, front turn, horn, ignition, etc. The main Cummins ECM and the Allison TCM are all located rather central to this as well. Lots of stuff to fit but hoping I can still make it all work.
                              1942 WC53 Carryall in progress.

                              Comment


                              • #45
                                10 lbs of stuff in a 5 lb box. This 3" diameter intake stuff takes up a lot of space. All for the sake of getting cooler air to the engine. I'll wrap it all up for final assembly to help insulate it against ambient engine heat and feed as much cool atmosphere into the turbo as possible. I'm also going to have the manifold ceramic coated and put a blanket on the hot side of the turbo and wrap the down pipe to keep as much heat away from the passenger's floor as possible.


                                The dog thinks he is helping. He wants it done so he can go for a ride too!

                                1942 WC53 Carryall in progress.

                                Comment

                                Working...
                                X