Announcement

Collapse
No announcement yet.

46 FFPW Restoration

Collapse
X
 
  • Filter
  • Time
  • Show
Clear All
new posts

  • #61
    Transfer case Pt 3

    While waiting for the idler shaft tool I'll been cleaning and prepping the other parts of the case.


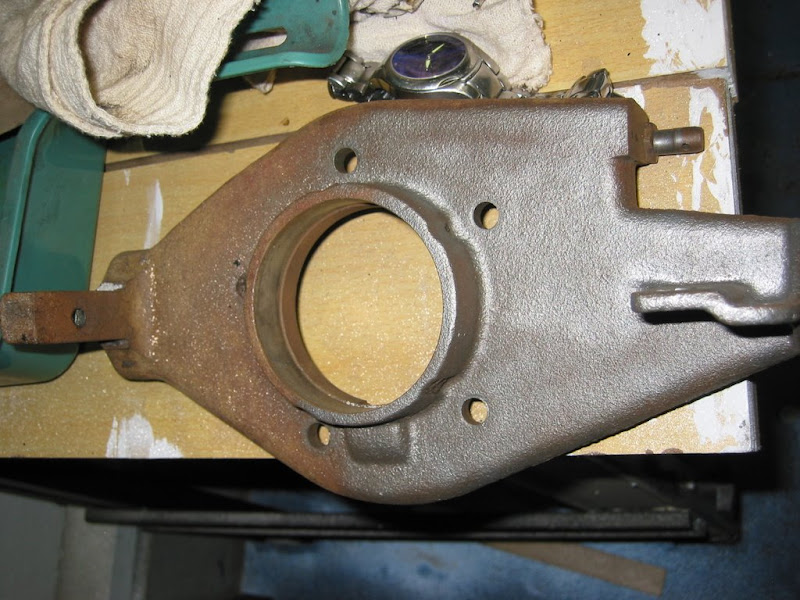
    I'll probably have to take the case somewhere to have it blasted and painted or powder coated. While I could get the case in my oven I can't fit it into my blast cabinet. But first I need a lot of de-greaser and scrubbing to get rid of 60 years of leaking lube oil.

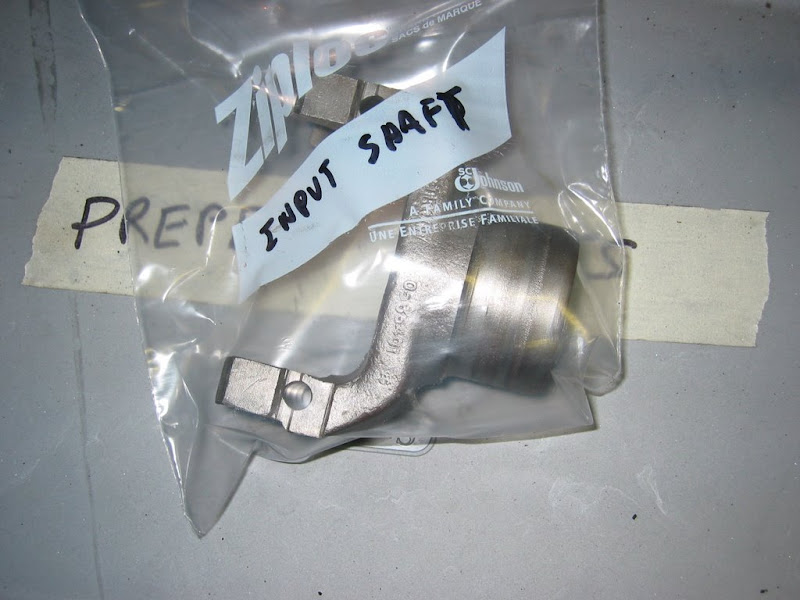
    In the mean time all the parts are on order so once the case is cleaned and finished I can start re-assembly. But first some vacation time with my family.

    Have a good week all.

    Comment


    • #62
      Still T-case (pt. 4)

      After a week's vacation I've gotten back into the PW. Also got side tracked with a worn out air compressor, so I spent part two days installing a new pump. Eventually I need to buy a bigger compressor, but it was much cheaper to put a new pump on this one for now, and there's nothing wrong with the motor and tank.


      As for the transfer case, on the advice of Tim Holloway I purchased the military manuals for the M37, they do seem to have better (or at least more detailed) instructions, and I like the PDF format.

      I managed to drive out all the bearing races and (after 15 minutes in the freezer) pressed in the new races.


      The races in the idler gear were a real bear to get out since there's no "notches" to help remove them. The manual recommends a bronze drift, and maybe bronze is hard enough to work, I had brass drifts (which were hard enough to find for some reason) and they were too soft to catch the lip of the race and drive it out. I ended up using a small cold chisel for it's narrow tip to catch the lip till I got the race moved far enough to get the drift on it. Luckily pressing them in was much more conventional.

      The output shafts were a completely different animal. The bearings put up a serious fight, and I had to use some extra metal square stock to hold the gear far enough above the press bed to have room to press the shaft out. It actually slightly bent the bolts on the bearing puller, but the press won.

      Comment


      • #63
        More t-case (pt.4 continued?)

        With the bearings off I spent a good deal of time cleaning up the gear. There was some seriously petrified lubricant on the inside of the gear and in the lubrication holes. In fact the lower hole that comes out at the bottom of the bearing shoulder was completely clogged.


        I didn't even know it was there until I wiped the bearing area down with some cleaning solvent prior to to pressing on the new bearing and noticed the slight depression, which sent me back to the parts washer for more scrubbing and cleaning.


        With the new bearings pressed on I'm getting close to putting the whole assembly back together.


        I spent part of the day scrubbing, scraping, and degreasing the case. I'll drop it off this week to be blasted and powder coated, it's too big to fit in my little blast cabinet. In the interim I have a few more parts I can finish myself so hopefully I can start re-assembly next weekend.

        After that, I'm not sure yet.

        Comment


        • #64
          T-case rebuild (pt. 5) the home stretch

          I didn't get a lot of feedback on the bearings so I set the e-brake bearing support at the low end of the pre-load range. The rear axle output support I managed to dial in to the 15~30 in. lb. range recommended.


          I also got the redi-sleeves installed and finished powder coating the rest of the smaller parts including the yokes, e-brake mount, e-brake drum, and the detent-ball screws.

          I've learned that with some of the cast parts heavily exposed to oil and grease have to be pre-baked prior to powder coating them. Otherwise no matter how much cleaning you do they still tend to seep oil when they are baked, which tends to hurt the finish.

          With the bearing supports set up I installed the oil seals and e-brake backing plate. They're basically ready for install as soon as I get the case back from the powder coater.


          I have the rest of the pieces parts all cleaned and ready for install. I don't have the idler shaft setup tool, and since I don't have the case I can't measure to have one cut. I'll just have to wait until I get the case back. After all the trouble with the bearing supports it's probably worth getting one made so I don't have to keep driving the idler shaft in and out of the transfer case to set up the bearings, it should be pretty simple to have made.

          FYI, I went to Harbor Freight looking to get a cheap socket for the 1 5/16" nut that holds the yokes on. The Craftsman one I bought was too wide to fit in the opening and I couldn't bring myself to grind or turn it down to fit. I ended up buying a 3/4" drive impact set that goes from 1" to 1 1/2" since they don't sell them individually. Long story short the sockets have a fairly thin wall and fit perfectly inside the yokes. I just use an adapter to go to 1/2" drive so I can use my impact gun and torque wrench, which I also learned is perfect for tightening the bolts. It's max tends to put them right in the 140~160 ft. lb. range recommended.
          Last edited by Desoto61; 07-18-2009, 11:01 PM. Reason: more info

          Comment


          • #65
            Using a drive adapter will cause your torque not to be accurate

            You need a 3/4 drive wrench so no adapter is necessary. Using a torque wrench at it's max limits isn't good either. Any torque wrench is only accurate in its middle range, once you start topping out at the higher #'s, accuracy fades quickly.

            What do you mean about using the low end of the spectrum on bearing pre-loads? You are cutting your throat when installing new bearings if they aren't set up correctly. We see more problems caused from improper bearing set ups than anything else. You also said you got little to no feed back about this, all it takes is asking. I'll be happy to help you, but simply don't have the time to read through all the forum threads daily. Just send an e-mail directly or calling will get you an answer if I have one.

            Comment


            • #66
              Sorry, I had posted the question to an old thread I found when searching the forum here, I also asked at the other forum too and got a few responses but nothing real concrete. Basically the e-brake bearing support I couldn't seem to get set up in the 15~30 in. lb. range. I was either a little under that number or a little over (5 in. lb. in either direction). I wondered witch direction would be the better side to err on.

              The torque wrench I'm using is marked to 210 or 220 ft. lbs. as the Desoto has a few suspension bolts that want 160~180 ft. lbs. minimum, which is outside the range of most 1/2" drive torque wrenches.

              The adapter will cause the actual torque to be a little lower since some of the applied torque will be absorbed as torsion in the adapter, but given the length and size of the adapter, plus the range allowed, I'm confident I'm within the specs for the yoke nut.

              I'll be sure to ask in the future, I just prefer to post questions here so it can be documented for others. I've already avoided a lot of questions by searching for the answers here and elsewhere. That's the primary reason I keep posting all this stuff. I really do appreciate all the help, I just don't like bugging busy people, with e-mail or otherwise.

              I know how important this is, though the instructions changed from my WDX manual to later versions in that there was no pre-load specified for these bearings in the earlier manual, it also specified to test everything dry vice lubricated. I was using the newer specs since I figured they changed for a reason, but after about a dozen tries with different shim setups I couldn't seem to get it dialed in to that range.

              Comment


              • #67
                Transfer case pt. 6

                Well thanks to Charles for his help on setting up the bearings. I picked up the case from the powder coater today. They did a nice job, blasted both the inside and the outside. They got some powder on the gasket surfaces but cleaned it up for me with no complaints. They're "satin black" is a little more glossy than the stuff I've been using but it looks good and is more about protection here than looks.


                I had scrubbed out the interior to make sure I removed any remaining blasting grit, which is why there's some flash rust but I'll clean that up before putting the case together.

                My neighbor has a small metal lathe so I took some measurements of the case idler shaft opening and had him turn a piece of tubing to the same length to make a spacer like shown in the manuals for setting up the idler shaft.


                Starting from the suggested base shim thickness I ended up adding shims until I got some end play then backed off. I put a dial indicator on the gear to verify there was no end play. The shaft spins nice and free with no axial movement.


                Ran out of time for tonight but should be set up to start putting gears back in the case tomorrow!

                Comment


                • #68
                  Coat the inside of the case

                  If you leave the cast bare and unsealed, oil will find its way right through the casting. It is porous, if not sealed on the inside, you will be unhappy with the weeping after a few weeks. Glyptol is a good sealant and makes a really nice smooth interior.

                  Comment


                  • #69
                    Originally posted by Charles Talbert View Post
                    If you leave the cast bare and unsealed, oil will find its way right through the casting. It is porous, if not sealed on the inside, you will be unhappy with the weeping after a few weeks. Glyptol is a good sealant and makes a really nice smooth interior.
                    Interesting. Ok, I'll order some tonight, I know Eastwood caries it, any better sources to get it from?

                    The powder coat is pretty thick so I don't think it would come through that, but I don't want to chance it flaking off due to contamination from the back side either.

                    The powder coat place asked if I wanted the interior done too but I declined thinking I didn't want to chance having it flake off into the case over time, but maybe that was the right answer.

                    Thanks for the tip!

                    Comment


                    • #70
                      Transfer Case pt 7

                      Got the paint yesterday and cleaned out the interior and put on a coat of paint. Had to cut the handle of a paint brush in half to be able to reach into the case and get some of the nooks and crannies inside the case.

                      It's expensive stuff but a little goes a long way. It's really strong, even with a fan and the garage door open I ended up wearing my filtered mask because the fumes were so strong.


                      So with the paint dry I could start putting things back together today. I had the idler shaft tool but while it made it easier to start the shaft into the case actually getting the shaft seated was a real pain. It's a very tight fit, and trying to brace the case while you drive in the shaft was tricky. It went OK until the last few inches when the larger OD end piece goes into the case.


                      You can see the end of the install tool in the above picture. The only problem I had with the tool was screwing the idler shaft into it. There was no way to hold the tool from spinning, and my shaft threaded on a little tight to the tool but I eventually managed to get it right.

                      With the shaft installed and tightened down I verified my shim setup was still right (it was), so I moved on to installing the two ball bearings into the case and measuring and installing the front bearing retainers with the seals installed.

                      I didn't realize there were two thrust washers on the input shaft. I had the inner one I got from Charles, but the outer one had been stuck on the removed bearing and I didn't realize it was two pieces. So after some searching and a little cleaning the outer thrust washer was installed and the input and front output shafts went in and their yokes were installed.


                      I used redi-sleeves on the yokes, and installed the seals flush with the front face of the bearing retainer. The new style seals aren't nearly as thick as the old ones, so the lip runs further up the yoke than the old seals did. I installed the sleeves pretty far down the yoke but should have probably gone a little farther. The seal is riding on the sleeve but very close to the end. Should be OK but if not replacing them won't be too hard later.

                      Should be able to finish tomorrow.

                      Comment


                      • #71
                        Nice job DeSoto! When I first started reading this thread,I was thinking the wrecker bed would be an awesome pickup bed.Glad you decided to retain it.
                        RT

                        Comment


                        • #72
                          Transfer case pt 8 - Finished! (sort of)

                          It's done! Well, the case is back together, I just need to check the torque on the yoke nuts and install the cotter pins, and re-install the e-brake hardware, but I haven't finished restoring it yet.

                          I installed the shifter shafts, forks, gears, detent balls, and springs. I used the stainless shafts from M-series, really nice stuff as usual. It requires some dexterity to get the safety wire in the shifter fork screws and around the shafts but not too bad.


                          I did a final cleaning of the case internals for any dust or debris and then worked on installing the e-brake bearing support. It took me a little longer to get this installed. When I tried to slide it in it would stop about 1/4" from mating to the case. I thought it was a problem with the gears and shafts seating but eventually realized the fit of the bearing support was tight to the case. Not serious but it required a little wiggling and tapping.


                          One final clean out and inspection and the rear axle output went in easier.


                          Like I said, my semi-gloss black and the powder coater's are fairly different but it's more about protection than beauty. I'll finish up the little stuff this weekend and work on the e-brake parts. Many of the pieces are worn so I need to figure out the best way to repair them, or just see if replacements are available. Then I'll need to bribe some friends to help me lift this monster off my work bench.

                          Comment


                          • #73
                            Great looking work! How much would you charge to do another one? Ha Ha.

                            I used an engine hoist to lift mine off the bench and onto the hydraulic jack to lift it back into the truck.
                            I drive a DODGE, not a ram!

                            Thanks,
                            Will
                            WAWII.com

                            1946 WDX Power Wagon - "Missouri Mule"
                            1953 M37 - "Frankenstein"
                            1993 Jeep YJ - "Will Power"
                            1984 Dodge Ramcharger - "2014 Ramcharger"
                            2006 3500 DRW 4WD Mega Cab - "Power Wagon Hauler"

                            Comment


                            • #74
                              Originally posted by W_A_Watson_II View Post
                              Great looking work! How much would you charge to do another one? Ha Ha.

                              I used an engine hoist to lift mine off the bench and onto the hydraulic jack to lift it back into the truck.
                              Thanks! I'm almost scared to look at what I spent on it, but it was a good learning experience and fun (yes I have a weird sense of fun). We'll see how well it holds up if it ever get's back under the truck. The next one would definitely go quicker now that I've been through it once, not to mention the little things I'd do differently.

                              I used an engine hoist to get it on the bench, If I re-attach the mounting ears I should be able to lift it down that way too, but I'm reluctant since it looks so nice, I don't want to scratch the powder coat LOL!

                              Comment


                              • #75
                                When you install the T case

                                Originally posted by Desoto61 View Post
                                It's done! Well, the case is back together, I just need to check the torque on the yoke nuts and install the cotter pins, and re-install the e-brake hardware, but I haven't finished restoring it yet.

                                I installed the shifter shafts, forks, gears, detent balls, and springs. I used the stainless shafts from M-series, really nice stuff as usual. It requires some dexterity to get the safety wire in the shifter fork screws and around the shafts but not too bad.


                                I did a final cleaning of the case internals for any dust or debris and then worked on installing the e-brake bearing support. It took me a little longer to get this installed. When I tried to slide it in it would stop about 1/4" from mating to the case. I thought it was a problem with the gears and shafts seating but eventually realized the fit of the bearing support was tight to the case. Not serious but it required a little wiggling and tapping.


                                One final clean out and inspection and the rear axle output went in easier.


                                Like I said, my semi-gloss black and the powder coater's are fairly different but it's more about protection than beauty. I'll finish up the little stuff this weekend and work on the e-brake parts. Many of the pieces are worn so I need to figure out the best way to repair them, or just see if replacements are available. Then I'll need to bribe some friends to help me lift this monster off my work bench.

                                When I changed the T case in My 56 Pw I put a 2''x12'' flat on the ground put the T case on the plank slid it under the truck lifted the plank one end at a time with one hand & put blocks under it until it was the rite hight then the blots went in easy hope this helps when you get that far

                                nice job you are doing on your truck!

                                PS when you are finished you will love driving your truck!
                                I love to drive mine & the looks I get are are very funny some times

                                Comment

                                Working...
                                X