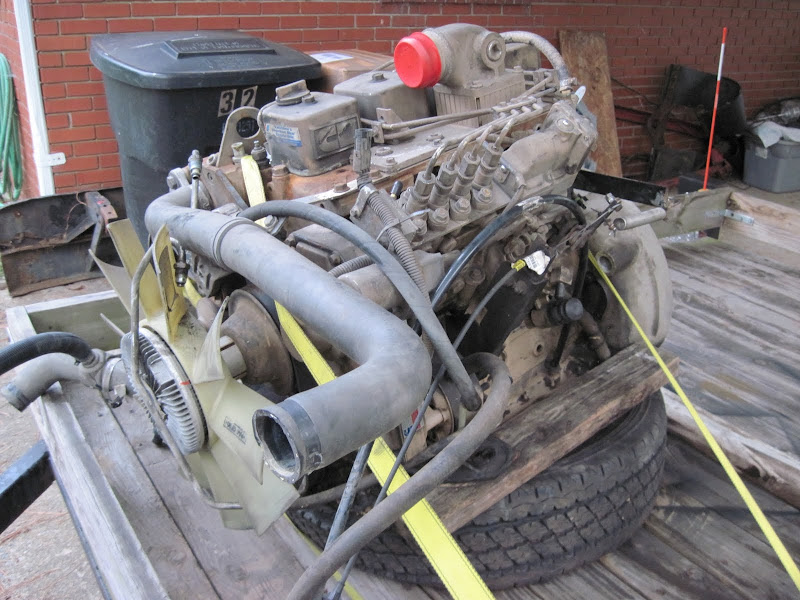
Announcement

Collapse
No announcement yet.

46 Power Wagon Restoration pt. 2

Collapse
X
 
  • Filter
  • Time
  • Show
Clear All
new posts

  • AC bracket 3

    The other result was that the lower alternator support originally attached to a tab at the top of the lower water neck. The top mount supports most of the weight, so the bottom is just to lock the position, so some 1/8" angle iron makes a bracket off the lower two water neck bolts and a piece of bar stock goes from the lower alternator mount to the bracket and is threaded to go through the bracket into the bar stock and hold the alternator in place.

    End result seems strong enough and should give enough clearance with the hood, we'll see if the alternator has enough wrap once under a load. I might be able to add an idler between the AC and alt, but will look into that if I have too.

    Biggest issue with this setup is that the belt length is really tight, it's tricky to get on and off, I'd like something just slightly longer (1/2" or so) but again, it's not available from what I could find.

    The other casualty of this setup is that it interferes with the stock oil filter location which is directly behind the alternator. Cummins has a remote mount solution for that though once the parts show up, which should also make the filter easier to change and less messy then the horizontal mount filter in the future.
    Attached Files

    Comment


    • The horizontal filter is not that bad changing, not much drip's out when you take it off. Fleabag!!

      Comment


      • Pulled the A/C mount off to paint it, and to allow access for the remote filter plate. The plate and remote filter head came from e-bay. There are some small parts and a gasket needed to install it that came from the local Cummins dealer.

        Before I bolted it in place I took both parts to the local hydraulic shop and found the right fittings to make up hoses. I purchased all the fittings and then they let me take some hose home so I could accurately measure and mark for length before having the ends crimped on.

        First I had to build a mount for the remote filter though. I was able to use the four bolt holes for the heater mounts from the firewall side. Some metal plate and angle iron make up the rest.

        I made sure to dig out the inner splash guard and set it in place to check for clearance between everything, especially the alternator mount. It's close but should be fine.
        Attached Files

        Comment


        • One of the last interior pieces was to finalize the Vintage Air box. That meant having the real thing so I could determine where all the plumbing would pass through the firewall. It was also a chance to check how all the plumbing would work under the dash.

          It looks like a nightmare but should fit, though it will be tight in spots. I have a few parts on order so I can figure out the plumbing for the heater and AC lines and install the bulkhead plates.

          The other plumbing issue is the condensate drain off the unit. Since there is also a drain off the cowl vent I purchased some fittings and tubing and routed them together with a Tee fitting. I didn't like the idea of just punching a hole for the tube so using some plumbing fittings I built a bulkhead fitting using some street elbows that gives a cleaner look and can run tighter to the firewall.
          Attached Files

          Comment


          • Progress has been slow for a few different reasons, but still creeping along. Determining the best way to plumb the heating and AC lines through the firewall was tricky. Not a lot of room and some large lines. The right combination of fittings and locations are important.

            There are two AC lines and two heater lines. I decided to use a set of bulkhead fittings for a cleaner look and ease of install. There are a few different configurations but by splitting them up into two groups of two I needed less room and could more easily route the hoses.

            I also decided I would use a bulkhead connector for the electrical system to make installation cleaner and more water tight. It required a fairly large hole and is a little tricky to get centered right, but it should support all the wires I will need to run through the firewall.
            Attached Files

            Comment


            • I wanted to keep the windshield mechanism operation looking stock even if it didn't operate that way. The hot-rod scene has created a switch to allow you to use stock manual window cranks with power windows. They come with different shafts for different handles and are well built with positive stops to prevent damage.

              Problem was that the mechanism mount didn't leave much free space behind the dash, the switch was kind of large and has to tilt slightly to fit. That meant modifying the mounting bracket. I cut a piece of plate that fit into the corner and tack welded it into place, then cut away the original mount and finished welding the new plate in place.

              The end result provided the room I needed for the switch. It doesn't quite come straight out of the dash due to the size of the switch, but it should work well once I figure out how to mount it behind the dash.
              Attached Files

              Comment


              • Most of the interior modifications are completed, so I've been slowly and systematically disassembling and unbolting parts from the cab and sorting them. Some need finished, others just need labeled and stored until they can be reinstalled, hopefully for the last time. Then the cab can be lifted clear of the frame, a feat made easier by the lift.

                With the cab clear of the frame some final cleanup work on the transmission crossmember modification I started. The extra clearance allowed access from the top which allowed me to finish cutting out the old section and weld in a new gusset for the trans support. I'll clean up the area once cool and hit it with some chassis paint.
                Attached Files

                Comment


                • Loose ends

                  There were a few other issues to button up on the frame. The biggest was the support bracket for the spare tire carrier. Since I had to cut out and build a new crossmember I also cut out and removed the original brace. I wasn't sure I was going to re-install it but after looking at the leverage the spare would have on the frame I decided it needed to be replaced.

                  A cardboard template was used to cut some 3/16" plate. A relief cut let me easily bend the brace into shape and then clamp and mark the holes to be drilled. The outside end is held in place by the bolts for the spare tire carrier, the inner bolts to the crossmember. I could have welded it but it would have damaged the paint and made future removal impossible if needed, so it was bolted instead.

                  One of the smaller tasks was to create a new hanger for the rear brake line to hose support bracket. These are those tasks that take a lot of the time. It's a simple enough task, a bracket to hold the end of the brake line where it transitions to the brake hose going to the rear axle. Two pieces of plate and a short length of round stock make up the bracket, but between the cutting, bending, and drilling that bracket took most of the morning. Then it still needed painted and installed.

                  With all that done the frame was pushed out of the garage so I could start learning how to do the body work on the cab.
                  Attached Files

                  Comment


                  • Body work

                    With the cab back on the rotisserie one of the first things I needed to do was finish up some welding under the floor where I had tack welded the nuts for the floor plates, and the mounting plates for the seat frame. I also installed some rivnuts for the cover plates I made to go over the access holes in the cab floor.

                    Next was to put on a dust mask and see how much trouble I could get into with some sandpaper. I decided to start at the back bottom of the cab, it was one of the rougher areas and will not be as visible should it not turn out well. A couple of rounds of sanding and filler and I think I'm starting to get an somewhere.
                    Attached Files

                    Comment


                    • Looks really good man! Keep it up! There is light at the end of the tunnel!
                      1942 WC53 Carryall in progress.

                      Comment


                      • Thanks, that area seems OK, but the roof area I think I probably should have spent more time working with the metal, though I'm not sure I knew what to do to make it better and trying to make it better usually just makes it worse if you don't know what you're doing. Worst case it will be a very expensive learning experience in what not to do.

                        Comment


                        • Absolutely epic build! You good sir have fully fueled my motivation to really roll on my new 1946 acquisition. It was dead when I got it. But now its all running and functional but planning on going entirely into it in 2014. Thank you for taking the time for pics and the detailed write ups. I have read every word and now am inspired by you passion.

                          Comment


                          • Thanks, it's definitely a labor of love. Glad you find it useful, I wanted to try and capture the reality of a project like this, so others go in with their eyes open. Plus it's one of the few places you can indulge your obsession without everyone's eyes glazing over.

                            Good luck on your build, pay it forward and share it with the rest of us!

                            Comment


                            • I've been turning a lot of body filler into a lot of sanding dust over the last week or so. The largest area was the roof, it was pretty rough, and I had quite a time working with the metal, but the filler definitely shows you the problem areas, unfortunately by that time it's a little late to take a hammer to it without causing problems. Still it feels a lot better under hand.

                              Next will be the area over the windshield, which has a very interesting contour.
                              Attached Files

                              Comment


                              • Originally posted by Desoto61 View Post
                                In the interim I've been keeping my eyes open for all the other parts I'm going to need. The biggest one being the new motor. I found what seemed like a good candidate last week and just got back from going to check it out.


                                It's a Cummins 4BT rated at 130HP @ 2300 RPM. Came with all the accessories and parts, they even gave me a few extra filters that came in the truck.

                                Then when I got home my new fuel tank was waiting! It's a 38-gallon stainless steel tank with provisions for a return line. Chris Case builds them, it's beautiful work! I'll need to modify the tank mounting brackets to fit it in the frame since the original setup had been modified for the wrecker assembly.
                                Looking at that fuel Tank would it be possible to get the contact information of the gentleman who made it?
                                1967 W200.aka.Hank
                                1946 WDX.aka.Shorty
                                2012 Ram 2500 PowerWagon.aka Ollie

                                Life is easier in a lower gear.

                                Comment

                                Working...
                                X