Announcement

Collapse
No announcement yet.

My Project

Collapse
X
 
  • Filter
  • Time
  • Show
Clear All
new posts

  • #61
    Ron and Gordon, I am definately keeping track of all the info and as soon as I get to a point where I can start making some progress I will definately be taking plenty of photos, both for my own sake when it comes time to final assemble everything after mock-up and for article writing potential. I am sure there is someone else out there like me that would love to drive some of this old iron, but arent too keen on the idea of double clutching, 55MPH speeds wound out and the plain poor handling of suspension technology of the era. There will be an article, probably quite long winded, but it will take me several months before I can get to that point of having enough progress to write about.
    Over Christmas break I was hoping to have a bunch of time to spend working on it but it looks like the in-laws will be flying over from Germany so that idea may not pan out.

    Either way I have to get the new frame off the trailer this week, get the bed sitting on it and get the old frame loaded up and out of here. My landlord is probably S#!&ing bricks with all the stuff I am piling up outside. Oh well, such is life when you rent to a car guy right? lol!

    Ron, you asked about track width difference. A quick tape across the rear axle tells me the new frame has a 6" wider track width (inside of tire to inside of tire) which looks like it isnt going to hurt me anywhere, at most I will have to stretch rear fenders a bit for clearance, but I dont see a problem right now.

    Ben
    Comment


    • #62
      Just a quick note, got a little item yesterday that will help the build along tremendously. Had a junker Harbor Freight Mig welder that I had been trying to use for my repairs. Only succeeded in making a mess. In its place now sits a 120/220V Miller autoset welder that can weld up to 3/8" mild steel in a single pass. 210 Amps of actual welding power. It can weld Stainless with only a change in wire, and with an added spool gun can weld Aluminum. Got the complete setup for $1200, which I didnt think was bad at all.
      Best part, its made in USA! No China junk here!

      Comment


      • #63
        Originally posted by MoparFreak69 View Post
        Just a quick note, got a little item yesterday that will help the build along tremendously. Had a junker Harbor Freight Mig welder that I had been trying to use for my repairs. Only succeeded in making a mess. In its place now sits a 120/220V Miller autoset welder that can weld up to 3/8" mild steel in a single pass. 210 Amps of actual welding power. It can weld Stainless with only a change in wire, and with an added spool gun can weld Aluminum. Got the complete setup for $1200, which I didnt think was bad at all.

        Best part, its made in USA! No China junk here!

        Good work!
        Power Wagon Advertiser monthly magazine, editor & publisher.


        Why is it that the inside of old truck cabs smell so good?

        Comment


        • #64
          I figure I gotta do my part to get us out of this slump. I was going to spend the money anyway, why not give some of it to a local supplier and the rest to an American worker, instead of most of it to 16 different resalers and a little bit to some Chinese man/woman/kid.

          Comment


          • #65
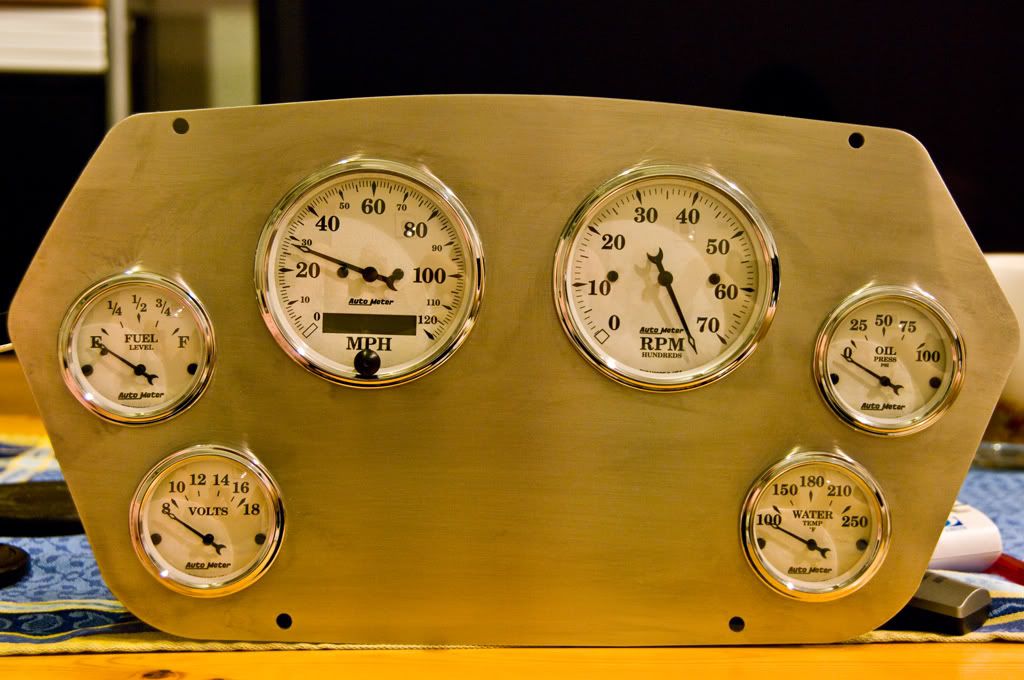
            Tomorrow I should get my new dash panel for my gauges from the metal shop. I decided to go with stainless and have them water-jet it out for me. I didnt want to screw with hole saws walking around, scratching the heck out of it, making uneven cuts, putting the hole in the wrong spot, etc.. Was just easier, and probably about the same cost, to have them cut it right the first time with the best possible results. I will try to mount the gauges up and post up a pic to get some opinions.
            I am thinking I will try to go with a brushed stainless look, and add a few stainless accents across the dash.

            Comment


            • #66
              Well, here she be. I think the brushed look fits the gauges quite well. I will probably finish the brushing a bit better and clear over it with some satin to kind of protect the finish a bit.


              What thinks we?
              P.S. Sorry for the size if its too big for you.

              Comment


              • #67
                Beautiful job I like the old time flavor of the gauges.

                Comment


                • #68
                  Thanks Ron.
                  I thought they would fit the truck perfectly with what I have planned for it.
                  I am thinking about etching Dodge into the space below the large gauges using a sand blaster just to give it a bit more of a custom feel. Either that or reproduce the old Dodge logo that is on the key I have.
                  I think it just needs a little something subtle to complete it.

                  Ben

                  Comment


                  • #69
                    Well, looks like the weather is going to start getting good enough to where I can begin fitting the cab to the donor frame shortly. Cant wait. Got the frame pulled and and throughout the week I will continue removing parts that are not necessary/in the way.

                    Comment


                    • #70
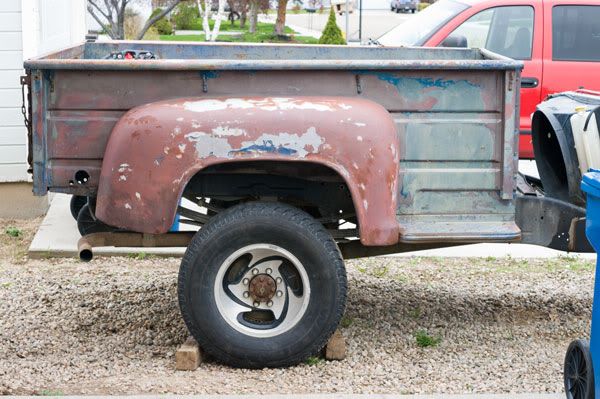
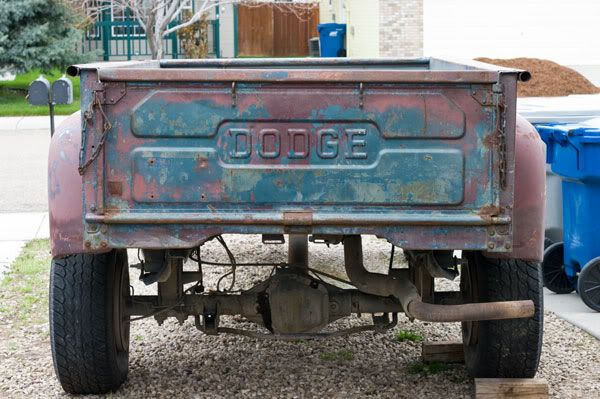
                      Got some progress on bed fitment accomplished yesterday. I ended up having to remove the upper shock mounts from the frame for the time being to get the bed to sit a bit lower on the frame. Looks like it is going to fit on the donor frame quite well. I will beef up the bed frame as its pretty tired and tweaked as it is. I think I will make the majority of the frame from square tubing and basically make a perimeter frame with some more cross bars to tie into the existing ones that are under the bed. That way I can use the donor frames factory front bed mounts effectively as well as support the bed quite a bit better than when it was on the original frame.

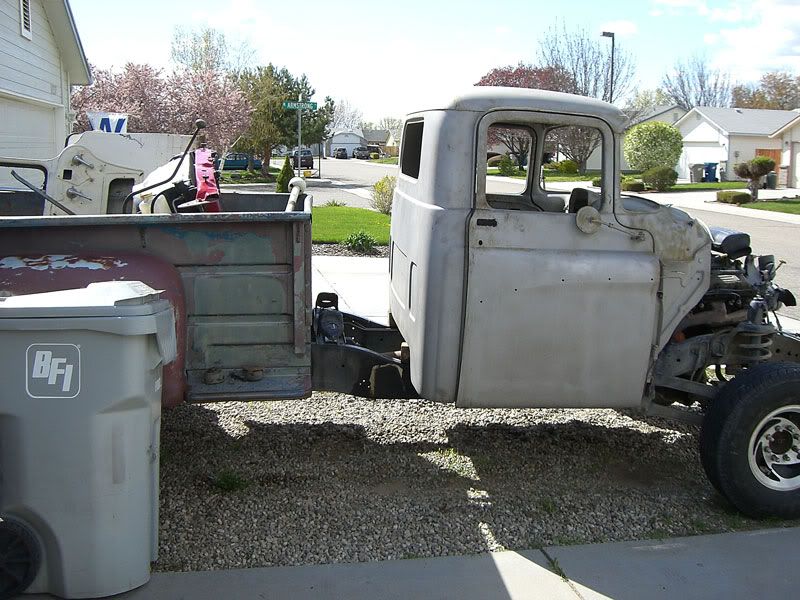
                      Here are a few photos. The bed is just sitting on the donor frame for the time being. Removing the shock mounts allowed me to move it back to a natural position over the wheels.


                      Width wise it looks like its going to work out pretty nicely. The lift blocks are most likely going to go away. The bed sits about 5' high at the top right now, which is a bit higher than I want.


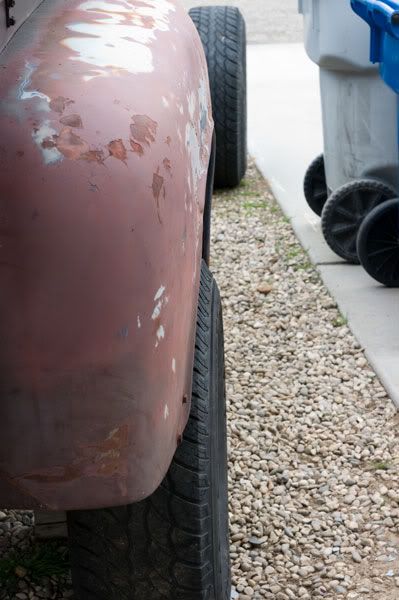
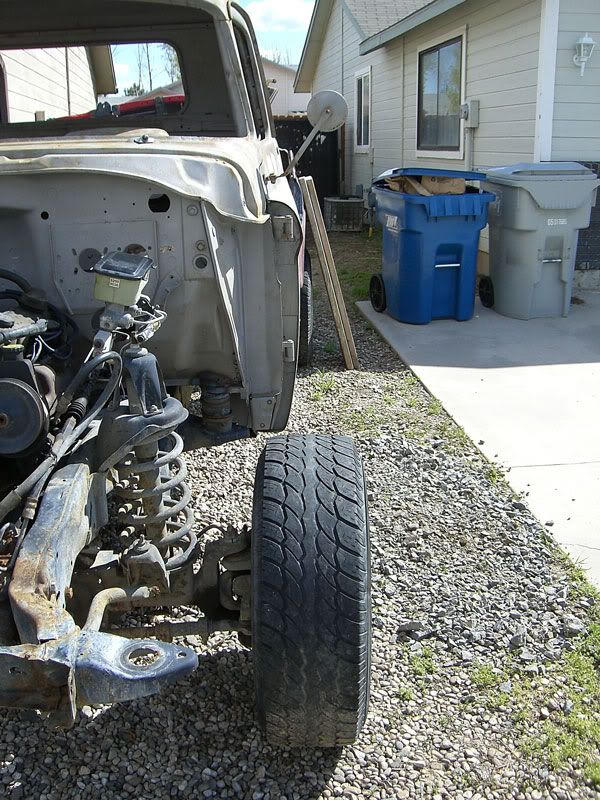
                      Both sides have about this much tread showing outside the fenders with the wheels that are on it now. I think stock style steelies will have a bit more offset and tuck them a bit closer which will be just perfect.

                      Comment


                      • #71
                        Cab sits on the frame

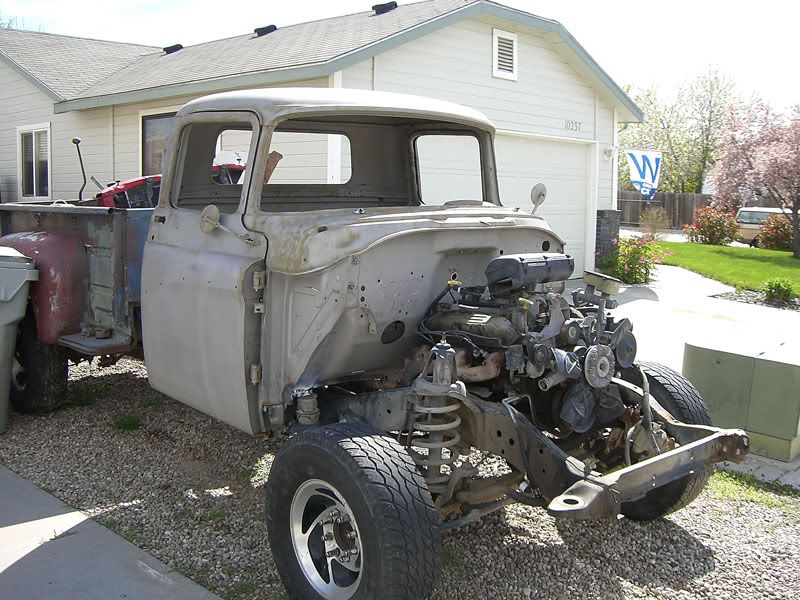
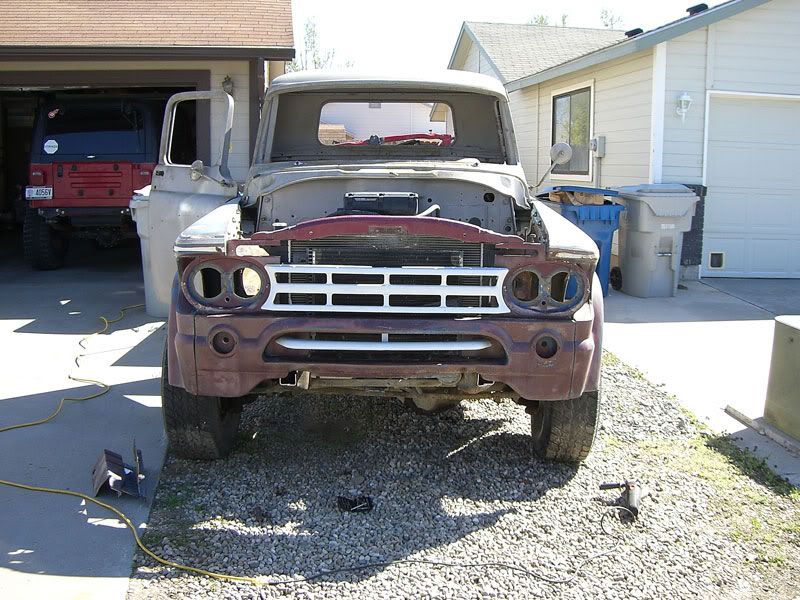
                        Well, finally got some decent weather on the forecast so today was the perfect day to trial fit the cab to the frame. Looks like it is going to work out quite well so far. Tomorrow I will work on getting the front fenders sitting on the cab so I can see how its initial placement will work fore and aft. After I am sure everything is going to fit together I can then get the cab mounts into a permanent situation and decide what to do with the gap between the cab and bed. I would love to stretch the cab to make it more roomy, but that is a ton of work and I dont know if I have the time/skill necessary to make it look right.

                        Here she is, just sitting on the frame;


                        Front tire reveal looks to be about the same as the rear;


                        Here is the gap I am dealing with;

                        Comment


                        • #72
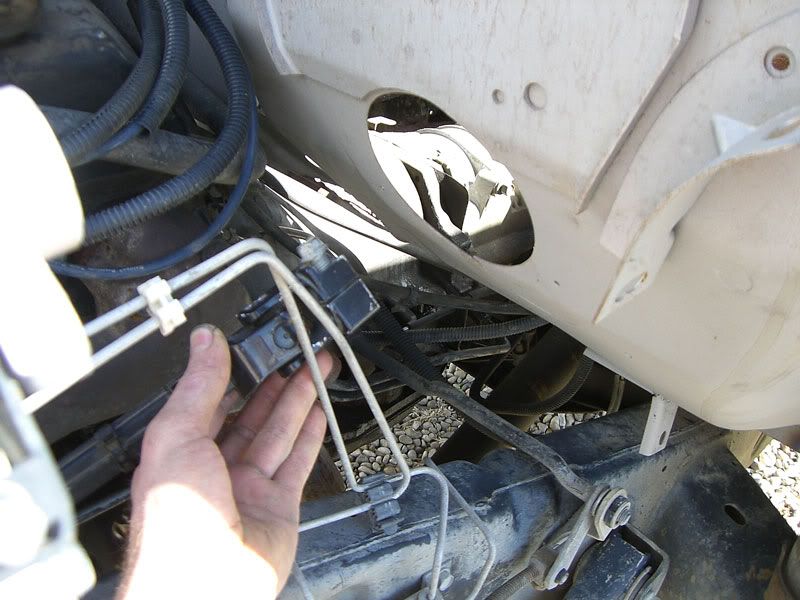
                          Steering shaft lines up with the existing column hole very nicely;


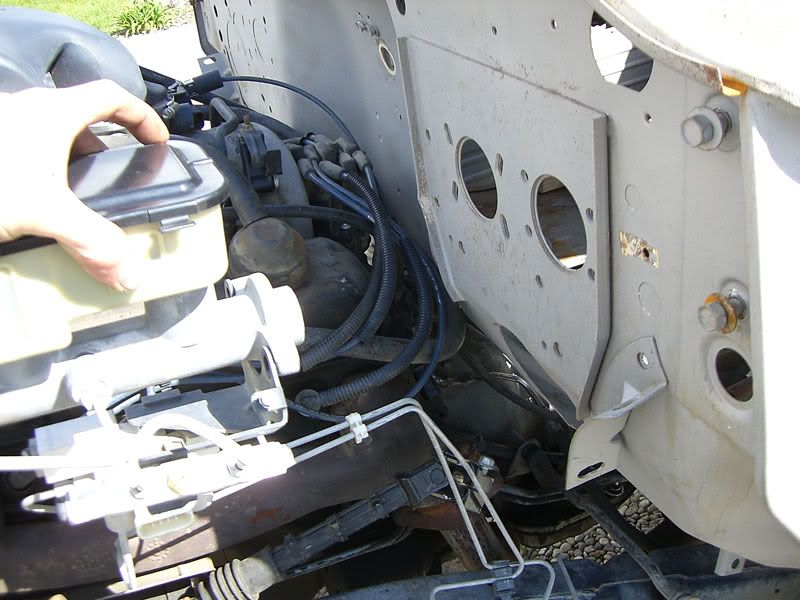
                          Brake master cylinder even lines up with the stock master cylinder hole. Makes fitting the '97 booster to the stock pedal assembly that much easier;

                          Comment


                          • #73
                            Looks like things are lining up except for the frame length. There was a PG at the Iowa rally one year that had been made into a crew cab. It was a lot of work and it looked ...well strange. The work done was good but it was different. I'll assume you are contemplating a frame cut with fish plates at the cut? I know welding the frame isn't advised by the factory. It'll be a nice truck when completed.

                            Comment


                            • #74
                              The only frames that manufacturers dont want you to weld on are the big tractor-trailer rig frames, as they are hardened and heat treated for high strength. Regular pickup frames are simply mild steel and therefore can be welded as long as its done properly. I will make Z cuts at either end to give me more weld surface area to increase strength potential. The frame is boxed at the spot where I will be making the cuts so I dont think fishplating will be necessary. I am confident that my welder can put enough heat into the weld to properly penetrate and provide a very structurally sound joint.
                              Turns out that after bolting up the front fenders that a bit of clearancing for the shock towers is in order, and I have to move the cab forward a couple inches to place the tire in a nicer looking position in the wheel well. I will start with beating the firewall a bit where the passenger side valve cover/head will come close and then when I am satisfied with clearances/positioning of the cab I will scoot it back and do a proper clearance bulge. I will also need to cut more of the floor out to make a bit bigger of a trans hump, but that isnt a big deal as I was going to make the floor solid anyway, without a removable panel to worry about leaking/vibrating/etc.

                              Comment


                              • #75
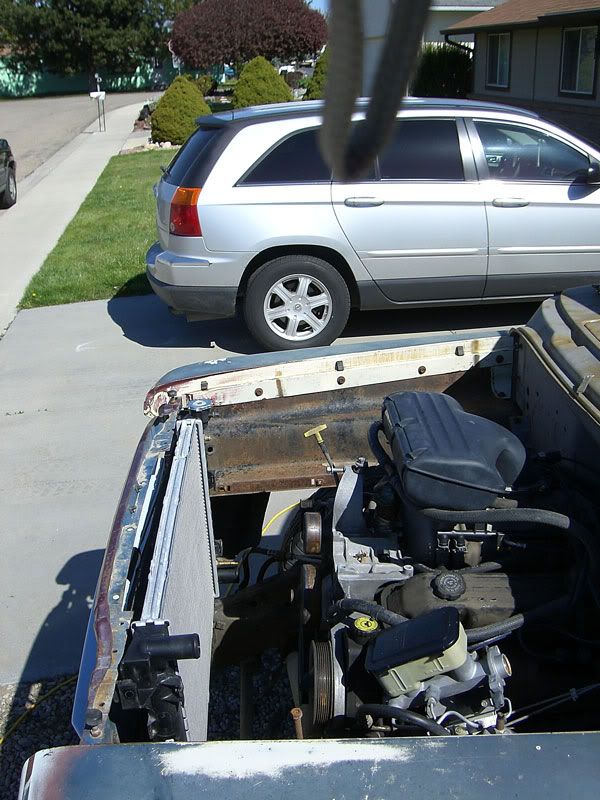
                                Little bit more progress today fitting the cab and front end to the frame. I had to hack the core support down quite a bit to clear the frame and to make room for the donor radiator. With how the steering gear sits in the frame there was no way I was going to fit the original radiator into the space. The donor radiator is much more efficient anyway so I just did what was needed to make room for it. I will go back in later and add some more material to beef up some of the areas where I removed a bunch of material.


                                Comment

                                Working...
                                X