If this is your first visit, be sure to
check out the FAQ by clicking the
link above. You may have to register
before you can post: click the register link above to proceed. To start viewing messages,
select the forum that you want to visit from the selection below.
Power Wagon T-Shirts are now available for purchase on-line through the Store.
They are only $15.00 each plus shipping.
Shirts are available in sizes from Small thru 4X and are Sand in color.
Design/Logo is printed on the back of the shirts and the front is free of any designs.
Where do you plan on hooking in to the block to feed the second turbo ?
What alternator are you running ?
Is that a custom thermostat outlet ?
My only concern would be where it looks like you have two return lines connecting together , is it not better to run a separate 3/4 connector into the oil pan ? Or is joining the two return lines common practice ?
The second oil feed line will go in the port below the first one, right below the oil filter in the last pic.
My engine was a p30 chevy conversion but when I put it in the dodge I used all the drive acc off a 92 dodge 6bt , alternator, water neck fan, ac, tentioner.
As for the oil return I considered drilling the block for a return right under the bottom turbo mount, and using a short flex oil drain, I think it would be better but I am nervous about drilling the block and this was free and is common practice.
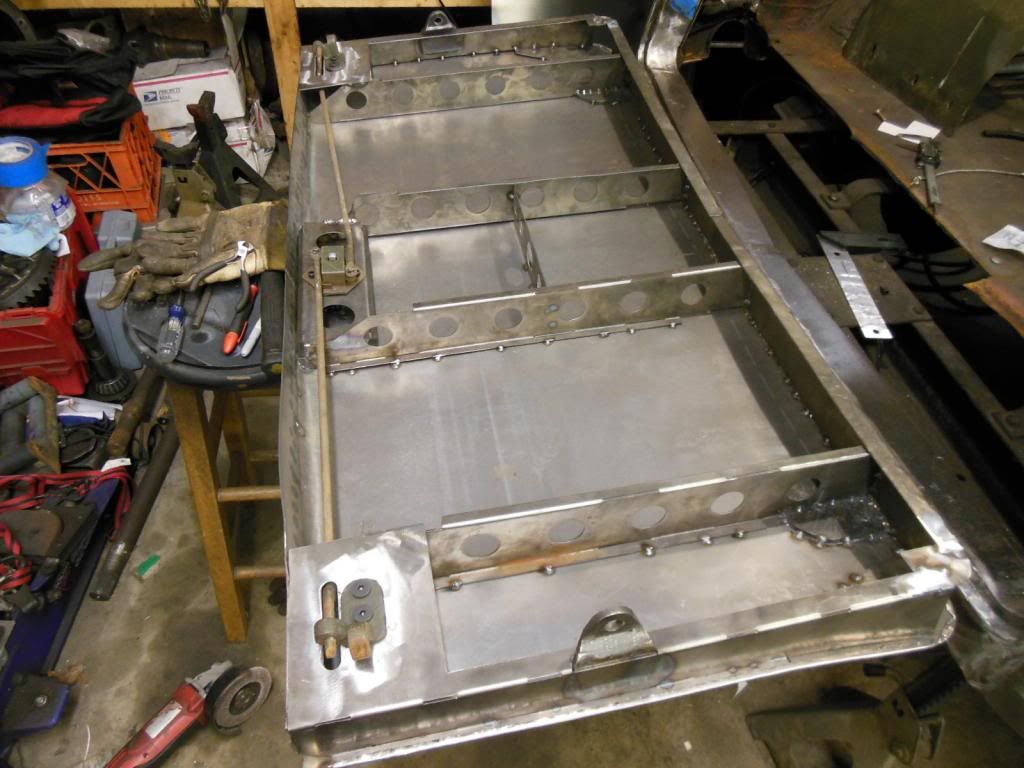
Some more work done on the gate... Found a place to blast and epoxy coat it once I am done with the majority of the work. I've been reading about before/after application of all metal filler on the epoxy coat and it seems it can be argued either way. Since it get so darn humid around here I am just going to have the gate sealed and then supposedly I have a 7 day window to get the filler on it.
Gate hardware and hardware mounts fitted into place. Those screws are not the ones I will be using. Just the only thing I had on hand with the 5/16"-18 thread.
Backing plate for the cheapo-handle I am using. I'll have it blasted and painted with the truck. No chrome on this project thanks. This backing plate had two small nuts tacked to it, and then the plate was tacked to the exterior skin of the gate to help reinforce the handle mount.
And then a view of the gate closed with the handle on it. I still have to roll the top center radius in a touch, get the top weather steal bar onto the gate and then I am also working on the interior sheet, getting that trimed and broke to fit which is another challenge in its own. I am planning on having it all blasted and primed before the interior skin goes on... sound deadening both pieces, and then drilling and spot welding the interior skin to the frame, and then using a can of aerosol epoxy primer from Eastwood to seal over the plug welds holding the interior skin on.
THAT GATE LOOKS REALLY GOOD!
I have to do work on mine or get another I don't think I have the skills to copy you and build one from scratch. Good job.
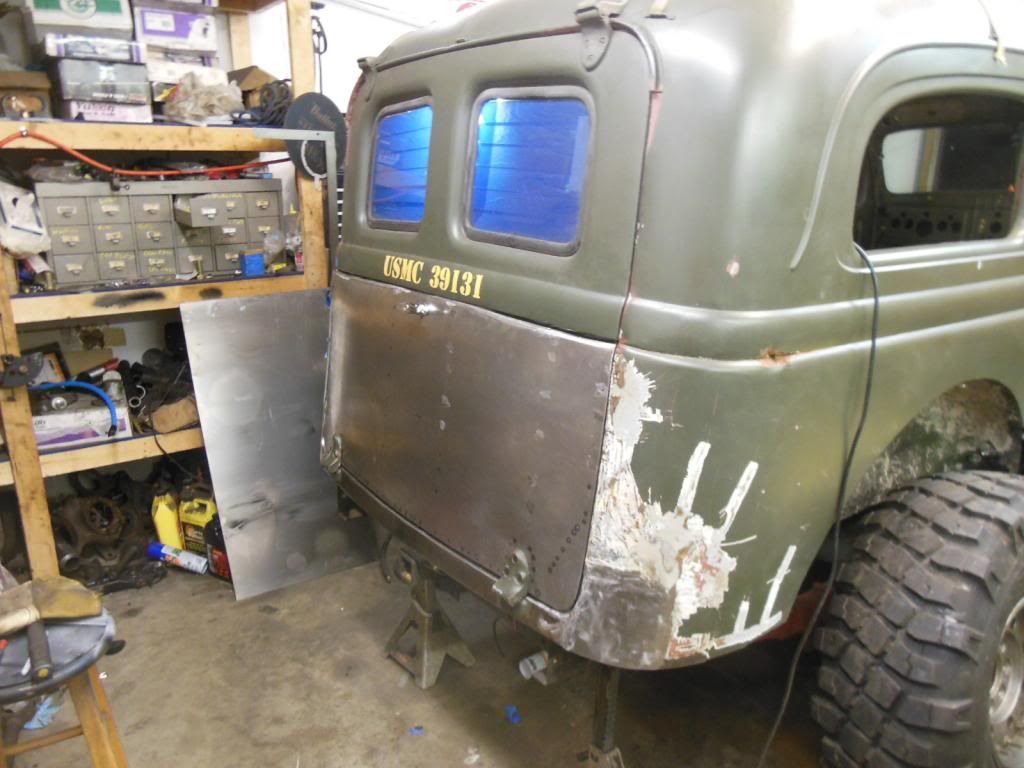
Thanks for the compliments. However, I have two large but fairly shallow areas that are probably going to need filling. I've pushed and massaged them from the inside out to the extent of my comfort just to the edge of fear... Fear of creating nearby problems by pushing or pulling too much here or there.
This being the case I guess I will need a thin amount of filler.. What do you guys suggest I use? I am ordering some All metal filler for some small but slightly deeper areas on the actual truck body, (ie around the aperture radius) but for the broader thin areas what say ye for material and type? It will be post epoxy prep but prior to sound deadening install.
Body supply place gave me the Z-grip to use, which is supposed to be a solid and very sandable primer. I have not sanded it yet but it applied fine other then having a very quick setup time. But seems like most of the Evercoat products are good. I see a lot of people using their Rage series with good results.
Like you plan I applied the filler within the 7-day window figuring that I'll do the rough sanding after I'm done with the interior but before I'm ready to prime it. That way I can top coat the interior and exterior all at once. I'll have to scuff anywhere I didn't sand, but I was going to have to do that anyway. Then I should be ready to go over that with the primer-surfacer within the new 7-day window for final blocking.
^ Thanks! I had a large shopping cart full of things with Eastwood that I was waiting to pull the trigger on so I dropped a gallon of that Zgrip in there too and its all on its way now. This must be where the money starts to really add up. All the little things. Between the Sound Deadening stuff, the body cleaning, prep, filler, etc... The money I'll be spending on blasting and E-coating... sheesh. I can see why folks get into these projects, take things apart, sit on it for some time and then eventually sell it. I feel I am getting a good grasp on this body work stuff and am just taking my time. I'll certainly make up for lost time when it comes to the drivetrain stuff.. I hope...
This must be where the money starts to really add up. All the little things. Between the Sound Deadening stuff, the body cleaning, prep, filler, etc... The money I'll be spending on blasting and E-coating... sheesh. I can see why folks get into these projects, take things apart, sit on it for some time and then eventually sell it. I feel I am getting a good grasp on this body work stuff and am just taking my time.
I spent $600 on just the primers, reducers, hardeners, and fillers, and that doesn't include sandpaper or cleanup supplies. Benefit is it's time consuming so your bank account has time to recover, vs. bolting on parts which is just $$$$$.
While the prices probably aren't as good as on-line, there is a PPG supplier in Suffolk or VA Beach who can help you pick out the right products. The PPG web site can give you the address.
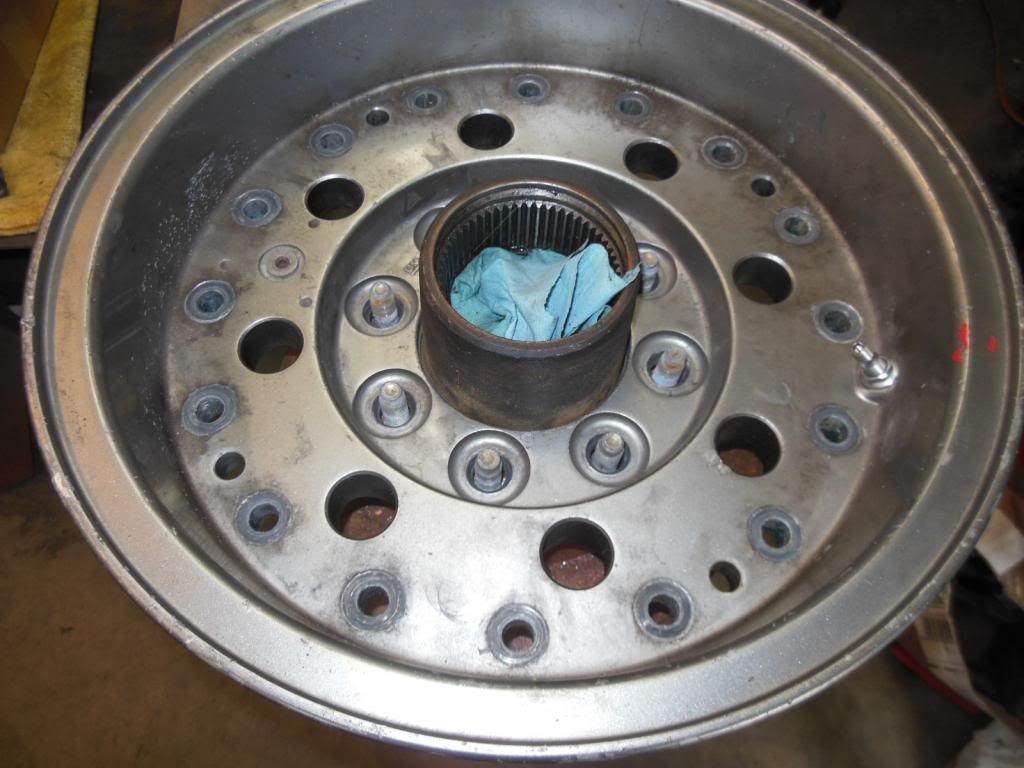
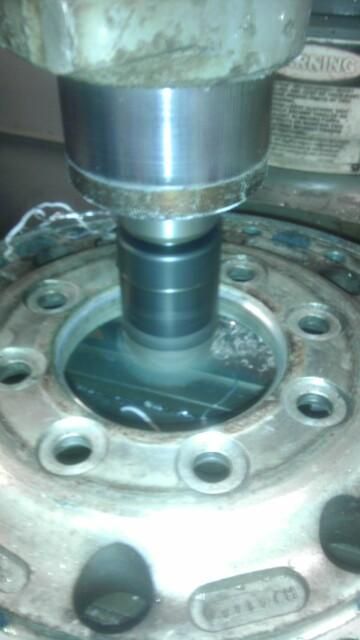
New little mini-problem. I remembered reading somewhere that the wheel hub center on the Hutchinsons wouldn't fit over a Ford Dana 60 hub... Which makes sense because the H2s wouldn't fit over the Eaton hubs on my wife's TJ when I was building that. Sure enough, its exactly true. I had the centers opened up on the H2s so I decided I'd have the same done for the Hutchinsons. Only needed an 1/8" of radius removed. These were easier too because its just the outer wheel shell to mess with rather than the whole wheel. So, I hit up my machinist friend and he swung by and snagged them yesterday afternoon and texted me a picture of him working on them. I also had him take out just a touch more to leave room for any powder coat that ends up on them as I think I am going to have them powdercoated the same color as the truck. Local guy says he can color match really well.
 Tweet
Tweet


Comment