Announcement

Collapse
No announcement yet.

The WC53 Carryall thread .

Collapse
X
 
  • Filter
  • Time
  • Show
Clear All
new posts

  • Originally posted by bobyepsr View Post
    Wow , I'm glad I didn't follow up sooner. Your pictures tell a different story than the sellers. The price seemed to rich for me so I didn't go past the first email exchange. Then when I ran across it again on cl I checked on it the day before you bought it. I would have been happy to have it for a future project (I've drug home two trucks in worse shape),or parts but at a different price. The missing doors were what initially held me back from even going to look it over. Now I see the rear windows were welded over, and the dash is cut up as well. The body sheet metal is what we expect here in the rust belt. That's why I jumped at a chance to get the western truck I'm working on. My wife wants me to get a carryall instead of a truck so there will be room for our dog. I'm afraid in dog years he'd be long gone before another project got done (maybe even this one). Of course I expect to live forever so buying another future project seems perfectly sensible. I'll continue watching cl for anything listed as a Power Wagon maybe the next carryall will follow me home. Jim
    You'll find a Carryall, there is one local to me that I want to get for a full OE restoration once I am done "Hot rodding" my current project.

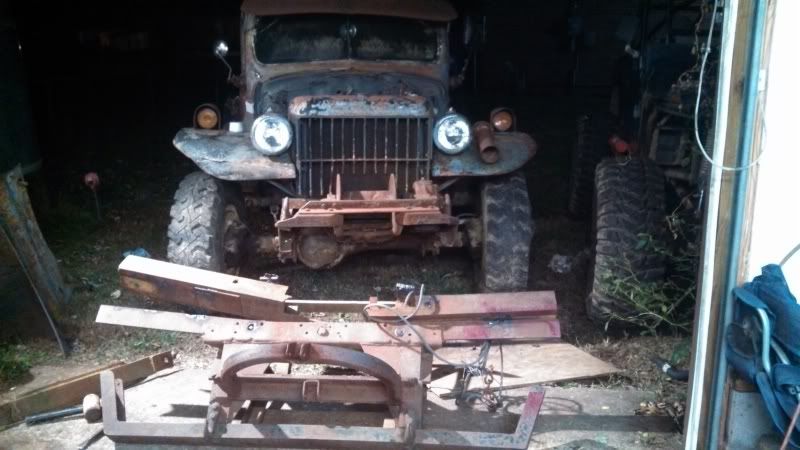
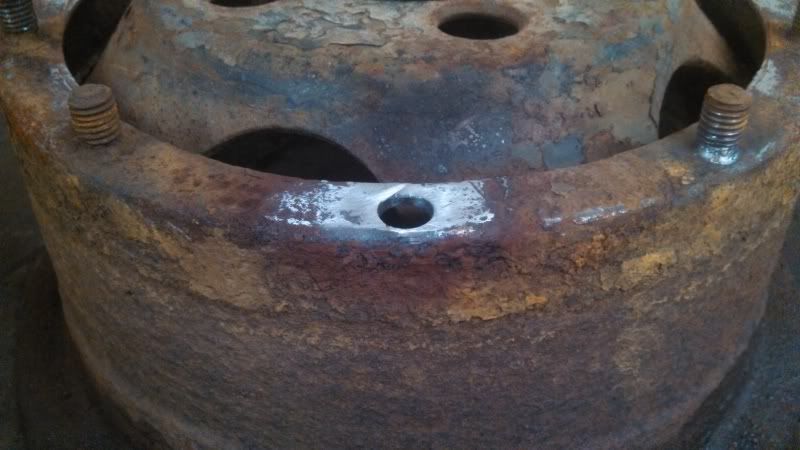
    Heck, I got both ends of the stick on this one, and pretty sure it was broom handle that someone broke in the center and I got the two center ends... a "friend" of mine originally wanted this thing. Actually, two friends. An aquaintence from Highschool and then an actual local friend. The highschool friend was cordial about saying no initially, and the closer friend is the one that sent me up there afterall having I already posted on here that I was not planning on getting it. He's the one that I lay blame to me having the truck as it sits in the yard. My wife is being cool about it because I think she knows I do love these things. I felt giddy last night for getting the truck running being as mundane an accomplishment as it is to most folks.

    Its amazing how many of these trucks do get sold being listed incorrectly. The last one I bought, the Navy truck that still had the logos on the side was listed as a Army Jeep Van 4x4...
    1942 WC53 Carryall in progress.

    Comment


    • You just raised the value

      I like to know how you got the thing running. That is worth sharing. nothing mundane about it at all. If you get the stock fuel pump to work, clean up the tank and carb, detail those parts, the sale possibilities go up no matter how butt ugly the vehicle is.

      Ditto goes for some of the junk. Cut it off and show us before and after pictures, I like seeing that stuff.

      I am getting close to 60 years old, I still bum slide down snow slopes and shout my head off as I whip down the slope, I also do a silly dance and have a big happy on my face when I get a vehicle to fire up that has been sitting around for years.

      And knowing that you managed to fire up that old pile of pooh has me smiling.

      Seriously I am happy for you.

      Thanks for sharing

      Bruce

      Did my test fit using all 4 bolts through the flange,drum and into the yoke. Everything lined up, no fighting, no tweaking, no slotting holes, no tight spot half way home. Nailed it . Neat thing is I had to peel a thousand or two off the shank/pipe with a file and sand paper. Once I put a bit of paraffin wax on the shank the bolts slid in without galling .

      Comment


      • Originally posted by Bruce in BC View Post
        I have an idea for an article on modified vehicles, another on zinc plating. Here is the challenge , how about we see who gets one off by sunday? The zinc article does not count .
        I also have a new term for you.
        AUTOMOTIVE DECORATOR. These are the folks who buy stuff and bolt it on their trucks . They certainly are not artists, or fabricators they are decorators.
        Dropping by Speedy Bobs chinese import part emporium and bolting stuff on your rig is not the action of a visionary or creative person.
        How is that for starting something?

        Lot of fun looking at some guys jacked up late model truck and saying " I really like how you decorated your truck"

        Bruce

        Please share the small stuff, if it was boring why would you look at it? It is not boring. Same old same old is boring.
        Like this lovely example?

        http://photos.imageevent.com/brigand...Dodgeabuse.jpg

        Comment


        • Originally posted by Bob Thompson View Post
          Whoa!
          he turned the crap magnet up to 10, broke the knob off AND installed a chrome cover where the knob used to be.....

          Comment


          • Lots of things happening so far this weekend, some good, some down right frustrating! Hoping Sunday turns out good. In my phone so will detail later but did get this snow plow contraption cut off. I bet it weighs nearly 250 lbs, (113 kilo for you Bruce, ha ha); the truck appears greatly relieved! Hope the photo works.
            1942 WC53 Carryall in progress.

            Comment


            • Originally posted by Chris Olson View Post
              Whoa!
              he turned the crap magnet up to 10, broke the knob off AND installed a chrome cover where the knob used to be.....
              That's a very apt description Chris.

              That photo was taken in Santa Ana, Ca. as I remember. The owner was present and was immensely proud to have his ride photographed. He was similarly adorned. A real "Rico Suave' " caricature. He was wearing enough mariachi "Bling" to make the truck seem conservative by comparison.

              Comment


              • Originally posted by Alxj64 View Post
                Lots of things happening so far this weekend, some good, some down right frustrating! Hoping Sunday turns out good. In my phone so will detail later but did get this snow plow contraption cut off. I bet it weighs nearly 250 lbs, (113 kilo for you Bruce, ha ha); the truck appears greatly relieved! Hope the photo works.
                The truck does look relieved Alex. Perhaps all that steel will offset the purchase price a bit.

                Comment


                • running 12.5 on a 6.5 rim

                  I have been running them like this for years . Not sure what the issue is . Tires seem to wear flat and I have yet to pop a bead at low pressure. Also I can get the bead set without having to fight with the tire. So if there is a downside I am not sure what it is. Side cuts on rocks perhaps?
                  Kind of like running nitrogen in your tires or needing tire pressure sensors or the latest scam " That tire is over 6 years old I can not service it, you need new tires"

                  Comment


                  • Originally posted by Bruce in BC View Post
                    I have been running them like this for years . Not sure what the issue is . Tires seem to wear flat and I have yet to pop a bead at low pressure. Also I can get the bead set without having to fight with the tire. So if there is a downside I am not sure what it is. Side cuts on rocks perhaps?
                    Kind of like running nitrogen in your tires or needing tire pressure sensors or the latest scam " That tire is over 6 years old I can not service it, you need new tires"
                    Yea, I totally understand it on let's say a big over the road truck, or on someone's daily driven vehicle but in this case its an Interco Swamped TSL, going on a truck that is way under the max load of the tires, won't see over 45 mph, on a bead lock steel combat wheel, running inner-tubes... rim width 1.5" narrower than the manufacturing company's suggested size is not a terrible concern. I've found a few folks lately in the Power Wagon WW2 Dodge community that just simply don't care for me.

                    Anyways, I've broken down two combat wheels from the truck and am snagging two more I had squirreled away from my last parts truck and am installing some old TSLs. I am cleaning up theme tires with the grooving iron to better fit their use at the farm.
                    1942 WC53 Carryall in progress.

                    Comment


                    • Fumbling towards ecstasy

                      Multiple apologies to Sarah M.
                      I shimmed up a bit of the parking brake mechanism. The holes were sloppy. I looked for some nice nylon inserts but had nothing remotely close. So I made one bushing from a piece of brass and the other from a piece of pipe and loctited it in place. I could have welded the hole closed and then drilled a new correctly sized hole but I did not feel up to grinding and filing the weld flat.
                      Will see how it works and correct as necessary, sometime in the far off future, after the truck is mobile.
                      The middle pin was created by cutting the head off a bolt ,drilling a cotter pin hole and adding on a nut that was sawed in half.
                      There is a lot of different opinions out there. some are quite unusual, some unique , some dangerous and some are so stupid you wonder if the author is serious, being funny or his 2 digit IQ is 25 points short of average.

                      edit: no I am not singling out the poor handy capped folks who do the best with what they have. But I do get a laugh over all the "authorities" who come up with their stupid advice.

                      here are a few of my favourites

                      " If you run your wheel nuts loose the wheel will balance itself"

                      " if you remove the head gasket you will increase the compression ratio in the engine"

                      ' if you change the air in one tire, the air must be drained out of all the tires and new air added from the same source"

                      "Diluting fuel with water increases power and fuel milage because the heat from the engine make the hydrogen and oxygen molecules separate and then burns up as fuel."

                      " disconnecting 2 spark plug wires will help save gas"
                      Attached Files

                      Comment


                      • and some more fumbling

                        Exhaust system is done . Clearances are tight. There is something in the muffler, a built in rattle, more than likely a blob of metal. No ceramic coating because it is too expensive for my thin wallet. I need to create a couple of heat shields , one for the transfer case and one or two more to keep the heat from the carryall cabin .
                        The exhaust exits from the original location, just a bit bigger diameter tubing.

                        Some of what you see is in the primer prep stage, and some of the green black is the restored patina. The trans is getting a coat of Cummins beige.
                        the exhaust will get one more coat of stove black after I cook the present one.
                        Attached Files

                        Comment


                        • Patterns

                          Alex, As I expressed earlier I love your ideas and work. You mentioned that you could be interested in sharing. if you have some patterns, or better yet a cad drawing I can replicate your suspension parts/engine mounting parts. I have a close friend that is has a large plasma table and multiple sets could be made. If there is some way that you would like to "work this out" I would be open to discussing the options.

                          If not, keep up the good work. I do still enjoy the photos.

                          Garrett
                          Last edited by Gordon Maney; 12-14-2013, 09:59 AM.

                          Comment


                          • Garret

                            You should private email your phone number to Alec. Having it out in public can create problems, just thinking out loud.
                            Bruce

                            Comment


                            • Hey there Garrett, I just now saw your post about cutting these parts in a large volume. I'd need to tweak a few of the drawings to make them more of a DIY fitment setup. I am personally looking into picking up a bigger table for myself. If my deal falls through and some things change around here with my focus of my current day-job employment, I'd be interested in a venture of possibly offering this 4 link setup as a kit. It would be something that a fairly outfitted builder or shop would still have to assemble though. However, I've already got a waiting list of people who want me to build a duplicate front axle of mine for their vintage resto-mods using the 8 lug outers but a nice round steel housing and center section. I would totally love to make this a living but my current financial obligations, lack of shop space, and neighborhood setting would require a full swing lifestyle change... something I'd be open to; my wife however, would not be.. and if she aint happy, aint nobody happy.

                              So, like everywhere in North America this weekend, the weather was terrible. We got no snow, which I am fine with, but lots of heavy, 33ºF rain... miserable stuff that turns my unpaved shop entrance into a mud hole so I did zero work outside on getting this other scary ugly Carryall running or mobile. I pulled two more tires and wheels from my parts pile at the family farm while I was up there for a friend's wedding. I am hoping to get all of the combat wheels broken down, cleaned up, and reassembled with some tires that don't have holes in them so big that the innertube is bulging out making it look as if though the Michelin man has elephantitis. (nice visual huh?)

                              In the process of breaking down these combat wheels I managed to twist off a stud. One out of 20 so far isn't bad given the rusty nasty condition of these things.


                              One of the wheels was rusted up so badly that I was afraid I was going to damage the ring flanges with the chisel, hammers etc. and since the tire was so bad I just went ahead and cut it off as it was no loss at all anyways.


                              This forum only lets me link 3 pictures at a time so expect a few more posts coming...

                              Here is the broken stud... I was angry because ofcourse it was #20 of 20 that ended up breaking... no problems from the previous 19 and this one didn't take much effort at all to pop either.

                              1942 WC53 Carryall in progress.

                              Comment


                              • So on to the tedius little things that take a lot of time. I am sure that someone out there has replacement studs for these wheels and that they probably aren't all that hard to install or replace. Truth be told I haven't even looked as the first thought that came into my head was that this was an excuse to spend a rainy cold Sunday hiding in my shop from the real world, dog hanging out on his shop bed, music playing, 10 steps from the Kegerator, and hovering over my little Atlas/Craftsman lathe I bought a few months back but haven't really had a chance to use that much on real projects.

                                Tedius, but fun... and relaxing.

                                Cut the old stud down and then drove it out, taking note of its odd shape and dimensions. It has a tapered/beveled shoulder for where it rests against the wheel flange and also has part of the shoulder nipped to lock against / clearance against the wheel inner shell face.


                                Started with some 1" dia alloy stock. I think its 4130 left over from a past project.


                                Then a little bit of machine work. I at first was planning on using a threding die to cut the threads... 5/8"-11 thread size, and ofcourse I didn't have a die to fit that size; everything else floating around in my toolbox but for the life of me could not find that size die so I had to cut the threads the old way and couldn't even chase them with the die like I was hoping to. AND I had already turned the shank too far down for hand cutting so I ended up flipping the stock over and starting again... Ohh well, practive. Resulting thread Class fit was pretty tight so I was pleased. Takes about 15 ft-lbs to thread the nut on and off so I doubt it will back off of the wheel once seated and tight. Also the alloy bar will give me a little more "spring" tension inside the bolt shank so it should be more inclined to stay tight.

                                1942 WC53 Carryall in progress.

                                Comment

                                Working...
                                X