Announcement

Collapse
No announcement yet.

The WC53 Carryall thread .

Collapse
X
 
  • Filter
  • Time
  • Show
Clear All
new posts

  • Thanks for the good words Alex. I still need to finish my shop before I get going on the WC53 build and I will being doing some other projects like finishing my CJ2A as well. I don't mind doing some firewall work, but I don't want to stretch the hood. If it comes down to that, I will go with a 4BT, but with a NV4500 behind it.

    I also picked up a 1/2 ton that I could not pass up a couple months ago. It is too clean to modify. I even drove it off the trailer and it has the stock front seats. If I keep it, I will do a full restoration. I may sell to help fund the other projects. It is hard to let go of these once you find one-LOL

    Comment


    • I like the 1/2 ton version, and a 4bt with an NV4500 fits real nice in one!

      Comment


      • Carryall in Gordon Maney's Driveway

        A welcome to the new Carryall owners and great job Alex and Bruce. I'm amazed at what you guys have been fabricating and I almost feel guilty saying I had to wash my Carryall today and replace FOUR rivets holding the webbing under the hood. (ha)
        I took the Carryall to the Vintage Powerwagon Rally in June and heard how Gordon's illness had progressed. I also felt Gordon's presence during the banquet so on Sunday I took the long way home in order to stop at Gordon's house. He was too weak for visitors but I asked his nurse to tell him to listen for the truck's horn and think of it as the audience's applause he never heard at the banquet. I laid on the horn in his driveway as I left.
        I'm also including pictures of Gordon's dog Kobuk and Carol's dog guarding the house.
        Rest in Peace Gordon and Thank You for bringing us the Powerwagon Advertiser.
        Attached Files

        Comment


        • Well done Gary

          I look forward to the day that my post says "washed the truck today".
          Thanks for the pictures of your vehicle dropping by Gordon's place. That was a really nice thing to do for Gordon.

          Best wishes
          Bruce

          Comment


          • Here is a real nice one

            https://seattle.craigslist.org/tac/cto/4541767712.html

            Check out the door jams in this truck. Sure looks rust free in the photo.
            Attached Files

            Comment


            • I hate sandblasting

              The big issue is it is too slow. Yes I have a pressure pot. The darn thing empties in no time and then I have the pleasure of cleaning up the abrasive.
              Attached Files

              Comment


              • So who got it? That Carryall did not last long.

                Darn picture is too small, but it provides a record of the truck . Location of the yellow bumble Carryall was Spokane.

                take care
                Bruce
                Attached Files

                Comment


                • I tried, he didn't return my calls or emails

                  Comment


                  • No réponse to ads

                    I find the lack of response to ads to be annoying but pretty typical. Funny are the ones that I have emailed and get no response yet the ad gets renewed a month later or turns up in another venue with the article still for sale.
                    I once found an ad that I had stuck on the wall. The ad was 8 or 12 years old. I phoned the guy and low and behold he still had the parts. No ryme or reason to how private sellers operate.
                    I usually post leads to anything Carryall here first. There are pickers who go grab the vehicles and just put them back up for sale at a higher price. I find that counter productive and try to avoid feeding them.
                    Ran across a set of XZLs for something under 200 for all 5. They were for sale for several weeks- I posted a link and they got scooped up and then resold for close to 1200. I wanted some PW owner to pick them up and have a great big smile on his face.

                    Comment


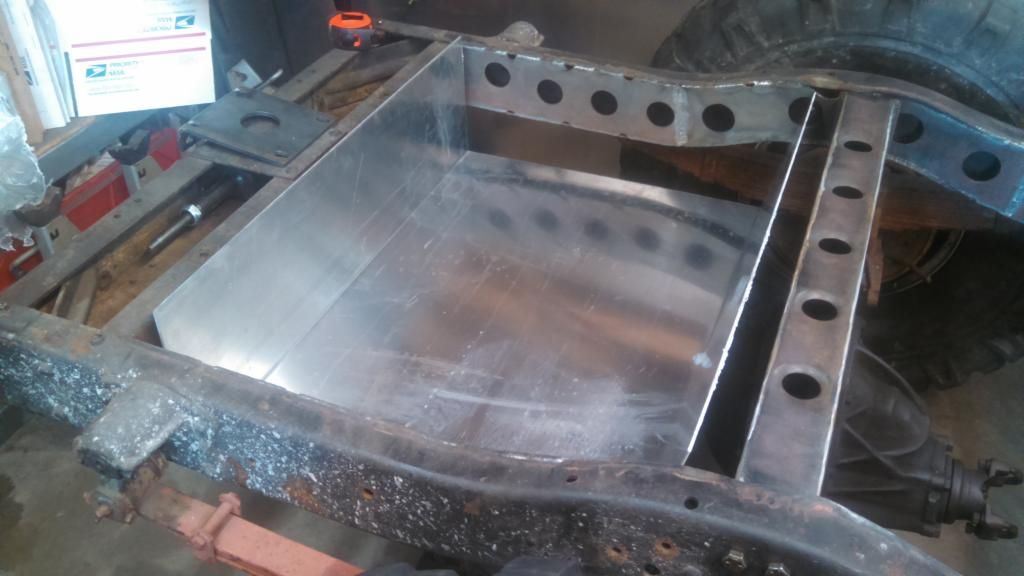
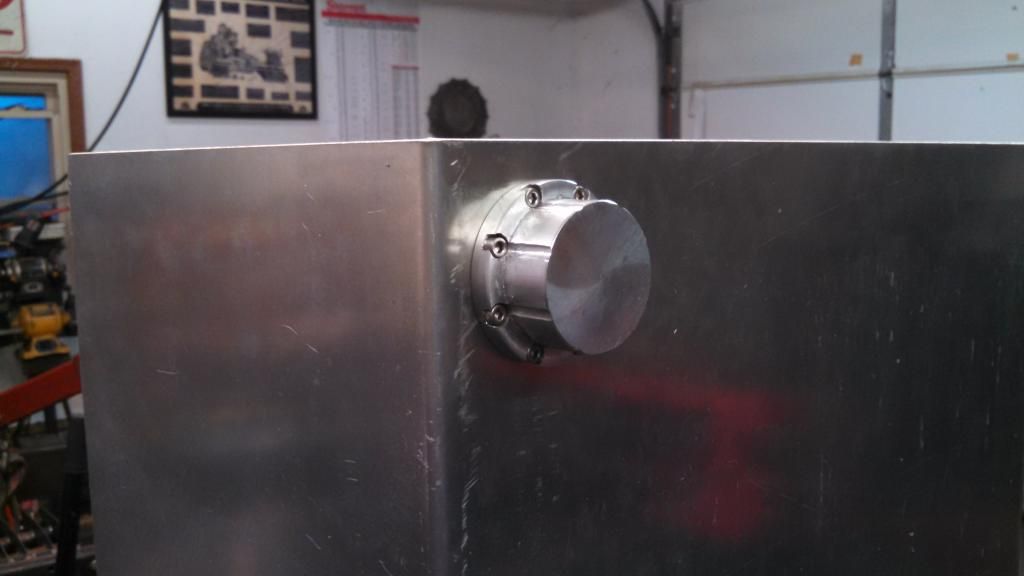
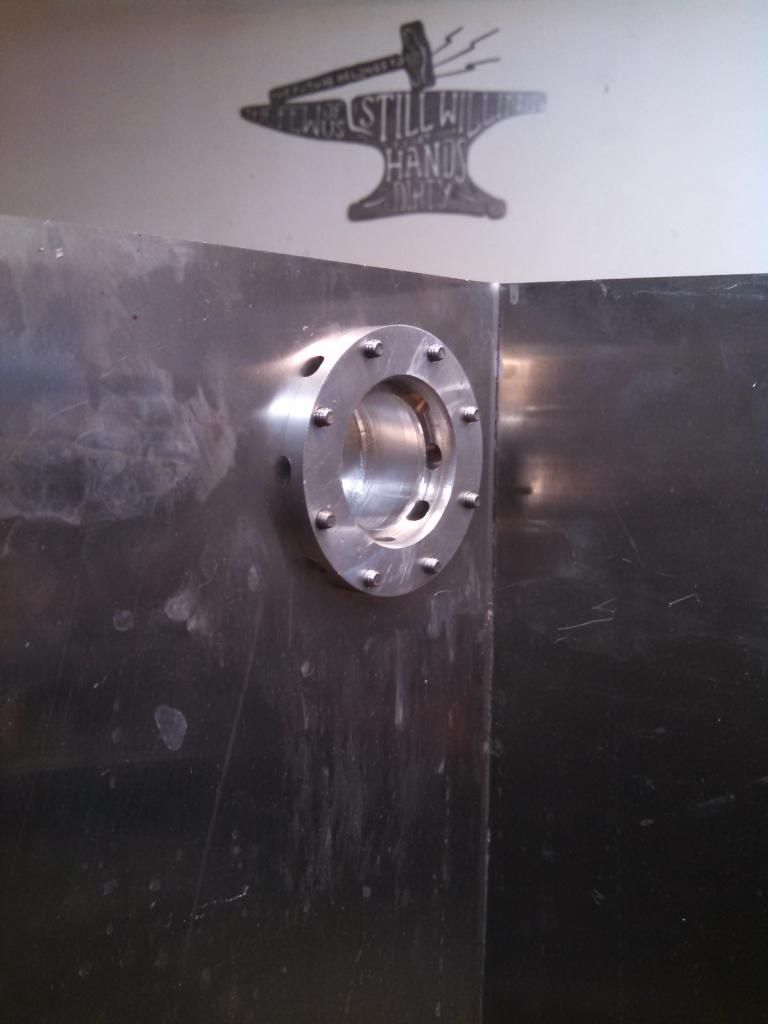
                    • Posting quickly because I gotta run out for a bit but started on my fuel tank build. Including the custom sump I machined but still need to tap for drain and outlet fitting.


                      1942 WC53 Carryall in progress.

                      Comment


                      • Whats the name of and the place to source that fancy copper type brake line that everyone likes so much? I am going to be putting the body back on mine soon and I figure I might as well run the rear hard line while I've got everything off and mix it in with the fuel line mounting brackets.

                        Thanks in advance!
                        1942 WC53 Carryall in progress.

                        Comment


                        • Cupronickel

                          Try googling it and you will come up with multiple brands that use different names. My local parts place had it in stock, it was a special order that had never been picked up.
                          I worked until 1 this morning and finished the first coat of epoxy on the bottom of the Carryall. Got to bed by 2 . Been a few years since I pulled a stunt like that. Spent today cleaning up the mess I made on Wednesday. Mostly sweeping and moving about a 1000 lbs of blasting sand from the front of the shop. Dumped it in a hole in the corner of the property.
                          Still lots to do, Gotta spend a day with some seam sealer, then hit the bottom with a little bit of rock guard, followed up with a coat of pipe line paint. I got some, so I might as well use it. Then a top coat with something green.

                          Got some tricks for taking out a few squeaks. I will post some pictures.

                          Have you looked at your right hand bend in the fuel tank? No cracks?
                          On your next sump why not make the screw holes blind?

                          Show some pictures of how it will seal. Neat looking part, Carryall skookum.

                          Comment


                          • It's copper/nickle tubing, like Bruce said I've seen a few different names. The Navy uses the crap out of it now in critical but lower pressure applications in contact with sea water like fire suppression. Easier to work with than stainless, very corrosion resistant, and not succeptible to chloride stress corrosion like stainless, but not quite as strong either.

                            I ran stainless on mine, but it remains to be seen how much trouble it will be getting the flares to all seal right. I'd probably go that route were I doing it again, or if I have to.

                            What do they do for fittings, to they have them in copper/nickle? Seems counter productive to use steel fittings on cu/ni tubing. I have stainless fittings but wonder if there would be dissimilar metal issues mixing all that with steel and aluminum brake parts?

                            Comment


                            • Thanks for the heads up guys. I tracked down and ordered a roll of line and a bunch of misc end fittings to get things going. Also ordered the flaring tool (ATD) that everyone seems to like over in the tool section. I went ahead and snagged the master kit so that I can do some larger and smaller hard lines for other projects.

                              I'm going with 1/4" lines on this build simply from experience of using a nearly identical brake system on a few Jeep builds. The caliper demand and line volume loss from using a 3/16" dia line vs the 1/4" line is notable. Yes, the larger line may be a touch easier to kink while bending but for one it will look more appropriate under this truck and the 4 wheel big piston brakes will need the volume. My Jeep and my wife's jeep have the same Calipers. Big twin piston fords up front and big Chevy 3/4 ton front calipers installed in the rear on the Eatons. The pedal is fairly soft and travels a long way. This is actually really nice for fourwheeling on the rocks because you have a ton of brake control. Emergency stopping however is less than pleasant because that pedal has to MOVE to get the line pressure up to snuff to get the calipers to lock. TONS of pressure at the bottom of the pedal but the throw is a bit more than desireable. A Jeep/buggy I helped a friend build uses all of the same components except he/we used 1/4" lines instead (because thats what his rear axle already had on it, which is a stupid reason but it was his reasoning) and the pedal is the same "soft feel" but takes about 30% less throw which feels more like a stock vehicle should. Obviously linkage ratio for the pedal system will have another affect on my setup when I build it all. May design my pedal hanger with a way that I can "move" the pedal hinge point further or closer to the plunger rod to change my leverage point but not change my pedal length. I've got some ideas as long as I can salvage firewall space.

                              As for the fuel tank sump, I am going to cut some fuel tank gasket material and use fuel safe sealant. I've used it on my wheeling rig tanks for fuel pump installations and have had my Jeep upside down and it didn't leak at all. ha ha.

                              I didn't have the tooling for a blind hole and my little mill was at its limits with the indexing head that I used for machining this thing.

                              The 90 degree bends for my fuel tank are all nice and crack free. The sheet appears to be a 5052 grade vs the T6 6061 which is normally what cracks like you are concerned about. I cut off a few little slivers of the over-cut trimmings last night and started to mess with getting my welder settings right and it wets really easily with the TIG. I'm very nervous. This will be my first "major" aluminum project. I've welded up a few little broken parts for friends and added a "name plate" to an aluminium body prop rod for a drag car but this will be my first critical, better not have pin holes, better be quality, minimal warping, type welding project on aluminum. Going to practice on a bunch of scrap again before going into it.

                              The other adventure is going to be the coping work for the filler neck tube. Not looking forward to that project either.
                              1942 WC53 Carryall in progress.

                              Comment


                              • Alex, you said you got it in a roll. I have a simple shop built solution for straightening lengths of brake line that come in rolls.
                                All you need is a couple of hardwood blocks, a vise and a long drill bit that is just a bit larger in dia. than your tubing.
                                Just split the block lengthwise, clamp it back together and drill longitudinally countersink or bevel the input side and use a little lube on the tubing.
                                I unroll the stuff to roughly straight and cut it a bit long. Then clamp the blocks around it in a vice and attach a pair of vice-grips to the lead end. Just a couple passes with have it straight as a rail.
                                This works for all sorts of metal tubing, I have blocks in several different sizes.
                                With your access to machining eq. you could fashion them from aluminum.

                                Comment

                                Working...
                                X