I have a friend in Washington State that has a Carryall for sale currently. He says its in a little worse shape than mine. Not sure the asking price or additional details but if anyone is directly interested message me and I can get some contact information and more details. I think its one of those its for sale to people who know him / parked in the yard for sale. He said he listed it on this forum back a year ago or so but didn't get much interest.
Announcement
Collapse
No announcement yet.
The WC53 Carryall thread .
Collapse
X
-
He can send me an ad for the magazine; it must include area code and phone.Originally posted by Alxj64 View PostI have a friend in Washington State that has a Carryall for sale currently. He says its in a little worse shape than mine. Not sure the asking price or additional details but if anyone is directly interested message me and I can get some contact information and more details. I think its one of those its for sale to people who know him / parked in the yard for sale. He said he listed it on this forum back a year ago or so but didn't get much interest.Power Wagon Advertiser monthly magazine, editor & publisher.
Why is it that the inside of old truck cabs smell so good?
Comment
-
I'll let him know! Thanks Gordon!Originally posted by Gordon Maney View PostHe can send me an ad for the magazine; it must include area code and phone.
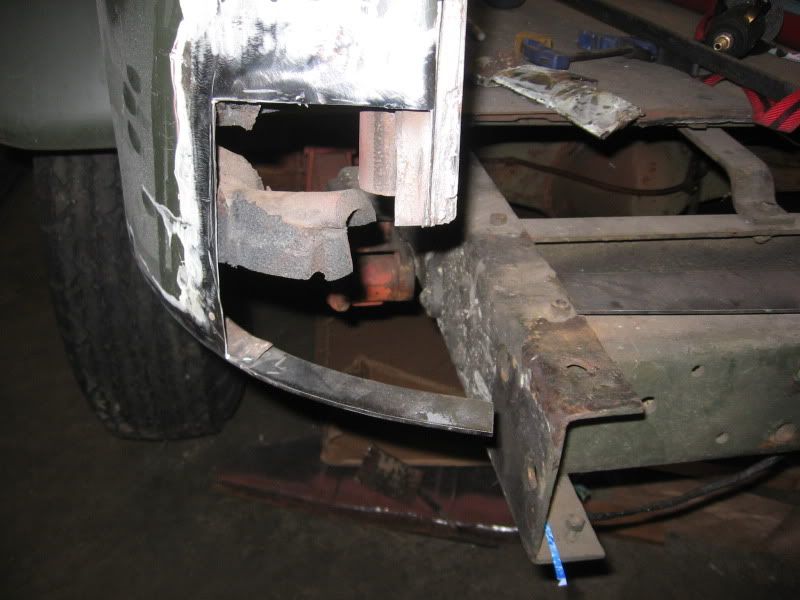
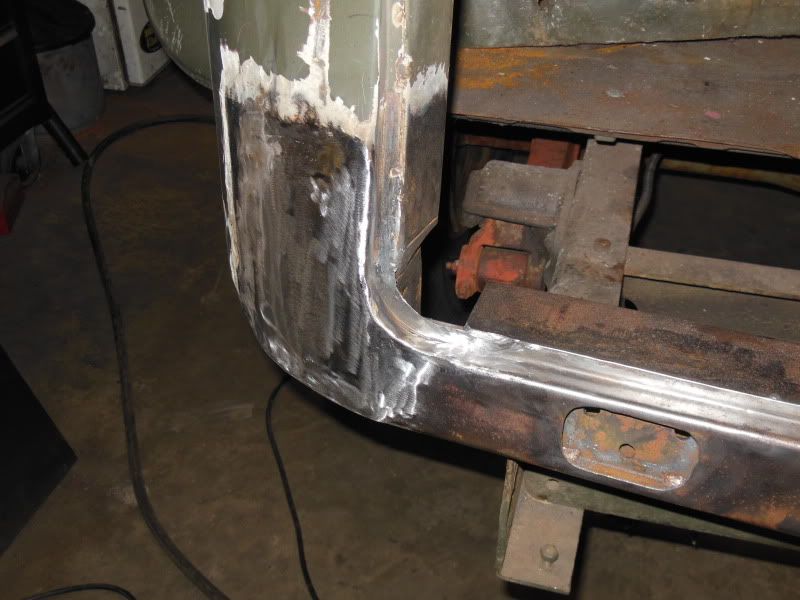
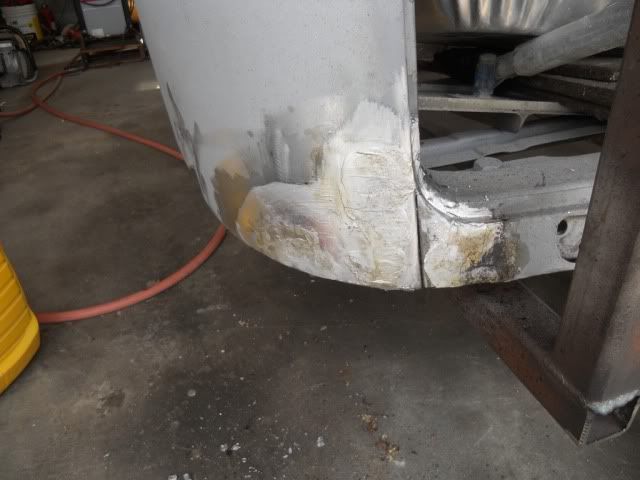
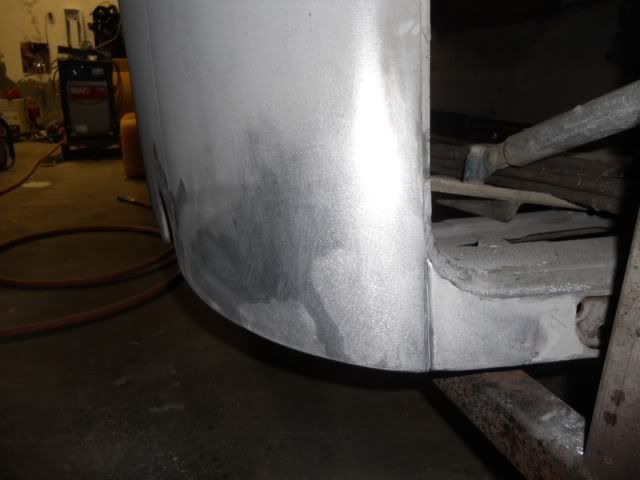
So I started on replacing a few of the bad spots and started getting that rear cross member tied into the rear quarter panels. This old and really thin sheetmetal is rather difficult to weld. This is a fairly "new" thing for me, sheetmetal work that is, so the learning curve is also messing with me. I'm getting the hang of it though.
Before:
After:
 1942 WC53 Carryall in progress.
Comment
-
looks decent
Except for what looks like a big melted hole in the side panel . How many of us have done that ? You get this beautiful weld going and all of a sudden there is a hole , which gets bigger every time you pull the trigger and then the porosity starts to show and the whole mess needs to be cut out . I have never ever ever had this happen but I hear it does occur once in a while .....
Your valance looks great , the lips and edges blend in and look stock to this old farts eyes . I still have not got my head around welding panels in using a mig , although I do need to drop to .023 and the soft wire and see how that will work . I have heard of some folks being able to metal work their MIG welds after using the soft , grindable , low carbon wire .
Today I made a small bracket and 1/2 a dolly to park the turbo 400 on . Stores are closed and there is no Harbour Fright around here to purchase a cheap wheel for the dolly .
Keep those updates coming , we are both making progress , and some of your mods and work is WWWWAAAAYYYYYY CCOOOOLLLLLLLLLL
Comment
-
Glad to know I'm not the only one. My saving grace is that between the grinder, sanding, disks, and eventual body work most people will never see my poor welding skills.Originally posted by Alxj64 View PostThis old and really thin sheetmetal is rather difficult to weld. This is a fairly "new" thing for me, sheetmetal work that is, so the learning curve is also messing with me. I'm getting the hang of it though.
Comment
-
Normally my welds are wonderful but this stuff has really thrown me for a loop. No matter how well I clean and prep the panels, both the patch panel and the Dodge factory skin, it still gives me a little bit of porosity. I have messed with my gas flow rates, and the amperage settings but still no love. I even considered bad wire but welded two new pieces together as a test and nothing but beautiful came of that with no oxide holes or anything... So my guess is that its this particular steel in this truck. Who knows what Children's toys, farm equipment, and kitchen appliances were melted down to make the rushed recycled steel used to put this thing together. Ohh well.Originally posted by Desoto61 View PostGlad to know I'm not the only one. My saving grace is that between the grinder, sanding, disks, and eventual body work most people will never see my poor welding skills.
On another note. Those with experience of owning these trucks and using them. I am about to start building my gate from scratch. I am going to ditch the 1/8" thick template frame that I was using to re-frame the gate aperture and start over. I have 18 gauge and 16 gauge cold roll on hand, as well as 1/8" hot roll. The frame I started to build with the 1/8" seemed a bit too heavy. I really wish I had some 14 gauge cold roll but my steel supplier doesn't have any in stock and can't get me any before the weekend which is when I will have time to build the gate.
So, my question is, would it be sufficient to build the entire gate using only the 16 gauge? The frame would be sheets that are broken at angles so there will be a touch more rigidity in it, there would be a couple of internal ribs and then I would skin the entire body with the 16 gauge to help reinforce it and make it less likely to dent. The 18 gauge seems way to soft and easily dented for me to feel comfortable using it for the gate skin since my intention is to use the truck on a nearly daily basis and it will see cargo going in and out / I fear some friend or one of my wife's girl friends dropping the gate while opening it. Figuring about 4'x4' total area of steel used for the skins, both interior and exterior; The weight savings between the 16 gauge skin(2.5 lbs-ft^2) and 18 gauge skin (2 lb-ft^2) is a total of 8 lbs. The 16 gauge gate will weigh about 40 lbs plus a few for ribs and hardware, and the 18 gauge gate would weigh 32 lbs plus a few for ribs and hardware. I am thinking that the 16 gauge might be worth it simply for the robustness, however the workability of the 18 gauge is much greater... Or I could go with 16 gauge framing and ribs, double up plates where the hinges and latch mechanisms mount and then skin the outside curver portion with the 18 gauge and then just do the flat interior sheet with the 16 gauge since its just a flat square sheet with a single broad radius break in the center.
Thoughts?1942 WC53 Carryall in progress.
Comment
-
I think the final option is best unless you rig up some sort lift assist. Otherwise the extra weight will be just as likely to invite abuse as fighting with it.
From what I've seen working on the doors its also close to how Dodge built them originally.
Comment
-
Carryall tailgate
Perhaps you should build it like a wing . Two or three internal braces with lots of holes punched in . Maybe three vertical braces . A couple of tubes running across . Would be rigid as all heck and light to boot . Get some beads rolled on the inner skin and that would add even more strength .
If you had quick access to an old step side tail gate , that was factory stamped , it might make a good inner skin .
The issue with the carryall gate is it is too thin of a design . It should be thick as the front doors . I am talking about the distance from the inner to outer skin , not the metal thickness .
made some small progress today - mucking with some bolts on the rear crossmember - might get one bumperette attached before bed time .
Comment
-
Securing the Bottom Carryall Tailgate
Thought I would just say that to tighten up the tailgate and at least reduce some of the normal rattles, I took a couple pieces of short angle iron and made a hook that I could latch to. With a latch on each side they really secured the bottom tailgate. Good Luck.Attached Files
Comment
-
Thanks for all the good ideas folks! I'll certainly try to tangle that series of thoughts into one big idea and hopefully come up with a stock appearing and functional, snug fitting tailgate.
Gary, when you say the normal rattles, what way does the gate move? Does it rattle side to side or is the slack where the gate doesn't latch tightly? Is it possibly to put a thicker but softer weather stripping inside the seam to help firm things up? I am building mine with a pretty snug tolerance between the sides and am actually planning on attaching some pieces of hard rubber isolaters to the sides of the frame where it meets the gate opening.
Last night I started to draw up the pieces I am going to cut for the sides. Didn't get a lot done because some friends of my wife dropped by so I had to vacate the garage and be social for a bit. Hopefully this weekend I can get some real work done.
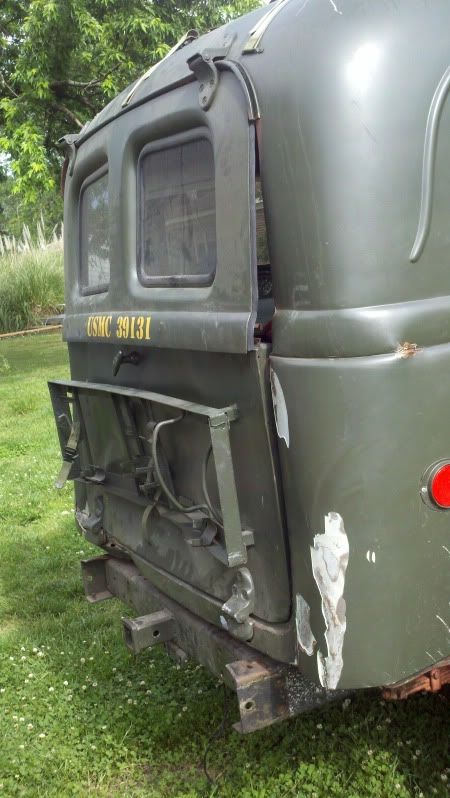
Ohh and almost forgot to post this picture... General view of the new cross member.. its a far cry from how it looked when I bought it. Notice where the body line is relative to the reciever hitch! Thats crazy that I've pushed the body back out that far!
Before:
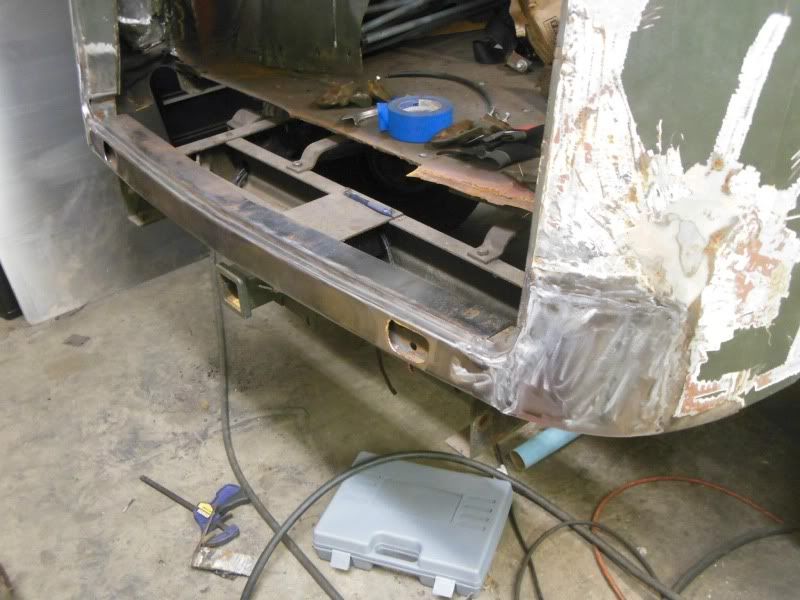
Edit: And then ofcourse this pops up on my ebay suggested items email this morning... Can almost garuntee it wouldn't fit though. Even though I tried my best to put my hinges back where they belong, I wager that they are off just enough that the gate from John wouldn't work. Not to mention I am a cheap enough that I will try my hand at building something before buying it so long as I have faith inmyself to build it. I will, however, print off a copy of this listing and save it for the insurance company so that in the future if the truck gets hit again I can wave this in their faces and say hey look, it costs atleast this much!
http://www.ebay.com/itm/WC-Dodge-Car...-/2810466943031942 WC53 Carryall in progress.
Comment
-
This is how I did mine. It may be a little late, but you may want a relief in the corner. It will crack, somewhere, might as well be where the factory thought it would.
Have seen Archie's tailgate? I can't find a finished picture with the outer skin, but the inner structure is great. I would also agree that Johns are great, if you have a perfect shell, but who has one of those?
All the work looks great.
James
Comment
-
James! Thanks for the heads up on that. It may be a touch late. The thing is with mine though I built the internal structure a little differently so the load path is different than the factory load path. I'll take some time and sit down and stare at it. It may actually not be too much of a pain to add something though. I'll sleep on it tonight and see what comes to me. Thanks!1942 WC53 Carryall in progress.
Comment
-
Small progress , big hours
I got the rear bumper back in place . There are 12 bolts on each side for a total of 24 bolts holding the bumperettes and split bumper in place . All the bolts need to be started on each side before the bumper is torqued down . Of course some holes needed to be reamed of paint and there is a sequence that needs to be followed . Unfortunately a couple of bolts that have nothing to do with the bumper needed to be adjusted so that access could be made for the bumper bolts . Six of the bolts are double duty . They attach to the crossmember as well as the frame and bumper bracket . This is not the best engineering , but short of building a whole new spring hanger , there was no better way to mount and hang the parts .
The bumpers are in primer - final patina will happen at a later date .
I can jack on the bumper to lift the frame and the bumper stays in alignment .
I think a similar bumperette could be designed to attach to the stock bumper . There are some advantages to this , faster build and it would be lighter than my set up but would protect the rear and the fender .
edit : oh yah it took me SIX!! hours to get the bumpers on , a bit of drilling , a bit of sand blasting , a bit of paint , an hour lost just looking for a part I had in my hand seconds before I started looking for it ......
messy in progress photos .
" My shop looks like a cranky teen age girl's bedroom , different mess , same organization
Comment
-
fuel tanks
Ford e350 tank , this is the tank from their van , will fit between the rails . I think mid 90s is the one you are looking for .
There is a company called TANKS that builds tanks for hot rods , I think they will build a tank if you send them your dimensions .
Check out who builds boats in your area , a lot of boats use custom tanks , they are available in aluminum , stainless and plastic and generally are built to your specs .
If you are in a farm area that has milk cows or wine country , you could find out who welds up their tanks . A fuel tank would be easy for them to build and any one who is certified to weld milk containers or pipe can easily weld up a fuel tank .
and there is a chap who posts over on Joe's power wagon page that builds tanks .
Bruce
How is that for ideas ?
Comment
Comment