Announcement

Collapse
No announcement yet.

46 FFPW Restoration

Collapse
X
 
  • Filter
  • Time
  • Show
Clear All
new posts

  • #46
    Just wondering if you had any sucess selling the wrecker unit. I have the same situation. I wanted the truck but not the wrecker that came with it.
    Mine is a drop in unit inside the pick-up bed. I can't seem to find a market for a fifty year old wrecker unit. I've been watching your progress with great envy. I wish I had more time to work on mine. Keep up the good work.

    Comment


    • #47
      tow truck structure...

      ISLANDER... welcome to the group... lots to learn here...

      IMHO ... your comparing apples and oranges... a slide in structure might appeal to a flat bed owner looking for hoisting capabilities without going to a major bed change...

      you must be a subscriber or premium member to post pictures...

      an ad with the PWA and/or the www.dodgepowerwagon would generate genuine interest...

      i'd be interested inpic or two ricktalarek@hotmail.com

      welcome and good luck

      Comment


      • #48
        Just wondering if you had any sucess selling the wrecker unit. I have the same situation. I wanted the truck but not the wrecker that came with it.
        Mine is a drop in unit inside the pick-up bed. I can't seem to find a market for a fifty year old wrecker unit. I've been watching your progress with great envy. I wish I had more time to work on mine. Keep up the good work.
        Thanks! Progress has been slow lately because I've been helping a friend to an engine swap on his car, and my work hours have been kind of weird, but that should change next week. Just need to find the time to get to the metal supply place before they close and get some material for the frame repair and cab braces.

        I have not had any luck, it may be I want too much money for it, or the people shopping don't want the single boom model I have (I seem to get that impression).

        Originally posted by rickt4498 View Post
        IMHO ... your comparing apples and oranges... a slide in structure might appeal to a flat bed owner looking for hoisting capabilities without going to a major bed change...
        I'd have to agree. I'm not sure someone could just convert a regular PW with my setup anyway. While most of the parts are pretty straight forward the welded frame support is required to bolt the bed, boom, and winch to and that can't be easily removed from my truck.

        In any event I've decided I'm going to keep the bed anyway. My current plan is to re-use the bed and just replace the floor (which is rusted out anyway). It's super heavy duty and has a unique look to it. I'll just have to figure out a way to rig up a tailgate and maybe add a hitch.

        I too would be interested in seeing pictures of this boom setup. Someone here (myself included) could probably post them for you if you e-mail the picture. Another option is to post a link to a photobucket/flickr/picasa type account.

        Good luck. I'll offer help where I can.

        Comment


        • #49
          Little Inspiration for Ya!

          This one looks kinda familiar Desoto61, and was the SEMA 2008 Top 25 Truck Winner.

          http://www.trucktrend.com/autoshows/.../photo_01.html


          Comment


          • #50
            Great picture, thanks!

            Comment


            • #51
              Back on task

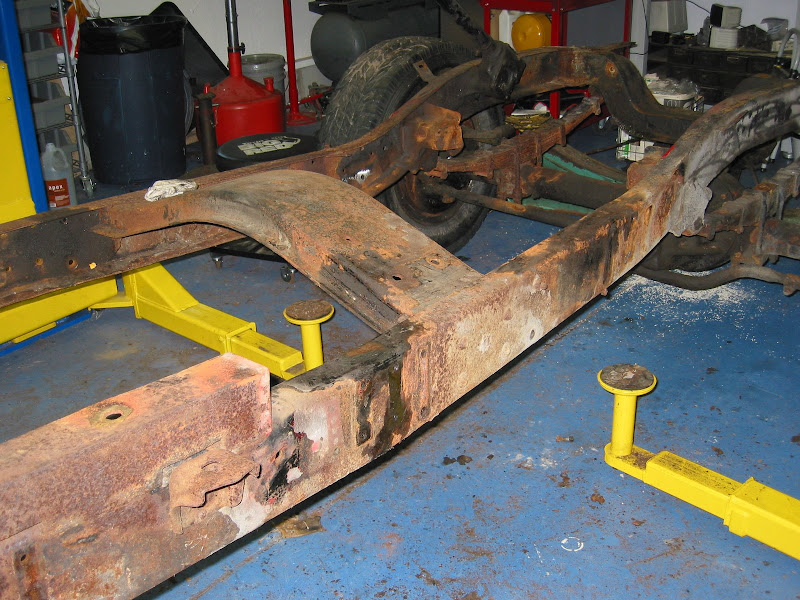
              With the engine swap completed (I hate working on foreign cars), and work levels at normal (good for projects, bad for checkbook), I put the truck back in the garage for the next steps.

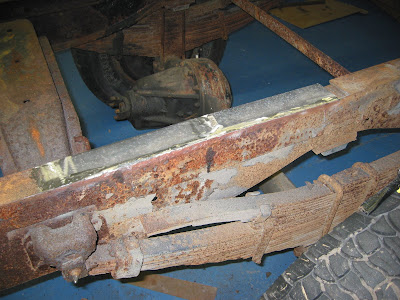
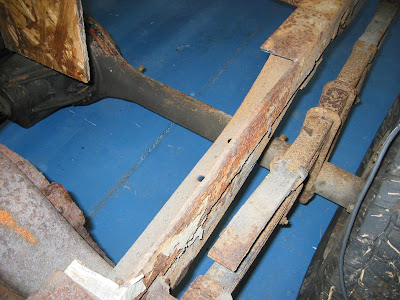
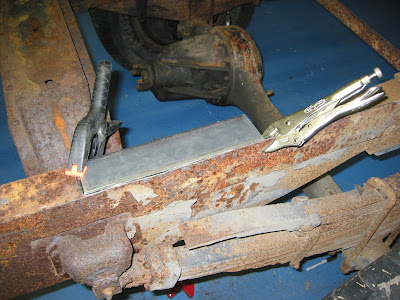
              The driver's side bed support rail had rusted through where rust had eaten through the bed and been alowed to sit. It's also right behind the center cross member which seems to be a magnet for corrosion. So I laid out the area and cut the top of the support rail.


              Finding the metal was tricky, the supply places I contacted don't want to deal with small orders like mine, so I had to do a bit of searching to find the 1/4" plate I needed. The tubing for the cab braces was easier.


              I originally was going to do one piece, but the rail has some sort of bend to it that's not obvious so I ended up doing two pieces to allow for that bend but keep the same width along the top rail.


              My welding still leaves a little to be desired cosmetically, but it's solid, and once covered under the bed it won't matter anyway.

              I haven't determined if I'm going to close up the gap at the back end further or not. Structurally it's not necessary, the original piece had a similar, but smaller gap, as does the other side. I assume it's to allow for the bend I mentioned, and was not welded up to allow some frame flex at the axle centerline.

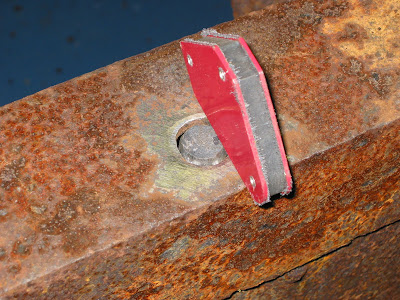
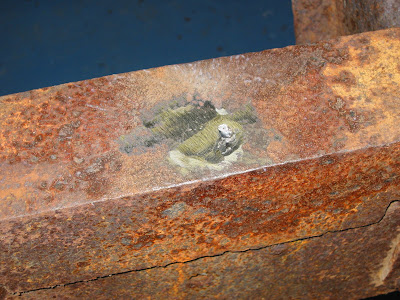
              I may also go and clean up the holes from the original bed mounting locations and weld in patches there too, then I can just drill my own holes when I re-mount the bed, even if I'll probably aim for the same spot should someone decide they want to re-install the boom in the future.

              Next I'll work on making up the braces for the cab doors so I can remove that. Hopefully without another month gap. Thanks for all the support!

              Comment


              • #52
                Productive week

                I've been making good progress the last week. I finished up the patch on the frame and started working on closing up the old bolt holes.


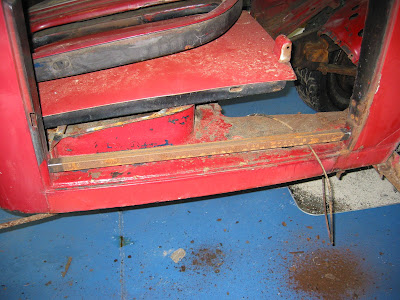
                I also made up a pair of supports for the cab using some square bar I tacked into the door openings to make up for the rust-weakened floors when I remove the cab from the frame.

                Comment


                • #53
                  but there's more...

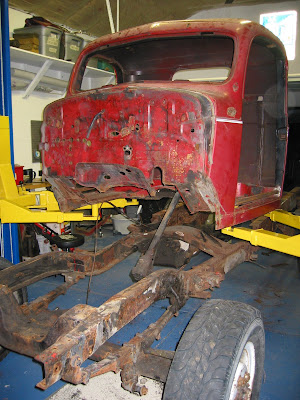
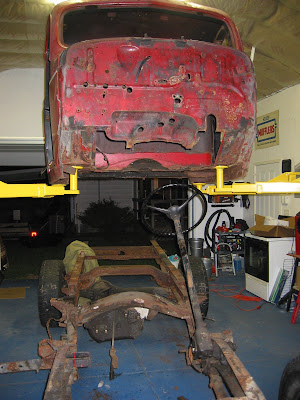
                  Since I was on roll I managed to remove the two rear cab bolts with a little persuasion. The front two bolts however were not really holding anything any more. The floors were so rusted out the driver's side wasn't attached to anything, and the passenger just broke loose when I tried to remove it.

                  I removed the steering column cab support and positioned the truck so I could get the lift arms under the cab and proceeded to lift it off the frame.


                  By moving the frame as I lifted the cab I was able to leave the steering column bolted up to make moving the frame easier.


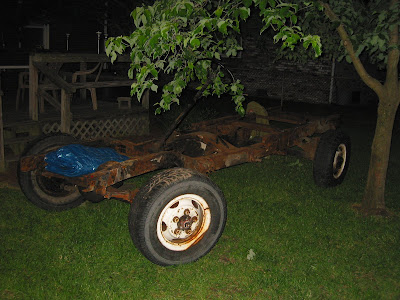
                  With the cab off I pushed the frame back out of the garage and brought my little trailer in and set the cab down on that so I can move it around and eventually take it to be blasted.


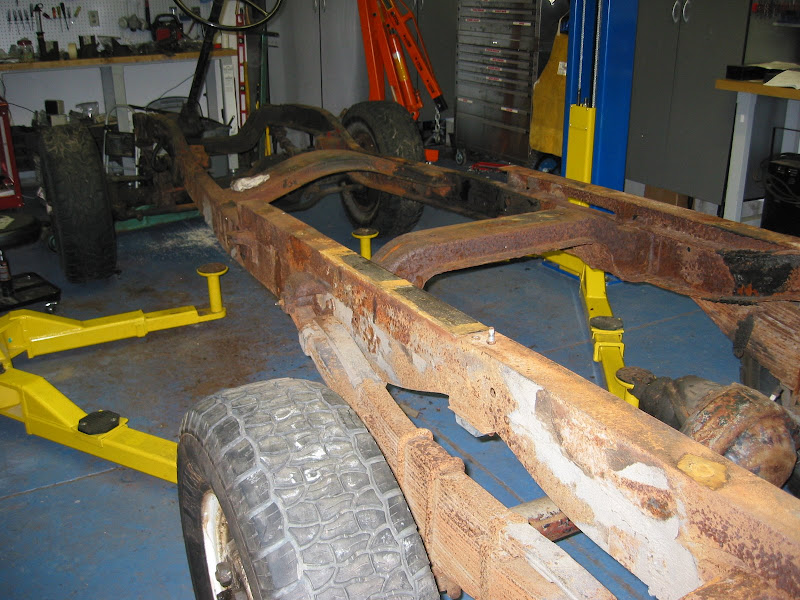
                  I've got some maintenance to do on other vehicles this weekend but next week I'll get the frame back into the garage and remove the transfer case and all the old rusted brackets and supports and get it ready to be blasted.

                  I was hoping to get a centered axle from another member that I was going to put in so it could be blasted and painted with the rest of the frame, but I don't think that's going to happen. So I'll probably just get it done with the stock axle and swap it out when I find another one.

                  Comment


                  • #54
                    More stripping!

                    I spent part of last week stripping some of the brackets and bolted parts of the frame and removing some of the previous "repairs". The rear cab mounts were bolted in place, however the front mounts had three bolts and one rivet each. The original owners had welded some angle iron to the frame to support the running boards when the original mounts rusted out. That all got cut away and ground smooth.


                    Also removed a cross bar from the rear that held the front side of the fuel tank. I'll send the brackets and pices out with the frame to be blasted and painted.

                    I also think I'm going to pull the center cross member (the one at the front of the rear spring mount) and repair/replace. The ends are too thin for my tastes. I hate having to tear off the mount plates but I'll regret not doing it later. It will also let me blast and paint the interior of the cross member while I have it out.

                    Since I have to pull the front spring hanger anyway I'm not sure if I'm going to bolt it back together with the current springs for blasting and painting or go ahead and replace them now.

                    Comment


                    • #55
                      Missed a spot

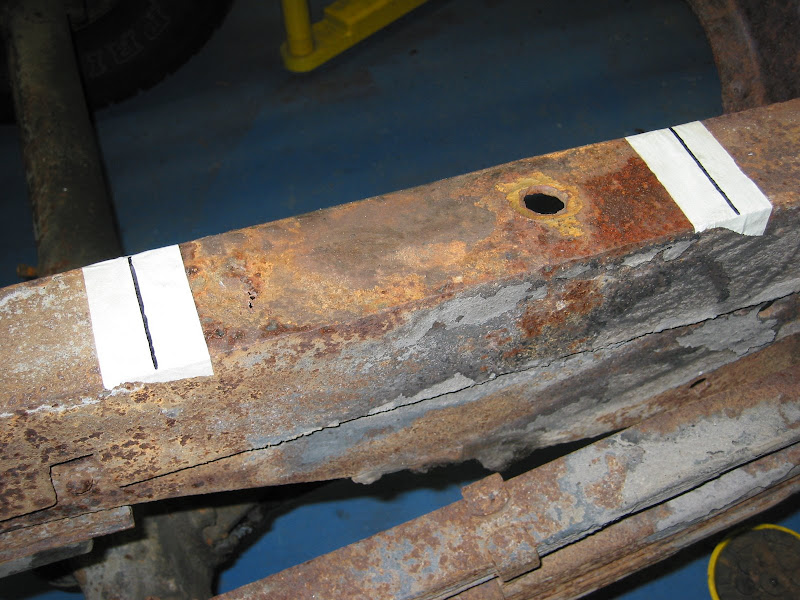
                      I replaced a piece of the driver's side bed mount rail where the metal had rusted though. I thought the passenger side rail was OK, there was a spot with some heavy pitting but I didn't think it needed replaced. While "poking around" last weekend I discovered otherwise.


                      You can see the little holes I poked out just to the left of the right side tape line. While I'm replacing metal I'll cut out the old mounting hole too.


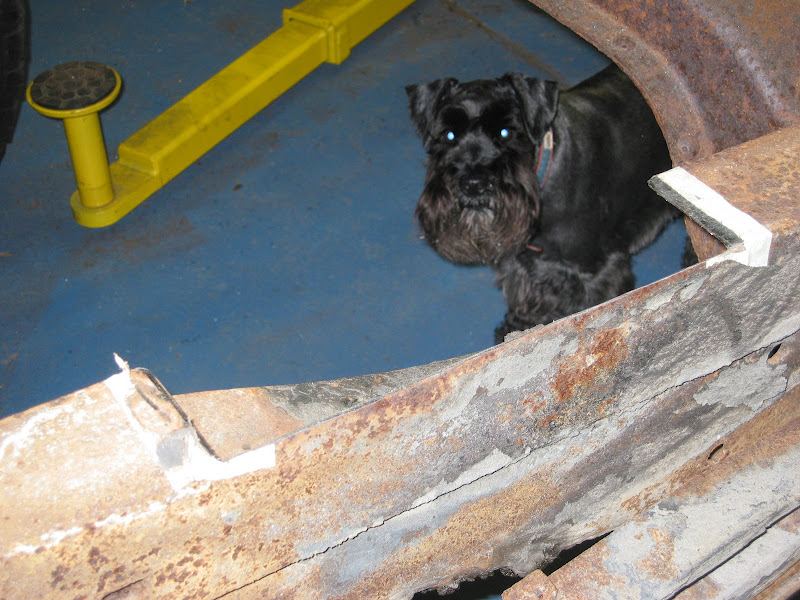
                      Onyx inspecting the repair area. I used a cut-off wheel in my angle grinder. Then beveled the edges for welding with a grinding disk.


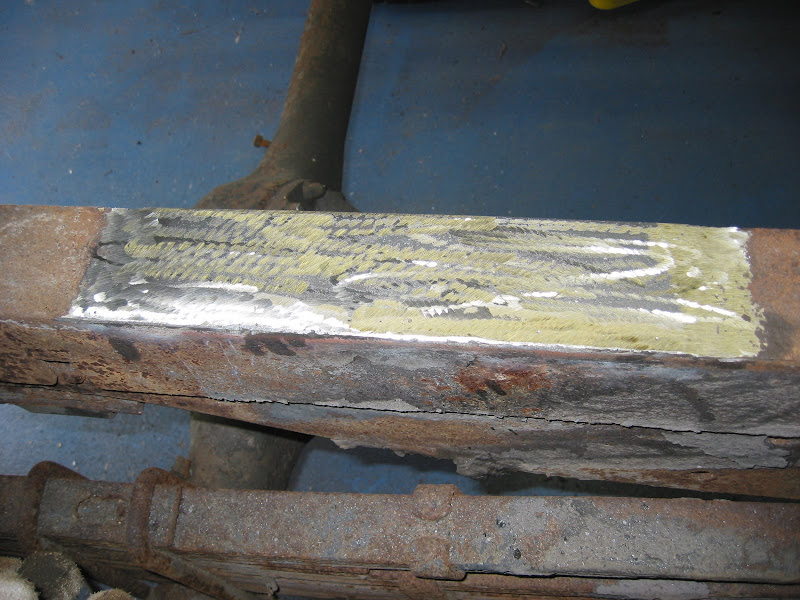
                      After welding and ground smooth. I'm getting better at this welding stuff. I also finished the last two mounting holes. So the bed rails are finished. I have a couple more brackets to remove, then I need to work out the courage to pull that cross-member.

                      Comment


                      • #56
                        Parts

                        Still not sure how I want to attack the frame so I turned to some other tasks.

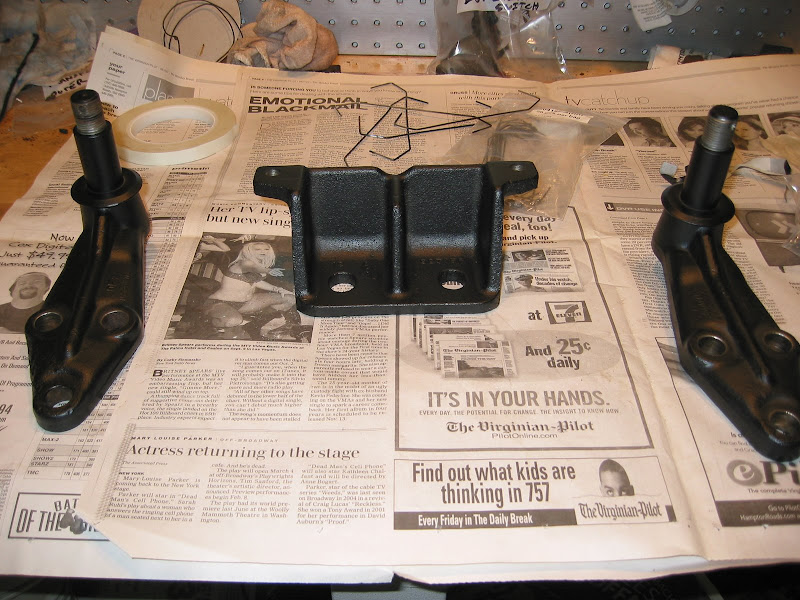
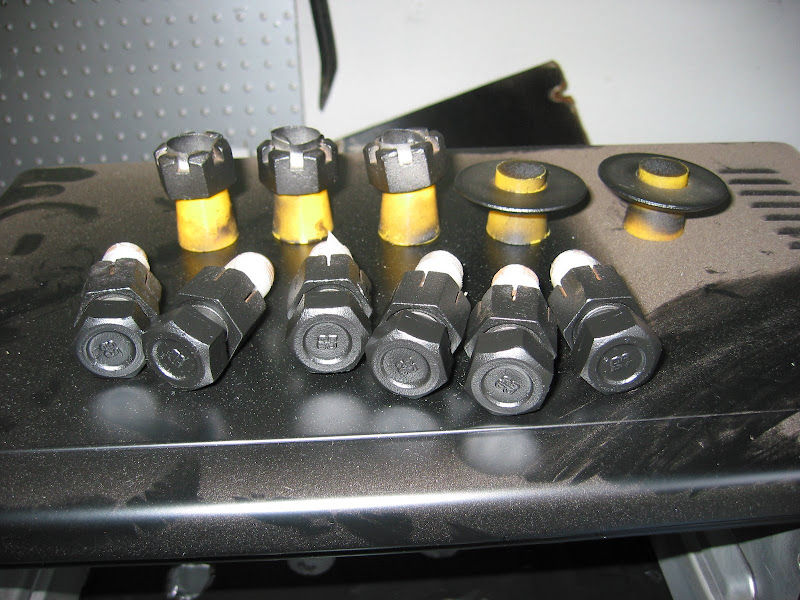
                        Prepped and powder coated a few frame parts including the upper shock mounts and radiator support.


                        The powder coating seems to be every bit as tough as the stories say. Dropped one of the bolts on the floor of the garage and not a scratch or chip.

                        Comment


                        • #57
                          Lookin' good Desoto. Did you do your own powder coating on these parts?

                          Comment


                          • #58
                            Transfer case rebuild

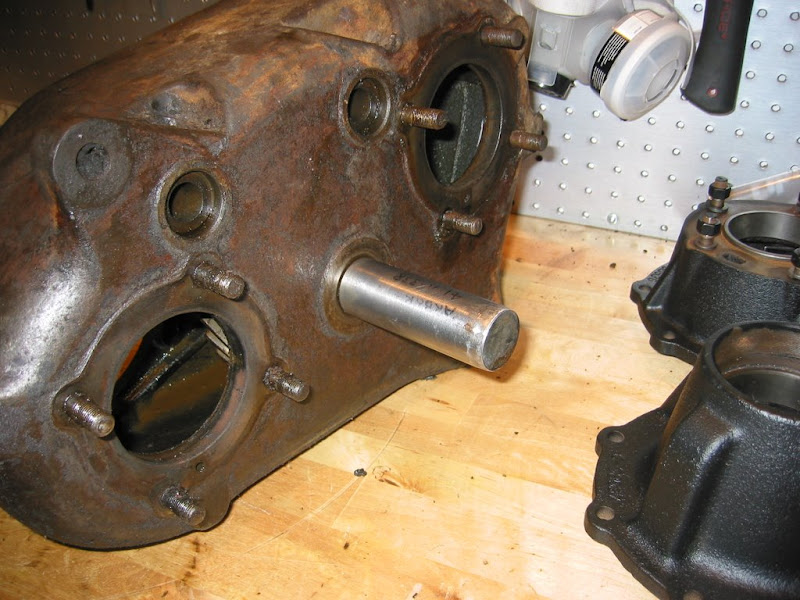
                            Started tearing down the transfer case. Two of the drive yokes came off without even a wrench. Guess that's why they use the cotter pins.


                            The front shaft yoke however put up quite the fight. I had to go purchase the right socket, but then the socket didn't want to fit in between the arms of the yoke. It was out by just a fraction so I used the Dremel and deepened the trough in either arm so the socket would fit.


                            The impact gun make quick work of it then. I've been following the sequence in the manual but it leaves a little to be desired on clarity so lots of pictures are being taken too.


                            I'll finish tearing down and make sure I don't need any other parts for the rebuild then start collecting the necessary replacements.

                            Comment


                            • #59
                              Originally posted by JReed View Post
                              Lookin' good Desoto. Did you do your own powder coating on these parts?
                              Thanks, long way to go but these little jobs keep you excited.

                              Yes, I bought one of the Eastwood kits a while back when they were on sale. I did the big parts in an electric oven I got for free, and the little stuff in a small toaster oven I got cheap.

                              It works well, though some of the "upgrade" pieces don't fit like they should, but I like the results. Hardest part is figuring out the right way to prep and rack them so you get good results.

                              Comment


                              • #60
                                Transfer case Pt 2

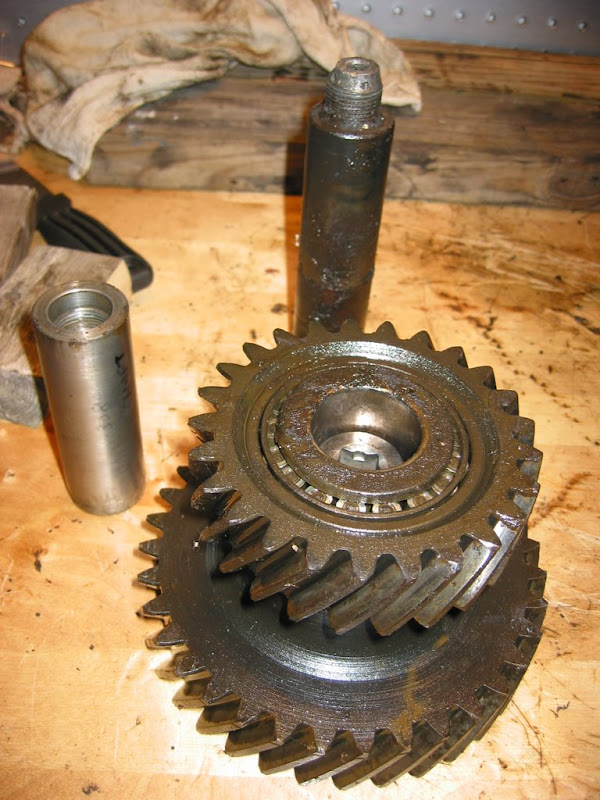
                                Managed to borrow a tool for removing the idler shaft but it ended up being .01 in too big to fit through the case opening.


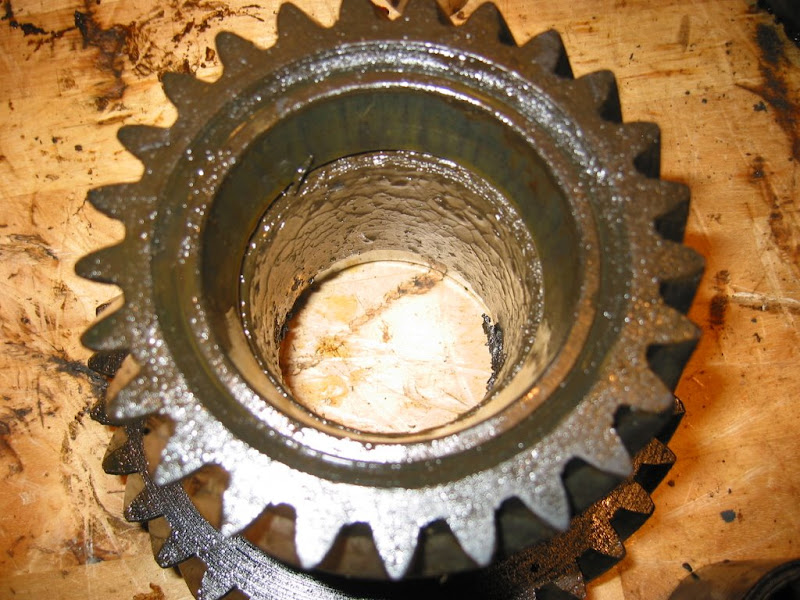
                                I ended up using a socket to perform the same function. You can see the end down inside the gear.


                                The lubrication holes in the shaft had clogged at some point in time. There was a large amount of fossilized lubricant inside the gear assembly.


                                I cleaned everything up and removed all the solidified lubricant. Now I need to work on removing all the bearings and races from the various parts.

                                The removal tool is the same size as the shaft so it should work but it will be a really tight fit through the case. There may be a lip on the case holding it up, or I may use the tool as a template to have one made 0.01 inch smaller, but it should make re-assembly much easier.

                                I think I can get the spacer tool made too now that I've had a chance to look at the assembly and understand it's purpose better.

                                Comment

                                Working...
                                X