-
How do you plan on wiring up the dual batteries? I considered it for the PW, and should have room in the battery box should I decide to do so, but it wasn't a priority for now. -
How do you plan on wiring up the dual batteries? I considered it for the PW, and should have room in the battery box should I decide to do so, but it wasn't a priority for now.Leave a comment:
-
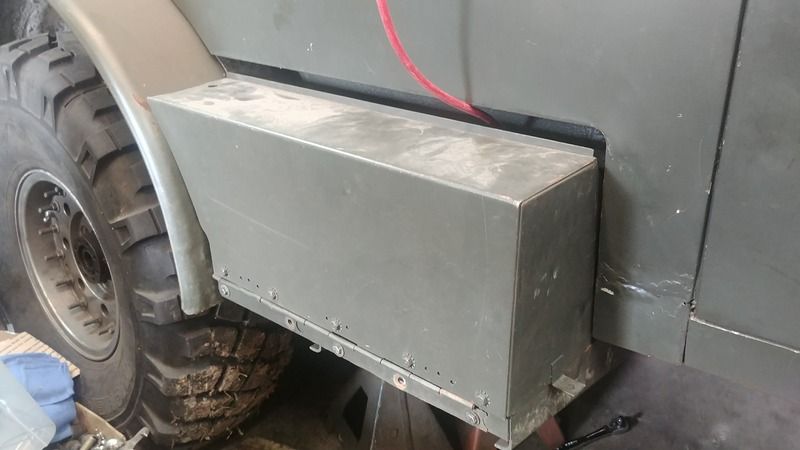
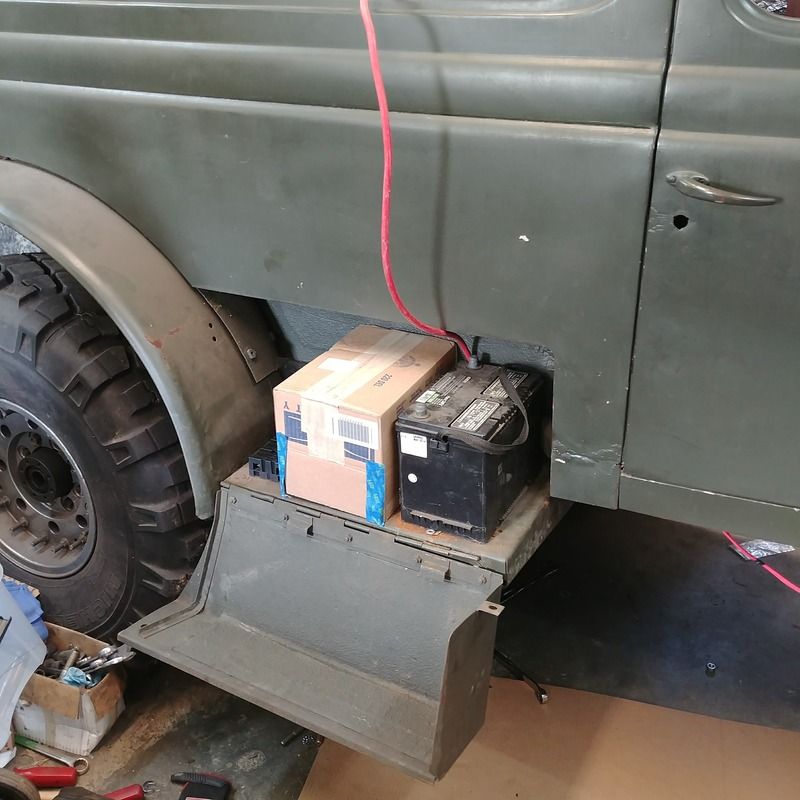
Mounted my battery box back in place so I can start building my battery trays, Mega Fuse panel, and I am mounting my 12V air compressor and rear suspension pressure valves in here. I figure I can have an air compressor connection on the top of the box where the gap is.
Have any of the other Carryall builders closed this gap with anything?
Leave a comment:
-
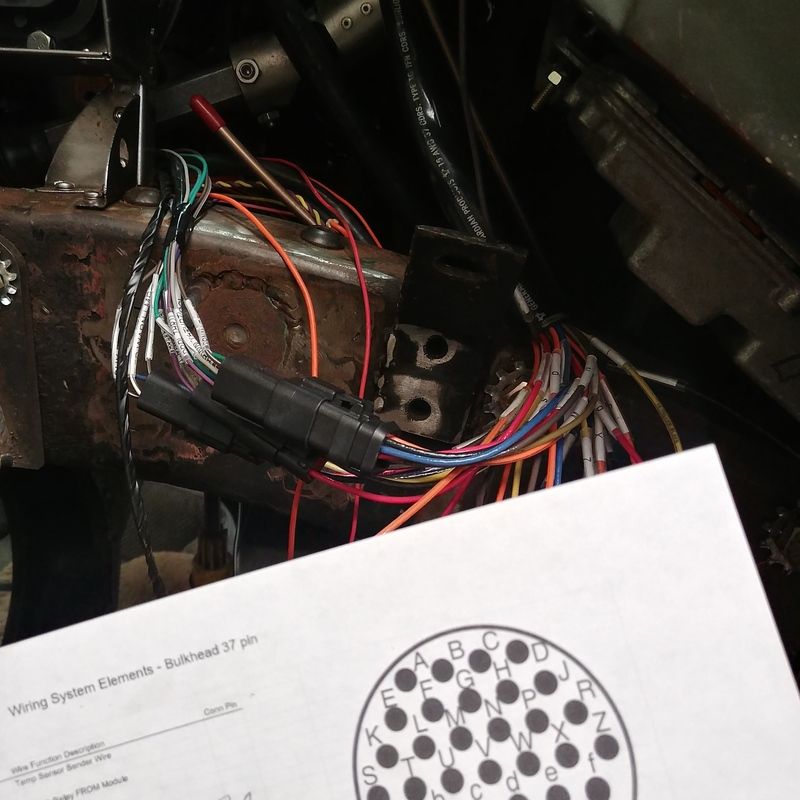
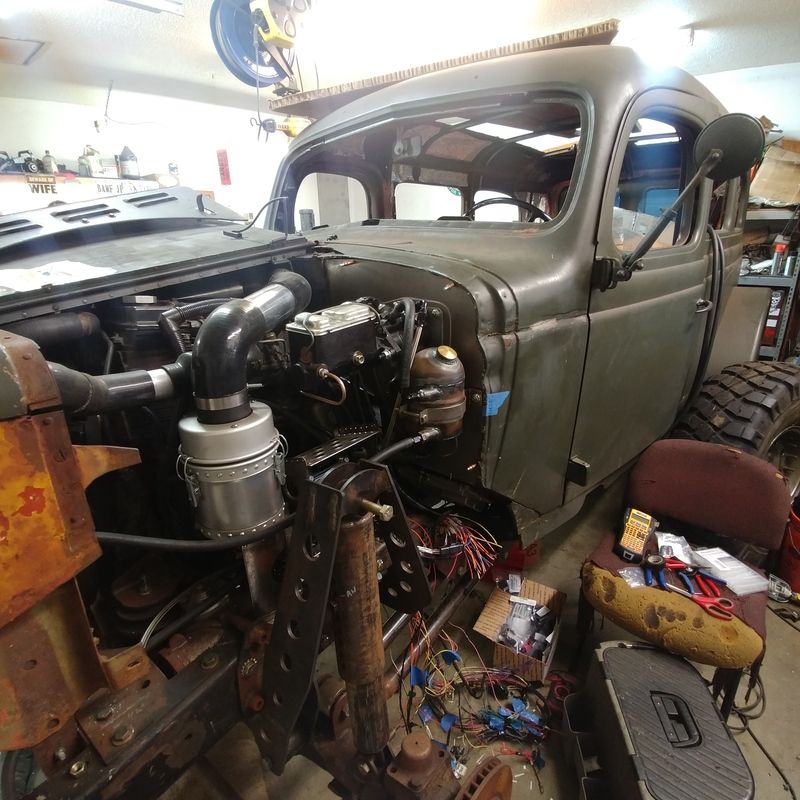
Pulling wires lately. Gonna get this thing to fire up soon. Not near ready to move it but I do want to hear the engine run and see the transmission spin.
Leave a comment:
-
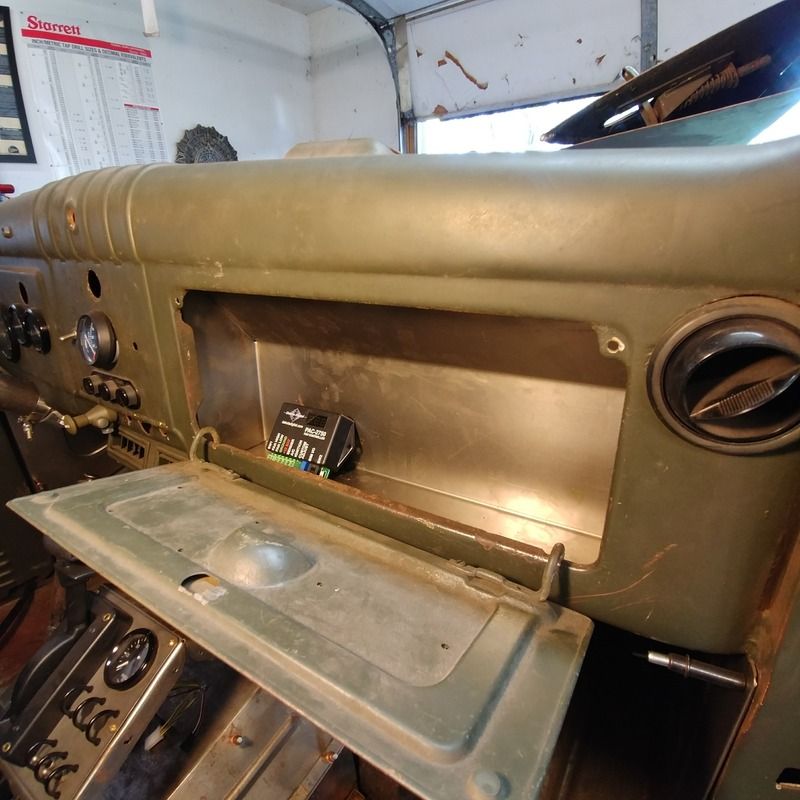
So my Cummins ECM doesn't have the fan temp control system, even though the build sheet says it does... weird. So, that means I am installing a stand alone controller. Went with the Dakota Digital that I can program my on/off points using the temp gauge sender as a source. Pretty slick little unit; however it has zero weather resistance and I didn't want to stand on my head to make the adjustments so I went ahead and bent up a glove box and installed the control unit there.
Leave a comment:
-
Originally posted by Matthew Welcher PWA View PostThanks guys!Originally posted by gyman98 View Post
So finally got some time to work on this truck again. Creeping along. 50 minutes of planning for every 10 minutes of work.
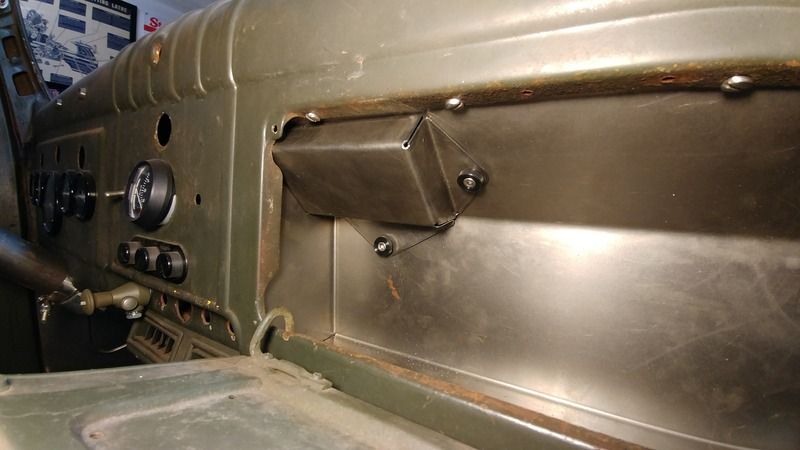
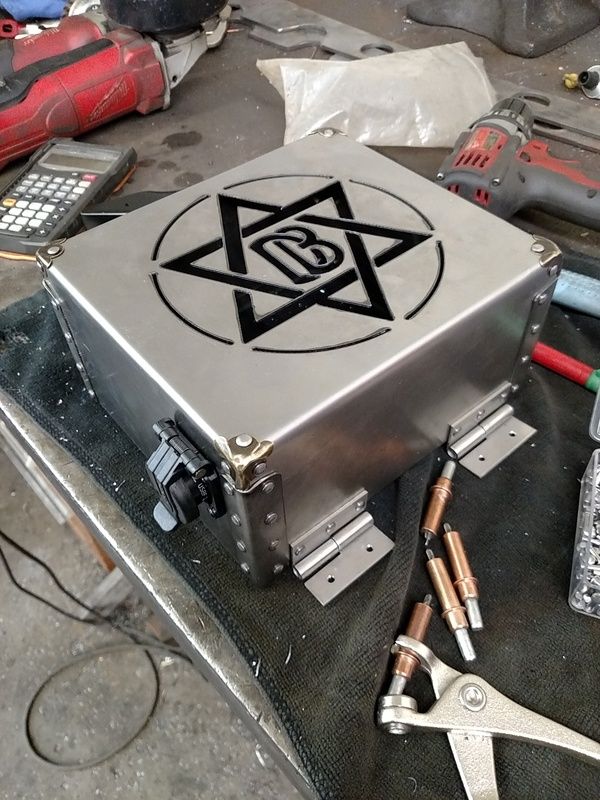
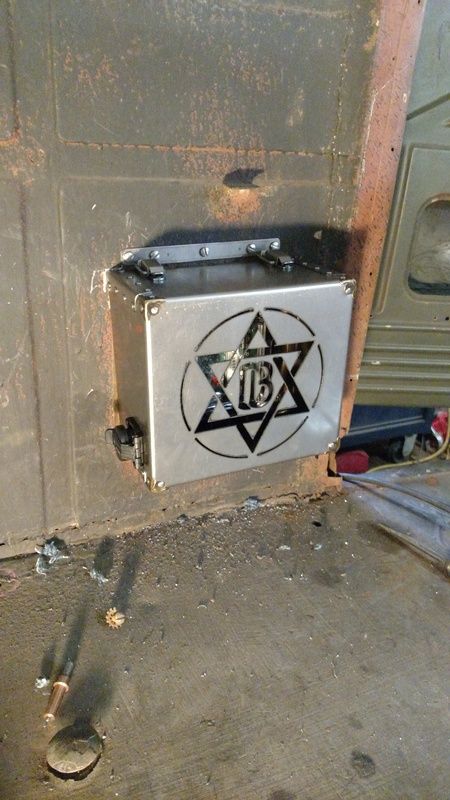
Yes, that is a flip cap Dust resistant USB port on the back of the box. It was the most retro modern way I could think of to hide a USB port in the box cover so that something could be charged in the back seat and also can be used to adjust different features in the CANbus system. The box cover opens but all of the wiring will be covering that access panel so this is just as easy. The corner guards are just little Jewelry box corners from Restoration Hardware. So yea, Restoration Hardware, Bed, Bath, and Beyond.. now all I need is some Yankee Candle and maybe William Sonoma and this truck will be the true definition of a "Mall Crawler".
Leave a comment:
-
I have to say that is one of the neatest things i have ever seen. Wow thanks for doing what you do and keep up the fantastic hard work!Leave a comment:
-
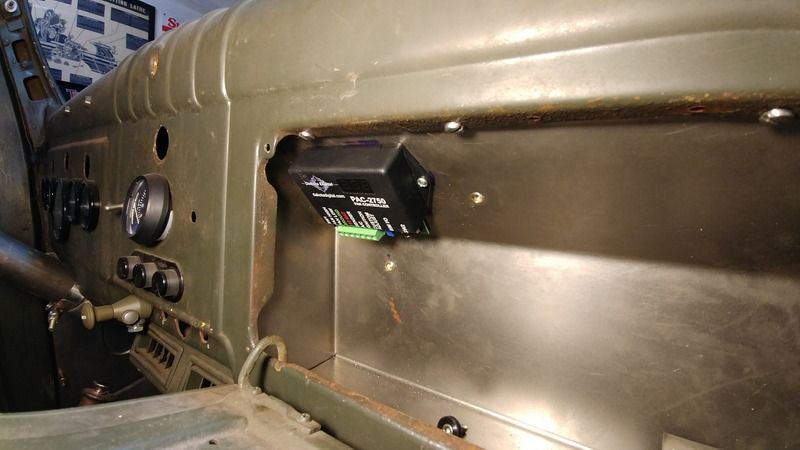
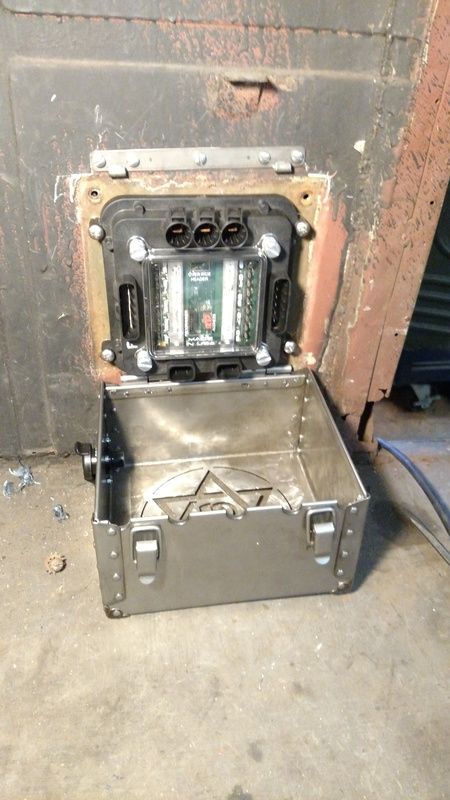
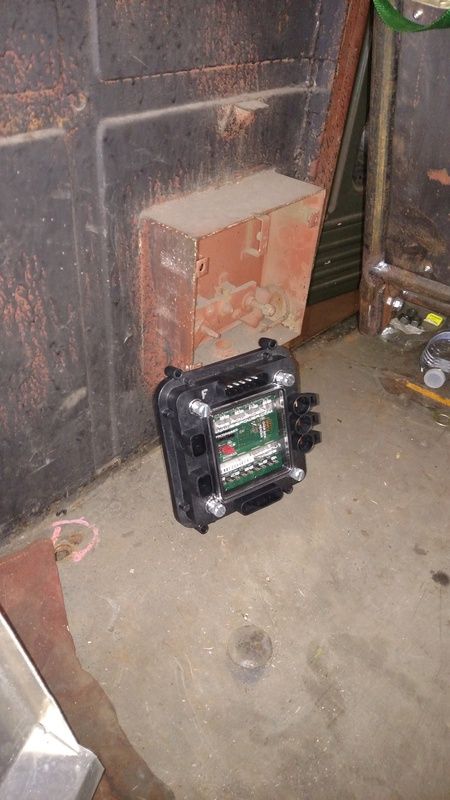
Tinkered with it some more. As ya'll know, I am going with the CANbus wiring system. Well there is a rear chassis relay module that needs to be hidden.
So here is my resulting execution... well thus far.
So this...
Will be replaced with this...

The box isn't finished yet (needs rivets of course) and some corner guards are on order from Restoration Hardware.Leave a comment:
-
It looks close, really close. Keep pushing through and looking forward to the first long cruise!Leave a comment:
-
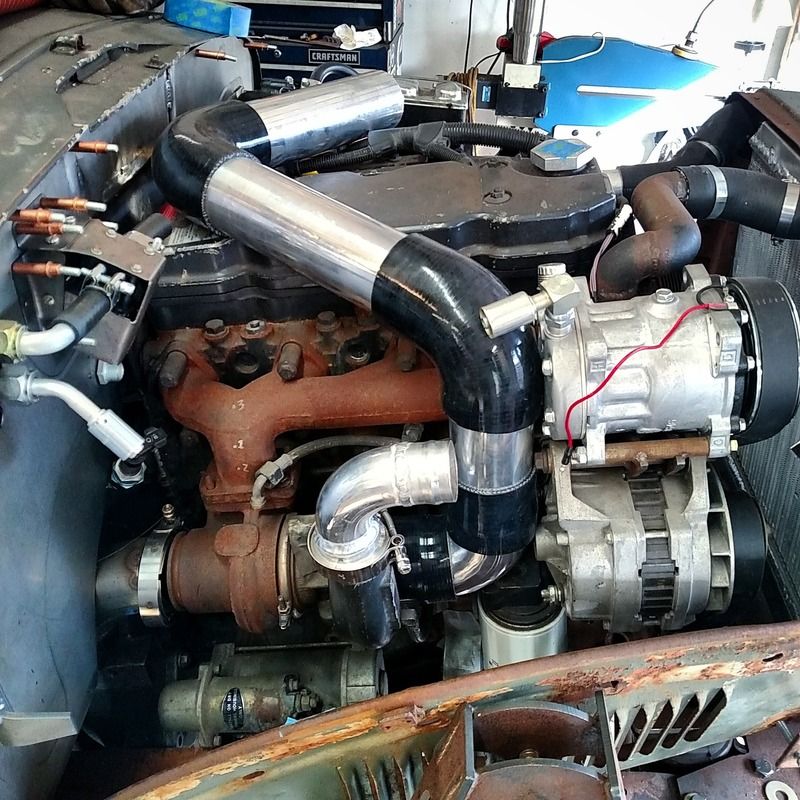
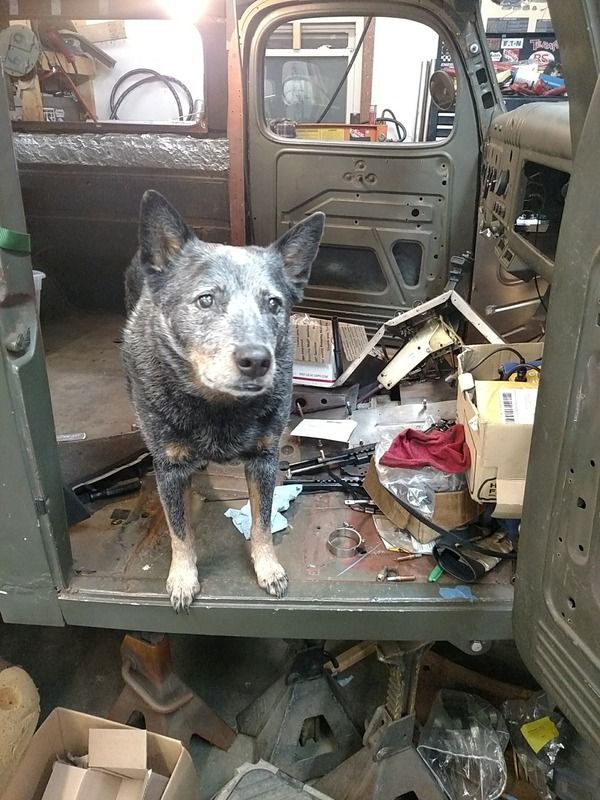
10 lbs of stuff in a 5 lb box. This 3" diameter intake stuff takes up a lot of space. All for the sake of getting cooler air to the engine. I'll wrap it all up for final assembly to help insulate it against ambient engine heat and feed as much cool atmosphere into the turbo as possible. I'm also going to have the manifold ceramic coated and put a blanket on the hot side of the turbo and wrap the down pipe to keep as much heat away from the passenger's floor as possible.
The dog thinks he is helping. He wants it done so he can go for a ride too!
Leave a comment:
-
Yea, I've been using their stuff as much as possibly but I have to sneak my intercooler tubing between the AC compressor and side of the hood and its a very very very tight fit.Originally posted by penski61 View Post
Unfortunately, what I thought I had given myself enough room for, I didn't fully take into account the overall size of these 3" silicone couplers and where they force the can to be located for the sake of hood clearance. I don't care for the proximity of the air cleaner box to the hot side of the turbo. The whole point was to pull cooler outside air for the engine and this is nothing but a burrito oven if I mount it here. I guess I'll move it to the other side above the powersteering box and the AC dryer and possibly a wiper fluid res can mount back in here. I already have to cut the drivers side inner fender up since it had a battery box bump in it that interferes with my strut tower so I can go ahead and create the opening and intake box for the air cleaner there too. Not going to be too exciting in here in the nearish future but I'm hoping I can slowly get back to normal stuff and really cover some ground here again.
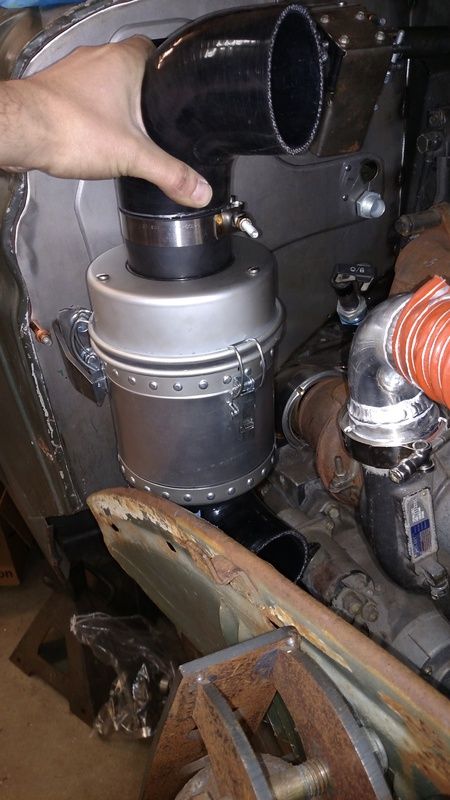
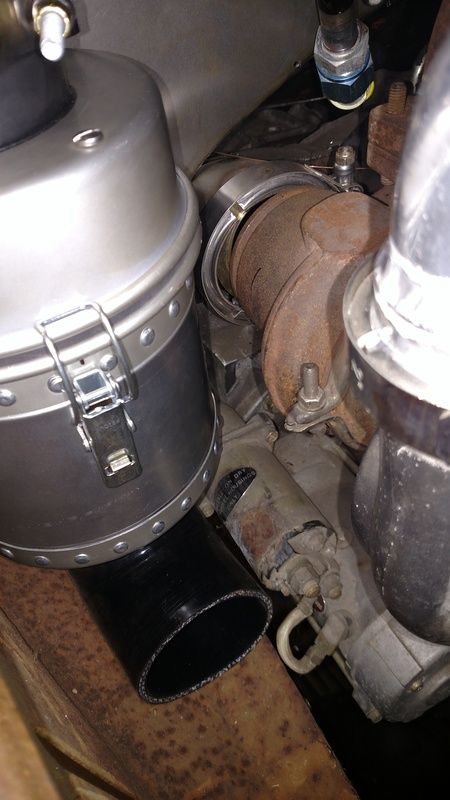
Even with a heat shield this is too close for my liking and blocks a lot of heat into a compact area.
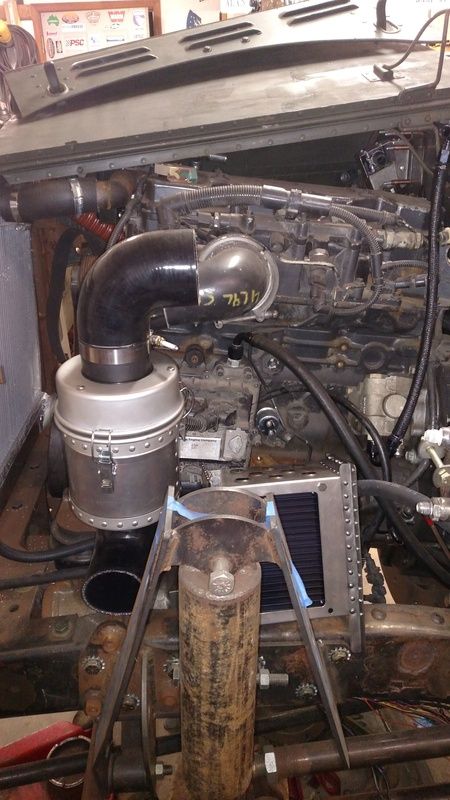
There should be enough room to run a jumper tube across the top of the valve cover and over to the turbo inlet. I had ordered some 3" SCEET tube to use for a flexible routing intake tube, but I guess I can use it elsewhere or hold onto it for whatever for now.. Brake vents.. ha ha.
The square box there is the front harness relay center that powers all the headlights, front turn, horn, ignition, etc. The main Cummins ECM and the Allison TCM are all located rather central to this as well. Lots of stuff to fit but hoping I can still make it all work.Leave a comment:
-
i used aluminum bends and rubber silicone fittings from vibrant performance on the 65 town wagon with 12v

Leave a comment:
-
Well, after nearly 3 months, I am back to working on this thing again. Many thanks for the motivating conversations with other members to get a fire lit under me so that I can get something accomplished.
No pictures for this update, but I did get some more components ordered for the intake system, and actually did a bit of mockup and some aluminum welding on my charge tubes from the turbo to the intercooler.
Does anyone see any major issues in using SCEET aircraft tubing for the charge air tube where I have all kinds of crazy routing problems? The material is not suggested for use in aircraft on the intake system for the sake of "If" the material delaminates it can cause an engine failure in flight. In my case it could possibly cause clogging of the intercooler and thats about it. Plus, it is going to be on the clean air side of the engine. I am not using regular SCAT but the double lined stuff.Leave a comment:
-
Nice work Alex. Definitely doesn't look like a set of cake pans anymore.
I'm hoping to bring the 6x6 out to Iowa next year, finished or not. I'll probably trailer it there either way, since top speed will be 45 mph.Leave a comment:
- If this is your first visit, be sure to check out the FAQ by clicking the link above. You may have to register before you can post: click the register link above to proceed. To start viewing messages, select the forum that you want to visit from the selection below.
- Power Wagon T-Shirts are now available for purchase on-line through the Store. They are only $15.00 each plus shipping. Shirts are available in sizes from Small thru 4X and are Sand in color. Design/Logo is printed on the back of the shirts and the front is free of any designs.
Leave a comment: