If this is your first visit, be sure to
check out the FAQ by clicking the
link above. You may have to register
before you can post: click the register link above to proceed. To start viewing messages,
select the forum that you want to visit from the selection below.
Power Wagon T-Shirts are now available for purchase on-line through the Store.
They are only $15.00 each plus shipping.
Shirts are available in sizes from Small thru 4X and are Sand in color.
Design/Logo is printed on the back of the shirts and the front is free of any designs.
Meeting up with Wayneh in the morning to finish up the transfer case, I'll post lots of pics after it's done. In the meantime, I worked a little bit on the rear springs and hardware:
Started with the bolts that attach the springs to the frame. A little wire wheel to start, you can clearly see the difference.
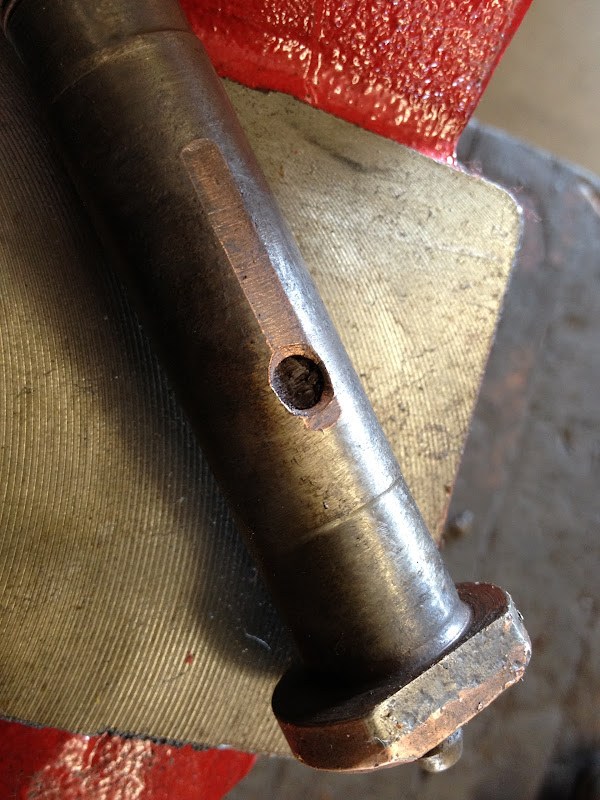
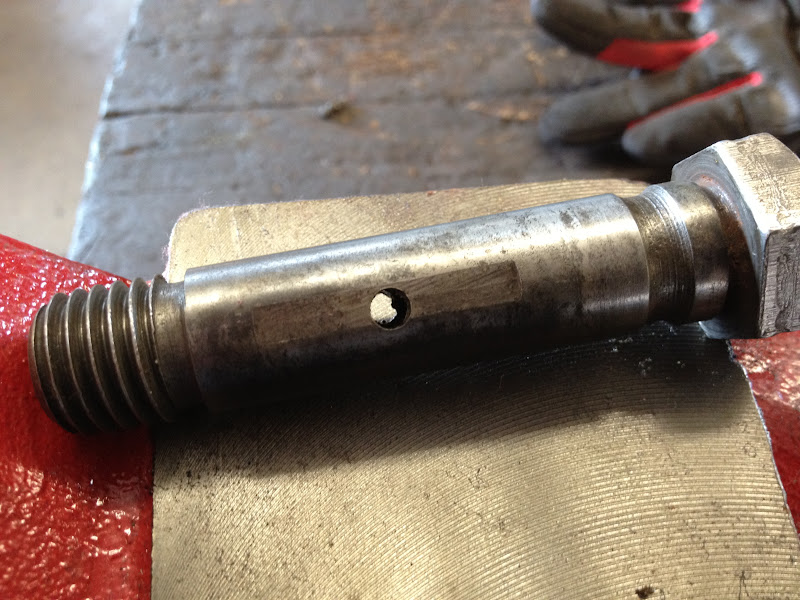
The next step was to take the zerk fittings off and clear out the grease channel. It was pretty well gunked up.
Make sure you examine all the shafts carefully. I had sludge similar to what you're seeing in mine. Actually had to chip it out of some places it was so caked on. But I also ended up having some oiling holes plugged with the stuff. Almost didn't realize it at first. On closer inspection I thought it was a pit or defect, but the passage was clogged solid with debris.
Indeed they are. Maybe I should have ordered two sets?
No worries! I'm too lazy to drop a working transfer case. But, your idler shaft for the idler gear has some wear on it. I don't think it would make any difference since it is where the spacer sits. On the VPW web it is part 57 for the two speed transfer case. Part 55, the spacer that rides on it made some grooves in it. I don't think that it really matters though, the bearings don't ride on it at all.
Right, need to get them ordered this week. On it. Any thoughts on the Glyptol?
If the coating inside the transfer case is OK and you don't blast it off then I'd leave it. All you want to do is seal any porous areas of the case so nothing can seep through.
Jared: I liked the stainless shift rails Charles made up for you I almost pulled my NP200 last night to drop them in. They are without a doubt a work of art. Nice job Charles!
Indeed they are. Maybe I should have ordered two sets?
Jared: I liked the stainless shift rails Charles made up for you I almost pulled my NP200 last night to drop them in. They are without a doubt a work of art. Nice job Charles!
Jared: I have extra seals from Rockauto if we need them. They were on closeout for less than two bucks each so I bought a few.
But, we're at a standstill without the shift rails. We ought to postpone a week if they don't show up tomorrow. I'm out of town next week, but be back Friday.
Wayne
I called Charles yesterday and he said he mailed them. I'll call you either way this afternoon to figure it out. Fingers crossed.
Jared: I have extra seals from Rockauto if we need them. They were on closeout for less than two bucks each so I bought a few.
But, we're at a standstill without the shift rails. We ought to postpone a week if they don't show up tomorrow. I'm out of town next week, but be back Friday.
a few years ago I ordered new seals from vpw and they sent factory garlock leather seals, I don't know if they are still selling them but they will leak like crazy. they're easy to spot, much thicker than a normal seal and they have a layer of what looks kind of like felt or fine scotchbrite. I'd call them up and ask to be on the safe side. If you get a vernier caliper and measure the id and od of what you need, any good bearing supply house can get you modern neoprene seals. In some cases you can get a double lip seal, does a better job. I'm running castroll synthetic cd50 in my trans and transfer, the truck shifts much better, espescially in cold weather. I would've used royal purple fut a diesel mechanic buddy of mine donated a 5 gal pail of castroll.
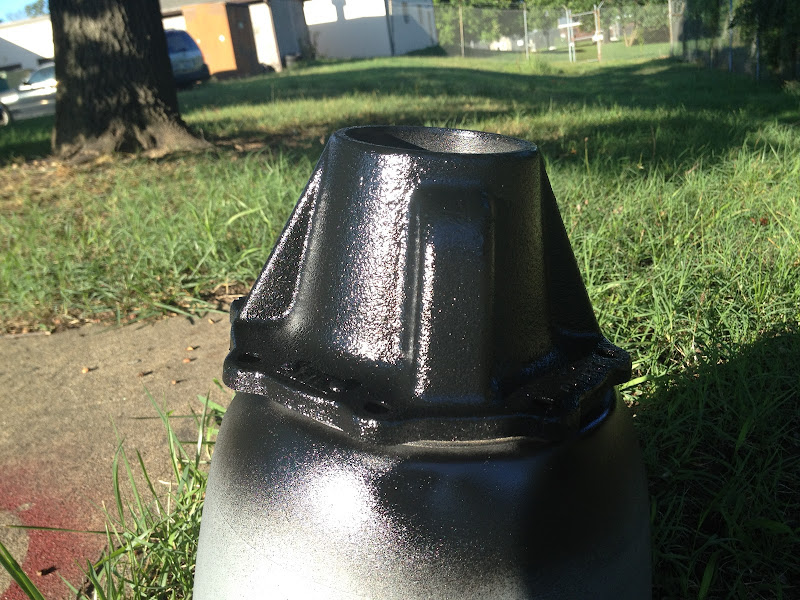
Inching forward slowly. Made a bit more progress today on the transfer case. Everything is painted and ready to go!
All the parts I need are in, minus the stainless steel shift rails. Charles, did you get my check? Wayneh and I are meeting up on Saturday if it comes in to do the install together. More pics to come.
Let me know when you are ready. Once you have done all the hard work putting it back together is easy! I'd like to hear some things that others have learned, but my tips are:
1) use sealant on the outside of every seal before you install it.
2) Use thread sealer on every hole in the casing.
3) As others have said, use sealant on the spines of the yokes.
4) The paper gaskets need gasket sealer too. Aviation gasket maker did not work well for me, but I have some permatex stuff that seems to work.
I also took Charles advice and used Royal Purple in the transfer case and transmission. I have not done and scientific measurements or tests, but it seems to work fine. (but it will leave purple drips on the floor if we don't do it right....)
I think this photo best shows the fruits of my labors.
Unfortunately it started to rain, so I didn't get to paint today. It's OK, lets the primer dry longer. I ordered the rest of the parts I need for the rebuild, including Redi-Sleeves, shims, grease, mechanics wire, etc. Also hit up Charles Talbert for two of the stainless steel shift rails, and I already have the rebuild kit from Vintage Power Wagon. Hopefully by the time all that comes in, I will be ready to try and figure out how this thing goes back together.
In case you guys haven't seen this post, check it out http://blog.gieselman.com/post/NP200...e-Rebuild.aspx
I have been getting A TON of useful info from this guys rebuild. Really well documented with part numbers and what not. Good stuff, I would check it if you are doing a restore.
While waiting for the primer to dry, I went inside to the ye old wire wheel and spent some time cleaning up my hardware. Sure I could buy new bolts, but then they wouldn't be original. I'll probably have to replace a few here and there, but trying my best to reuse where I can.
Before
After
It's hard to keep the thing from grabbing your bolt and shooting it out the back like a rocket! Luckily I recovered everything.
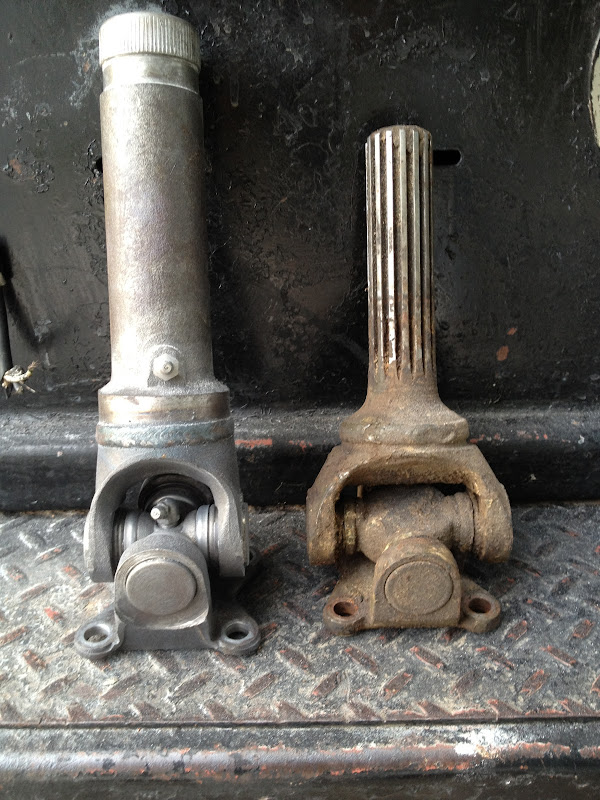
While I had the soda-blaster going, I wanted to use up the rest of the media I had, so grabbed these drive shafts. The thing really is quite remarkable! As you can see, it really does a nice job. The one on the left is about 5 minutes of blasting. The one on the right, well, needs about 5 minutes of blasting.





Leave a comment: