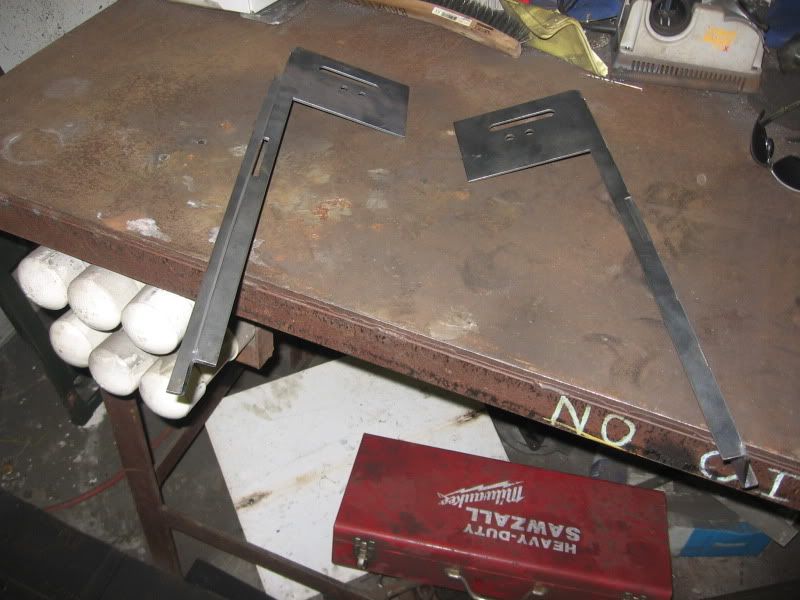
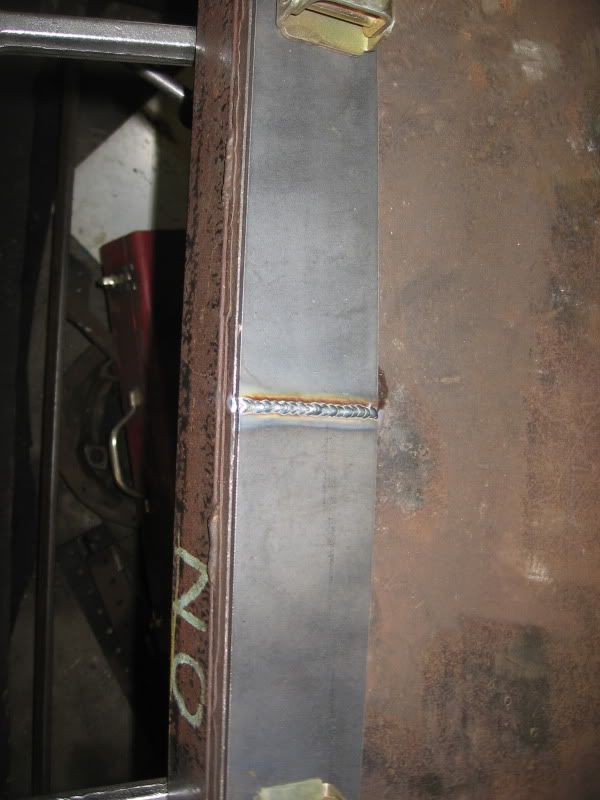
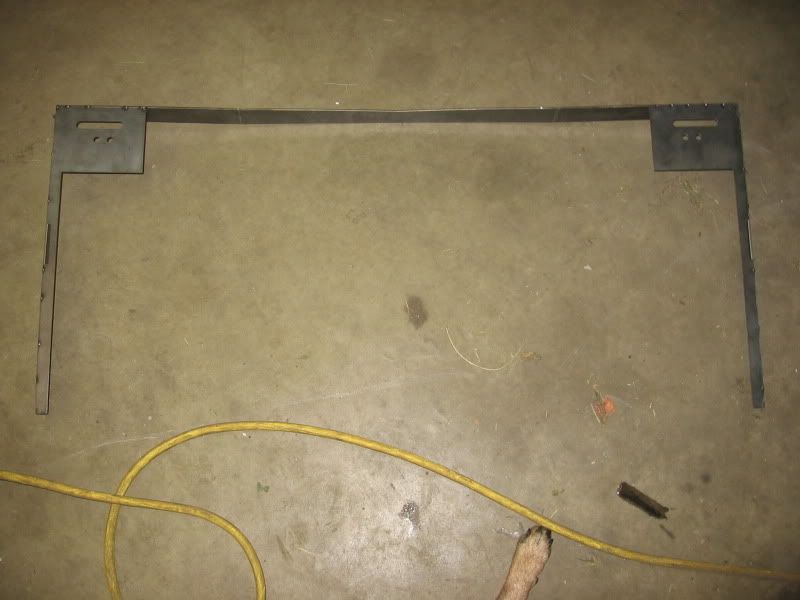
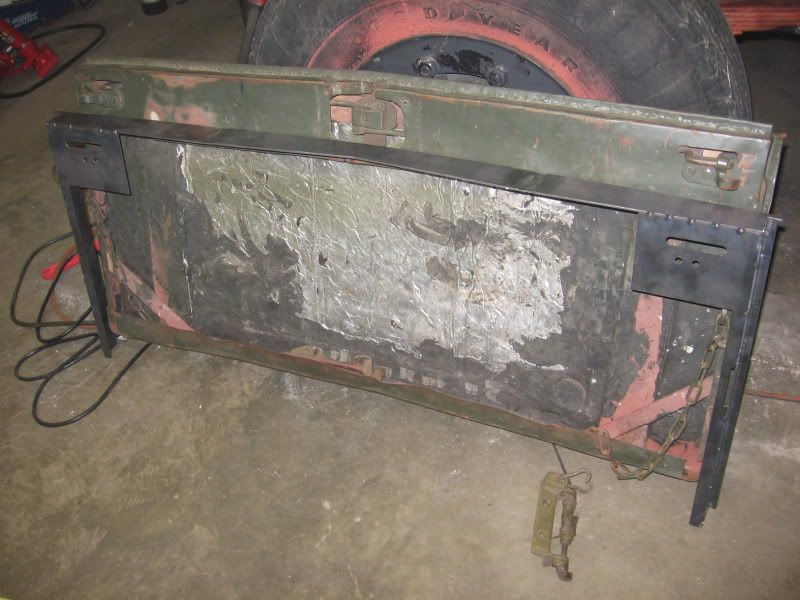
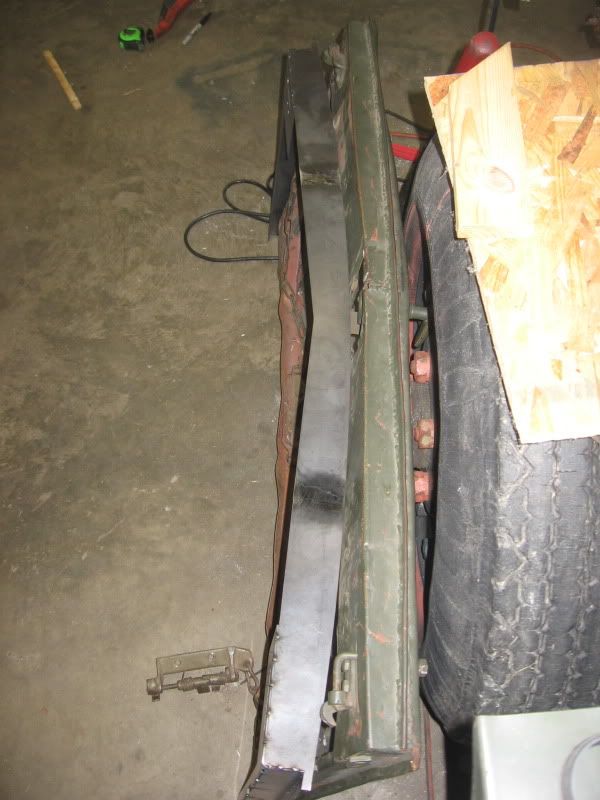
Announcement

Collapse
No announcement yet.

The WC53 Carryall thread .

Collapse
X
 
  • Filter
  • Time
  • Show
Clear All
new posts

  • Patch panels

    I used 16 gauge for the body panels. Some 14 and 12 gauge on other pieces. I did make a very small repair section out of 18 gauge, but after welding on the thicker stuff, I like the 16 gauge a lot better.

    James

    Comment


    • well, I've been messing with my tailgate and messing with it and can't for the life of me figure out what the deal is with it. I have the truck stretched back out decent and the gate openings are square top to bottom with each other and at a clean 46" too. And I also keep finding other nice well rounded numbers when measuring, or very close to them, which makes me feel like I am getting it close to where it should be. Then, of facebook, a friend of the previous owner tagged him in a photo, so I stole it and then noticed that the gate had the same shape that I've got it back to but previous to the accident. That being the case, I think I am just going to rebuild an entire one from scratch. All of it is doable, save for the stretching of the sheetmetal. I have heard that its a "compound curve" sheet... That being the case, is there a trick or is it the old "english wheel" and where it out until its right?

      I have these two pictures to show the differences I have come across. Notice the top of the gate in the picture doesn't seam right with the radius of the upper window hatch. I have managed to figure out that radius and lay it out but the lower portion of the gate AND the truck is mangled enough I can't tell if its the same radius, or as I fear, broader and longer, thus creating the weird stretch at the bottom. Anyone on here stretched a sheet to rework the gate?

      How the top of the gate looks stock...


      And notice the top in this picture here. The sheet of steel that is currently on the gate is too narrow to stretch back out to the curved shape. Glad I found the picture because I was getting worried by pushing on it with nothing really happening other than the get getting way too narrow for the opening.


      1942 WC53 Carryall in progress.

      Comment


      • Curve

        It's actually a reverse curve, and yes you will need a wheel, and most likely a shrinker/streacher. The hard part is getting the upper radius while keeping the shape of the skin. With out a proper pattern to start with, your going to have a little challenge. I would start with a foam pattern, and carve your pattern of your curves into the foam. After it looks correct, with some sanding, and a shop vacuum (to clean up your mess) then you will have your pattern. Get some 18 or 19 gauge sheet metal, and have at it. If you haven't done any wheeling before, just remember, small gaps between the lines, and start with LOW pressure. Remember you will need to shrink that upper radius in order to keep the shape. You may want to practice on a smaller version, then increase in size after your happy.
        Also after you buy a wheel, and the other tools, it may have been cheaper to buy a new gate from MWM.
        Good luck.

        James

        Comment


        • Upper radius

          I made a buck out of high density ranger board . Routered the radius in . Simple case of clamping in the sheet and beating the tin over the radius . That compound curve at the bottom will be a challenge .
          It may be an optical illusion but the upper and lower tailgate in the top photo look too flat .

          Bruce

          rebuilding the weird rear hatch lock mechanism and I just pulled the top rear hatch from my dip tank . Came out super clean and I can see all the original hand work that was done to form the inner and outer skin .

          Comment


          • Again, thanks for the awesome ideas guys on how to get that rear skin warped to the shape that I need to get the new gate covered properly.

            Since the guts of my gate were a bit banged up, and all of the sound deadening material was making it hard to work on, I started to build my own gate.

            Started out by making the sides and by making a top frame piece. This way I have a defined radius and shape I can build to. I just took the shape from the bottom of the upper gate and kinda changed it a little to fit the shape of my gate opening and used the old gate as somewhat of a reference. Obviously the way I am doing it is not original, but I think its going to end up with a stronger gate with an easier platform for me to build from.

            Cut and bent some side rails. Cut the openings for the original gate hardware to fit.


            Used my brand new spool gun and some .023" wire. I had never welded with a spool gun nor welded with that thin of wire gauge.


            I didn't have the ability to cut my top cap out of one solid piece so I broke it into 3 smaller pieces and then re-welded them together with my work bench and some clamps as a straight edge.

            1942 WC53 Carryall in progress.

            Comment


            • So then I tack welded my side plates to my new top plate and test fit it against the gate opening for the truck and then against the old gate I have. The new frame is about 1/2" wider overall than the original/ modified gate that was on the truck. That being the case I am going to have to make some adjustments while finishing out the gate and also while rebuilding the lower portion of the rear floor area.

              Here are some pictures. Everything is from 1/8th inch thick steel.


              1942 WC53 Carryall in progress.

              Comment


              • Tail gate

                Nice welds , looks like you used hot rolled , stripping the black scale off is problematic . It takes too long . I now use cold rolled when ever possible .
                So why is your new frame 1/2 an inch wider ? What does it look like when it is in the rear door frame ?
                Sure wish I could post pictures of mine .
                As an aside I am back working on my carryall too .
                Bruce

                Comment


                • This is really an incredible thread!
                  Power Wagon Advertiser monthly magazine, editor & publisher.


                  Why is it that the inside of old truck cabs smell so good?

                  Comment


                  • Originally posted by Bruce in BC View Post
                    Nice welds , looks like you used hot rolled , stripping the black scale off is problematic . It takes too long . I now use cold rolled when ever possible .
                    So why is your new frame 1/2 an inch wider ? What does it look like when it is in the rear door frame ?
                    Sure wish I could post pictures of mine .
                    As an aside I am back working on my carryall too .
                    Bruce
                    Yea, the hot rolled is all I had at the moment. I need to pick up some cold roll for a few more pieces that I need to cut.

                    Its 1/2" wider because I couldn't get that last 1/2" back out of the old gate from it being cut and "repaired" a few times.

                    It fits the gate frame pretty well. I held it up there and fit it in and it looks good. I am going to get the bottom portion cut and assembled and then get some more pictures. I am hoping to spend a few more hours on it on the 4th since I have off.
                    1942 WC53 Carryall in progress.

                    Comment


                    • Just A Thought

                      Originally posted by Bruce in BC View Post
                      Nice welds , looks like you used hot rolled , stripping the black scale off is problematic . It takes too long . I now use cold rolled when ever possible .
                      So why is your new frame 1/2 an inch wider ? What does it look like when it is in the rear door frame ?
                      Sure wish I could post pictures of mine .
                      As an aside I am back working on my carryall too .
                      Bruce
                      Bruce, Send your pictures to Gordon or myself even, we would like to see your progress!

                      Comment


                      • Stripping hot rolled mill scale

                        Took a sheet of 6 mil poly and used it as a liner between some fire wood logs .
                        Then I filled the depression with 45 - 60 gallons of water and added about 1/2 a gallon of pool cleaner . This is hydrochloric acid . Dropped in the bumper over night , pulled it out this morning , rinsed the bumper , steel wooled the bumper and then dropped it in the anti rust tank . I took this step because the mixture will help neutralize any hydrochloric acid remaining on the part . The next step will be to pull the part and wipe it down with a mild solution of phosphoric acid . Hopefully I will have a few parts ready for painting next week . Trying to get a small batch together .
                        Do not use this process with springs , suspension or steering parts . It is possible to create hydrogen embrittlement .
                        The reason for removing the mill scale is that it will rust , even under the paint.
                        .
                        back to the shop

                        Bruce

                        edit I also took the upper tail gate out of the anti rust bath yesterday . This morning I taped up all the holes except for two . I then poured in 1/2 a quart of paint that I had laying around . I sloshed the mixture around by flipping the upper gate end over end and from side to side . The paint used was some kind of tank primer and top coat . It should be better than nothing .

                        Comment


                        • What is in your anti-rust tank?

                          Comment


                          • Anti rust tank

                            there is an outline of the process with pictures upstream on this thread .
                            All you need is a plastic tank , I have used a fibre glass bath tub and have one made with scrap wood and 6 mil poly . In this place a piece of sacrificial metal with a piece of strap coming out . Then add the piece you want stripped of rust and paint . Add washing soda to the water . Hook up a battery charger to the two pieces .
                            NEG - goes to the part you want stripped .
                            POS - goes to the sacrificial anode .

                            Small parts can be done in a 5 gallon pail . Fragile parts come out without damage . Bezels , mirror backs , window locks and cranks really come clean .
                            Done all my doors and fenders this way . Only part not done is the body .

                            Bruce
                            try page 48
                            http://www.powerwagonadvertiser.com/...t=5521&page=48

                            Comment


                            • Just how many people have been killed because of cheap inports like steel ?

                              I made my bumper out of 3/16th hot rolled steel . The steel was imported from the east , I thought little about it until today . I dipped the bumper in acid to strip the mill scale , this was followed by a trip to another tank and then put in the shop to dry .
                              Today I was surprised at what I found . The bumper is riddled with islands of impurities . If I had ground the bumper down I would never have noticed but because I dumped the steel into the dip tank the impurities are very clear and can be seen with the naked eye . There are blobs or islands of metal that are floating in the central piece . These islands appear to be a better quality of steel than the base metal , they are smoother and less pitted than the background metal . Along the edges of these islands there is a noticeable line or gouge where the acid removed the scale . The islands are as small as 1/4 inch and others are several inches across and irregular in shape . There is other foreign material imbedded in the metal as well . This material has the colour of scale but the acid did not affect it . Many of the islands of metal are also a tiny bit higher than the base metal .
                              Of interest is none of my welds show any change along their edges . In most cases they can not be seen at all . The only thing that happens that makes them show up is the welds will rust before the base metal , otherwise they can not be seen .
                              I am not surprised that there are so many structural failures of things made from imported or false parts . If what I have seen in my bumper is any indication , there are serious problems with imported metal or parts manufactured using foreign sources for materials . Next time you are asked "do you want the cheap Chinese one or the better quality one " you may want to think twice about what could happen if the part fails .
                              This has been quite the eye opener for me . I have heard about inclusion in steel but this is the first time I have seen it and to be able to see it without X-ray or a microscope has frightening implications .

                              Bruce

                              Comment


                              • A good days work and I ain't done yet

                                Pulled the motor , to do so I had to roll the truck off the hoist at least part way . I left the transmission attached which meant all sorts of small parts and members needed to be taken off and got out of the way . When lifting the motor the trans wants to smack the fire wall . The front drive way is not level , so i had visions of the truck rolling out the door and traveling at speed across the road and into the billionaires lot across the street . So I blocked up the truck and made provisions to get it back in . I drilled a hole in the shop floor and installed a 5/8 thread plug . This gets an eye bolt . Then I can use a come along to get the truck back in .
                                I also did some work on a door , reinstalled the window guides I removed earlier .
                                next is 2 patches on the door and a bracket to keep the engine from flopping over ....
                                then I get to winch the truck back into the shop .

                                Take care
                                Bruce

                                Comment

                                Working...
                                X