 Tweet
Tweet
Originally posted by dieseldude4bt
View Post
-
It is now part of the truck. The previous owner installed it actually. He took the truck off-road quite a bit and had problems with the rear gates coming unlatched because the rear of the truck twisted so much when he had everything twisted up crossing ruts and such. To help stiffen up the rear of the truck, he installed the tube that goes around the inside of the door frame. Its not attached to the floor or sub-frame members very well at the moment, which I have intentions to correct. However; if it wasn't for that halo being installed I believe that the rear-ending the truck recieved would have done a lot more damage than what it actually did. If you haven't read far back in this thread, I got this truck from a guy who had already done the 4bt swap etc. It was the WC53 build on 4bt swaps. Same truck.1942 WC53 Carryall in progress. -
I know the truck and history from the 4bt swaps forum. I have read this thread at least twice start to finish, sometimes i forget you guys don't know as much about my truck and 4bt conversions.Comment
-
dana 60 math & a question
Got a hp axle ... 610313 the short axle measures 16.17
Got a low pinion 610341 the short axle measures 15.97
The hp front long axle measures in at ................ 36.97
The lp front long axle measures in at ................ 35.20
The low pinion is totally built but the drive shaft angle is at about maximum
The high pinion is just the housing and bearing caps .......
So I could put all the guts from the low pinion in the high pinion except for new gears . . 20 would have to come off the short side axle tube and .77 off the long tube side . Most likely the "Cs" from the low pinion would end up on the high pinion thus creating a stronger highbred axle .
How much higher is the Dana 60 HP axle over the LP dana 60 ?
Cost wise it may pay for me to build the hp axle and pay for the gears - a high angle drive shaft would run around 650 - 1000 bucks .
Not sure which way I will go but I am crunching some numbers and looking at the time factor here .
Bruce
edit - the HP is 2.25 higher than the low pinion .
running a low pinion in the front reduces the strength by about 15 % as compared to when the same gears are used in the rear .Comment
-
Who was looking for a WC53 ??
Here is one
http://seattle.craigslist.org/oly/pts/3328425890.html
enjoy .
BruceComment
-
Rust
Wow, you get a little bit of Carryall with your purchase of a whole bunch of rust. If the floor is that far gone, I would hate to see the lower panels. No thanksComment
-
rusty carryalls
All these rusty carryall photo shure make me feel better about mine.
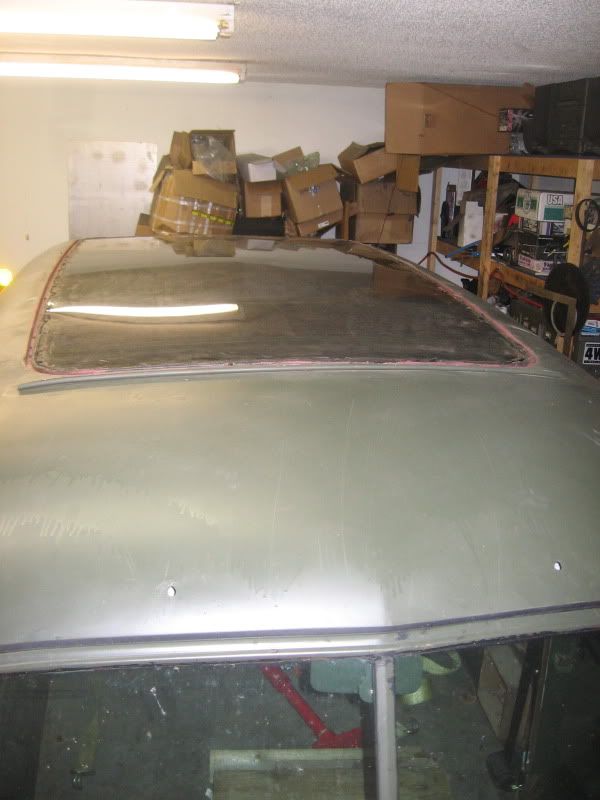
Anyway I made some progress on the roof today. It had a piece of galvanized steel that was pieced together then gas welded to the top, it had been walked on as well as warped when installed, I removed it to start over.


Comment
-
So how did you do it ?
I would have chopped it off with a zip blade about 1/4 away from the weld and then worked my way in . One of those panel nibblers would work even better . So what tricky way did you go about it ? Enquiring minds want to know .
Bruce
Is that your wifes can opener I see on the roof ?? You only get to do that once .Comment
-
roof repair

I then drilled all the spot welds and removed the old retainer seen in the pic.

then cleaned up sum lead filler.

So what have people done to fill the roof and what would you do differently.
I am thinking of using a panel from a mid 80's suburban, I'm just not sure whether to lap it, or cut the panel and roof for a butt weld, and in so doing remove the trough?Comment
-
roof
I used a zip blade on an angle grinder and cut on the inside of the weld, very carefully.Comment
-
Good job Bruce
I remember that feeling. For me it was when everything was cleaned up, repaired or replaced and in primer or painted. I felt like the restoration had turned the corner and was moving forward. Keep up the great job guys. It's worth it.Originally posted by Bruce in BC View PostComment
-
Good job on the roof.
I put metal inside on the lip and then put a nonabsorbing foam and vinyl on top. It looks good but if I had to do it again I would weld in a top from a Suburban or SUV like you suggested. That way I would know it will never leak and wouldn't be afraid to go under low hanging limbs.Originally posted by dieseldude4bt View PostComment
-
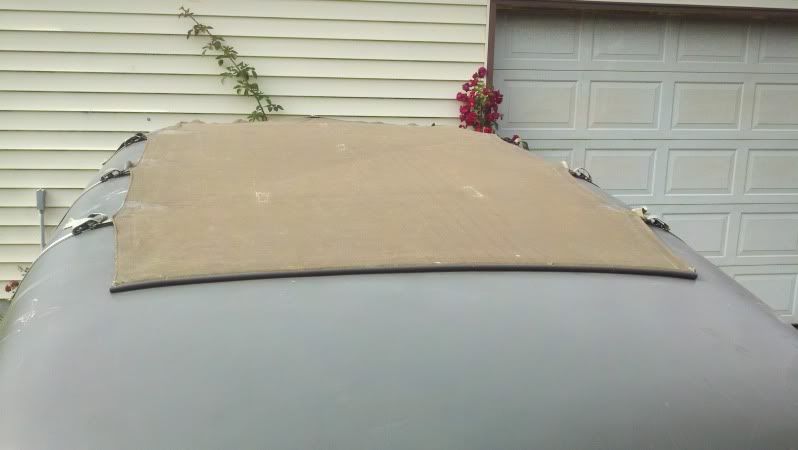
Previous owner of my truck installed tinted Margard. I'm probably going to just keep it as its great to have the roof open for sunlight, however the sealing of it wasn't that great and it needs a drain system but otherwise I like it. I am going to cut out the stock braces and install some plated box inside them and then weld back in the stock braces so you can't see the stiffening.
Info on the material used.
http://www.modernplastics.com/pdf/mp...d-brochure.pdf
http://www.usplastic.com/catalog/ite...3753&catid=704
 1942 WC53 Carryall in progress.
Comment
-
Looks like I am going to be taking a month or so break from working on the Carryall. I have to get my trail rig ready for a big Annual trail ride in Harlan Kentucky and it needs a list of things as I've been wheeling it all year and not really working on it. Don't want to neglect some simple things to haul it 10 hours each way for it to simply let me down on the entrance trail to the park because of something simple that I can't fix on the trail.
WC is booted out of the shop and wrapped up in the yard. Until later gents!
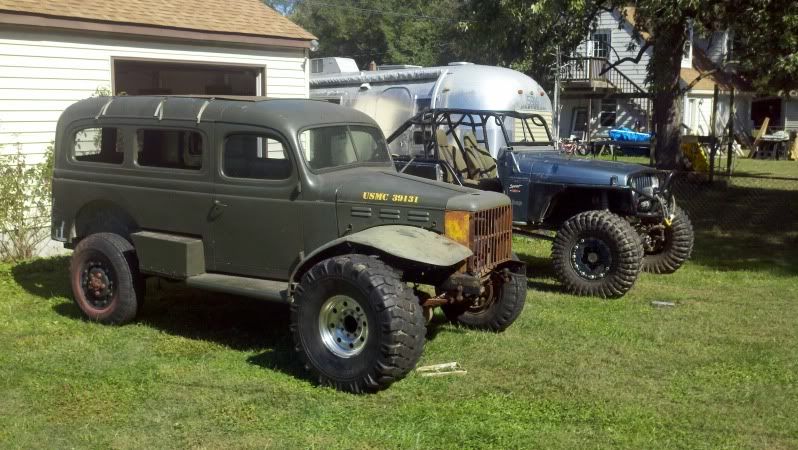
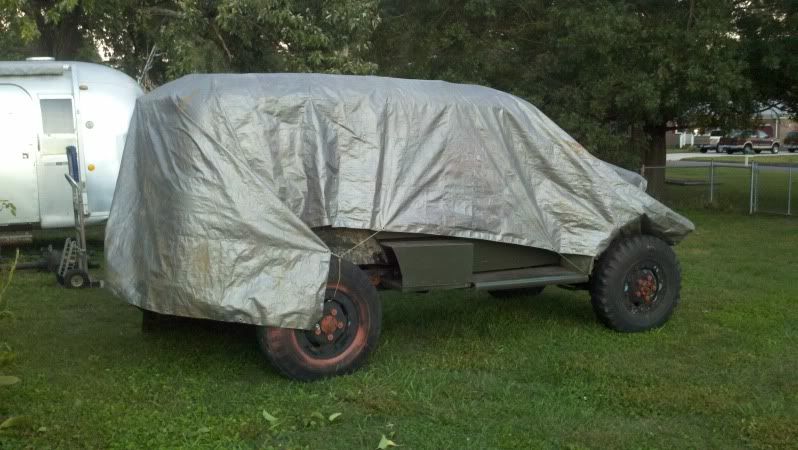 1942 WC53 Carryall in progress.
Comment
-
Bendix hydro boost with a twist
This is a new one on me , the accumulator is not in it's usual spot . There is no accumulator on the piece that connects to the master cylinder .This style may work on our trucks when a conventional unit would have clearance issues . I found this unit on a Chev motor home from the early 80s . The cylinder in photo two is part of the unit , it is quite heavy and has thick walls , I have no idea how this would compare with a standard hydro boost .
BruceComment
-
saginaw box rebuild
Like everything the first time is an adventure . The box has 22 little balls that need to be installed just so and the balls need to alternate . There are dull balls and shiny balls and there is a ball that might be shiny but then again it might be dull . I lost count 3 times and had to start over , even with a check list , something seemed off . It was at this point that I spotted the ball that was mixed up and needed to be segregated .
Take care
Bruce
edit : OOPS .. the splined shaft that connects to the steering wheel has a flat spot on it . This machined spot points straight up when the box is centred , mine is out 180 degrees . The problem is all the balls need to come out , a large piston pulled and then everything needs to go back in . The trick is not to destroy or nick the teflon seals . Odd thing is I followed some saginaw directions - you need to dial everything in then rotate 90 degrees , the only reason mine came out wrong is I have a reverse rotation box and i need to rotate things in a different direction . The directions I found are for a standard rotation box ...
GGrrrrrrrrrrrrrrrrrComment
Comment