Announcement

Collapse
No announcement yet.

The WC53 Carryall thread .

Collapse
X
 
  • Filter
  • Time
  • Show
Clear All
new posts

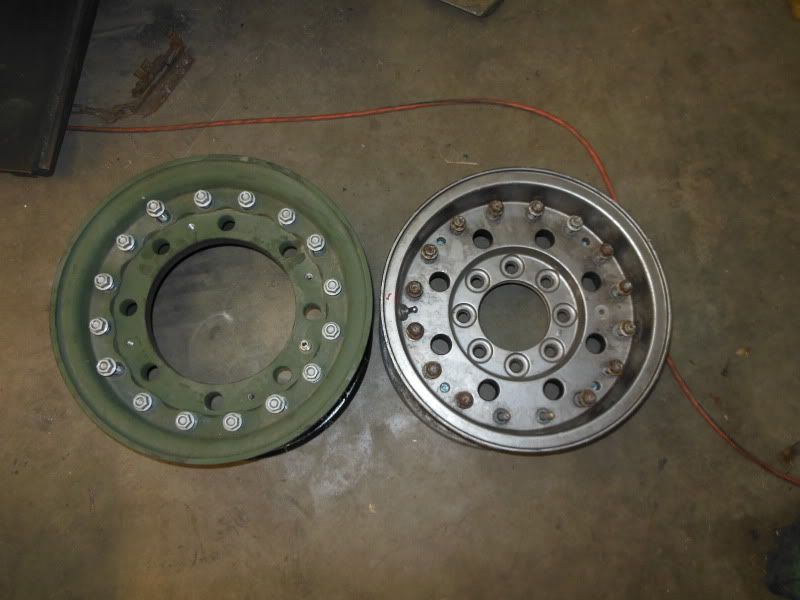
  • Oof, that thing is bad. Makes my past 3 Carryalls look like chariots, even the very last one that I dubbed as "Tetanus the Menace". Wowsers.

    I feel like there is an every growing demand for these trucks currently. I think the Legacy Carryall is really fueling the fire. Also the peoples choice at the Summit Racing Hot August nights was a Carryall also. My build thread on Pirate4x4, and then a few of the other magazines have had some features recently. All this publicity makes the value of our trucks increase and it will also be nice because less and less people will be calling them J**P... ha ha.

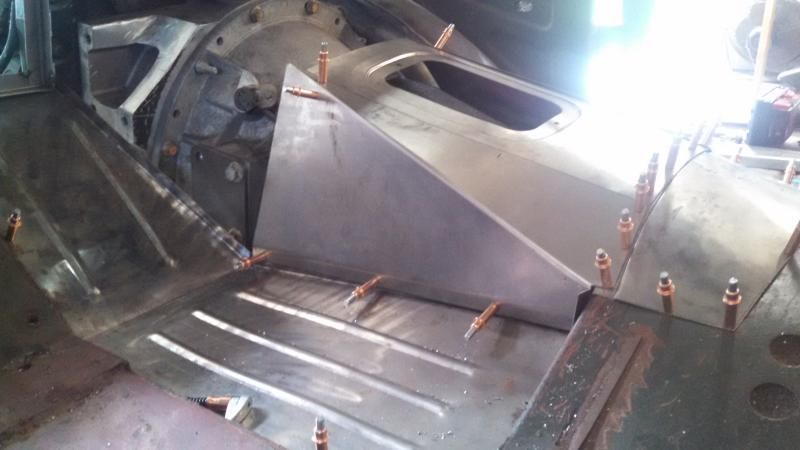
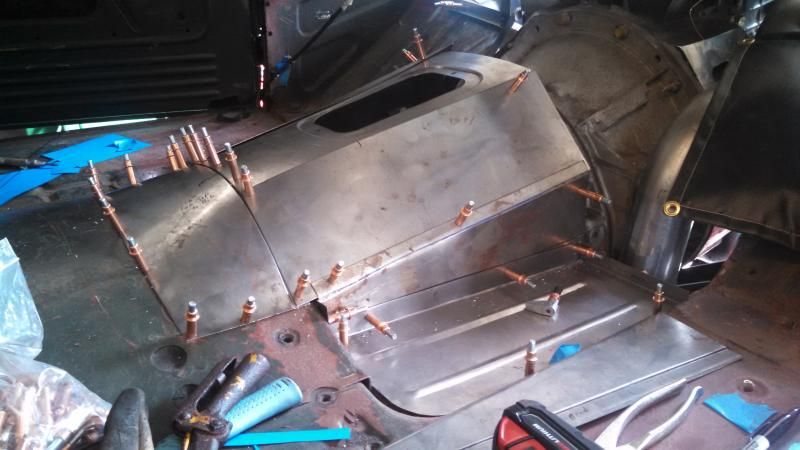
    Been working on my traction bar some more. Re-using a stock shackle for the front hanger and will be using a Uni-ball at the top for torsion allowances (though minimal)


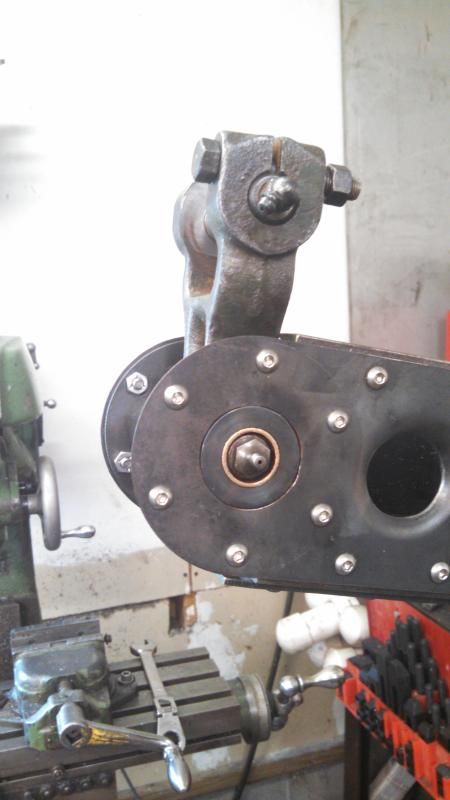
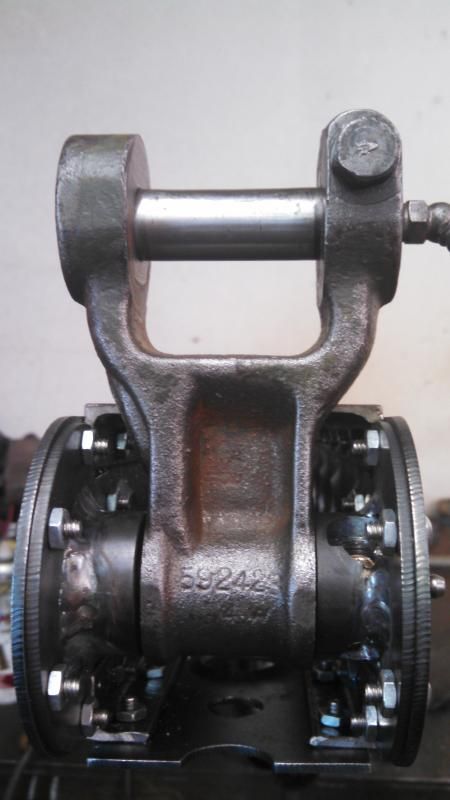
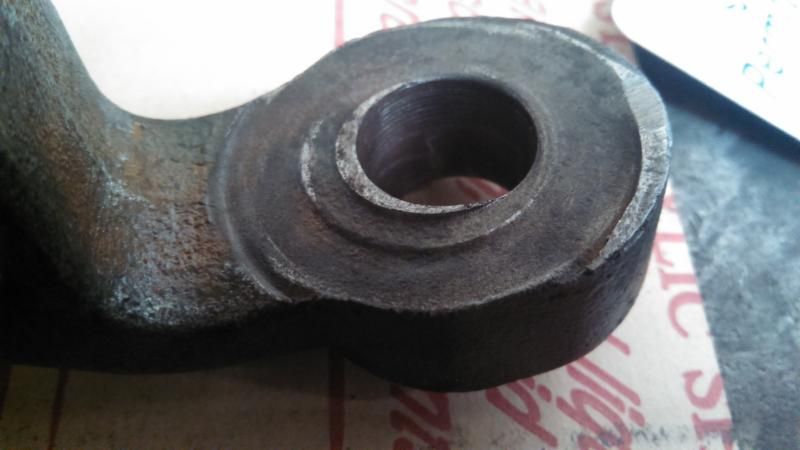
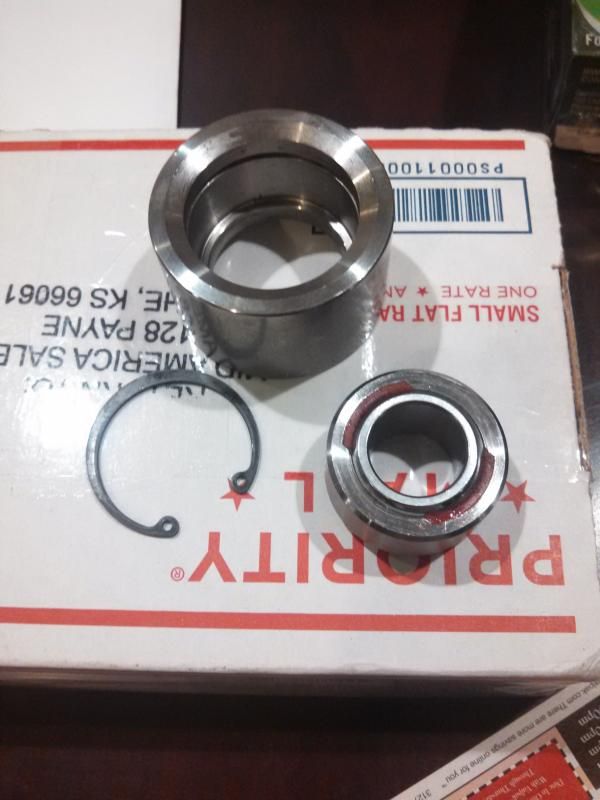
    This shackle had some wear on it so I didn't feel bad machining it a little wider inside ID. You can see the re-machined inside faces in the picture above relative to the photo below.

    1942 WC53 Carryall in progress.

    Comment


    • Nice work as always Alex. It looks better than "factory"
      I hope to have an opportunity to build another Carryall. Lessons learned, etc....However, having spent so much time on this project, when its done I owe my wife a vintage fastback Mustang for her patience! Regrettably, a Ford, but should still be fun to drive.

      Comment


      • Another teeny step forward and one step sideways.

        I have headlights, sort of. The new switch is faulty, if I wiggle the switch the lights go off. I have had this happen before and with a new unit at that time too. It will be interesting to see just how good the American Autowire guys are about replacing the switch. I was a bit concerned that this might happen - the plug to the light switch takes more force than usual to get it connected to the switch.
        I am about 1/2 done on the wiring.
        As an aside has anyone considered using the Ford nine inch axle with the high 9 option for one of these builds? You can go full floating, ARB, Detroit and get your driveshaft tucked way up and out of the way.
        A tad expensive perhaps, but pretty darn bomb proof?

        Bruce

        Edit - any body know what these Hutchinson beadlocks were originally made for? 16x9
        Attached Files

        Comment


        • Bruce, those wheels are orginally for the LAVs. They are what our big Michelin tires are off of. I scored a pair of them a while back with my two brand new XMLs on them and a set of run-flats. I gave the run-flats to the local Cross-Fit Gym and they throw them around in their parking lot as a "workout". No thanks.

          The wheels could be used by having a hub adapter machined and then using some VERY large bolts. I think they would look AWESOME with a bunch more bolts holding them together. I kinda wish I had found 2 more and kepth the two I had as I later found some large Aluminum hardware that would have worked and saved weight on adapting the pattern down to an 8 lug. My fear was running true and balance on the adapter deal so I just went with the Hutchinsons that I already had from the Border Patrol trucks.


          Mine were already valved for CTIS (Central Tire Inflation System).


          In regards to the 9"... you got it.. Pricey buggers. They are stout but essentially you are building an entire aftermarket axle, from scratch. I essentially did that with my front steering Eaton axle. The hi-pinion feature is nice for a trail rig but did you know that a hi-pinion in the rear application is weaker than a low pinion because of the way the gears are designed to be loaded? Convex/concave drive teeth are not the same strength; think bridge arch. Also,the 9" has the lowest hypoid center however, meaning it has the most tooth contact cycle; thats why you can get stupid ratios like 7:17 and they still hold together. My Eatons have the second lowest hypoid center. It means a very low pinion but it also means plenty of gear strength.

          Sad to hear about headlight switch. Nothing is more frustrating than bad parts new out of the box. I had an ignition coil do that to me this time last year.
          1942 WC53 Carryall in progress.

          Comment


          • Ohh yea, made some progress on the floor again yesterday... Sheet metal work is still hard for me. I am planning on having my auto shifter assembly run a push/pull cable and the whole thing will just bolt into the trans tunnel cap with a bajillion bolts and that way I can just remove the whole plate and service / adjust my shift linkage without a bunch of fumbling around under the truck with my arms wrapped around that big girl named Allison 1K.


            1942 WC53 Carryall in progress.

            Comment


            • Metalcloak question

              What size are you running? 1.25 or 1 inch shank?
              Advantage or disadvantages to each ?

              Comment


              • I am running the 1.25" shank on the metal cloak joints. The reason mainly is because I went with 2" dia link material on the lowers so the jam nuts don't look piddly on the link end using the 1" shank vs the 1.25" shank. Also get a lot more thread contact with that 1.25" so that way if a jam nut comes loose it will be less likely to wear the threads to the point of a pull out before I realize whats going on and tighten it back up. Guy I wheel with was lazy and never installed jam nuts on the heim joints on his cross-over steering on his jeep; trail only truck. Second trip out it ripped the threads right off of the cheap non-ptfe lined heims he was using.

                Speaking of heims, I am going to run a COM Uni-ball for the shackle hanger for the anti-wrap so that any or all torsion can be absorbed.


                Ordered a bunch of hardware to build my autoshifter linkage. Hoping to get that incorporated into the trans tunnel cover as I finish it out and start working on the firewall. Probably won't get into the firewall build until I get atleast one seat installed so that I can work out the ergonomics of the wheel and pedals so that I can reinforce the firewall around the hydro-boost and MC assembly.

                Issue I am coming across currently is the transmission dipstick. I don't have the correct dipstick for this transmission and I will need a flexible stick as well. Not to mention I am not certain of the fluid level I will need to indicate if I were to try and adapt one of the aftermarket flexible sticks which is probably what I am going to have to do.
                1942 WC53 Carryall in progress.

                Comment


                • Thanks for that Alex

                  I am not sure how or what style of anti wrap bar I am going with. Space is limited. I was looking at some pictures of some Volvo trucks that have leaf springs on the top and a bar with rubber ends under the axle. This is an off road truck. Sort of a 4bar arrangement. So I may end up with one like yours or the 4 bar arrangement. I gather there are cases where the anti wrap bar can create yoke side loading at the transfer case. Wears the bearings out in the transfer case in record time. Sounds like something we want to avoid.
                  I contacted American Auto wire about my faulty switch . They where real quick with a reply and asked for an invoice. Low and behold I had the invoice from the place that I bought it and AAW had the switch in the mail. Nice to deal with someone who gets the job down without any hassles.

                  take care out there
                  Bruce
                  Brrrrrr it is chilly out side

                  Comment


                  • Hmmm "thats not stock…….is it??"

                    Tail light, fender, bush bar….sorta looks like it whole shebang belongs there. I think it is a Ford light , the stand was made out of a cycle fork, it has a nice taper. There are now stands made for these lights- I think SoCal has them.

                    Once I get the darn thing inspected I will switch to blue dots. I love the look a blue dot creates at night. If you can find some Dodge airstream lights from 34 or 35 they will fit in these buckets. Way cool and the troops would be seriously confused.
                    Attached Files

                    Comment


                    • Progress...

                      It's been a couple of months since I've been able to work on the carryall, but the temps drove me indoors the last couple of days so I made some progress. I got the 4bt and NV4500 mocked in the engine bay and began getting my motor mounts figured out. I am trying to reuse the front engine mounts from the bread van, and I think they will work pretty good. My biggest concern is a possible conflict with steering gear. Do any of the 4bt guys have an opinion on whether or not I'd be good with these front mounts and just a rear trans mount, or do I need another mount around the bellhousing for additional support and to help with torque? Also, I'm about 1.5" off the firewall, is that about what you guys are doing with the 4bt to not crowd the front?
                      Attached Files

                      Comment


                      • Positioning the cummins

                        Have the Power steering pump installed on the block. Also have the starter in place. In some respects having the steering box in place or at least roughly positioned will help you figure out where the engine mounts will work best.
                        With the PW pump in place and the starter you can rough in a mount, then see if there is enough room to pull the PW pump without hitting the motor mount. Do the same with the starter. Also the 6bt air conditioning adapter will fit on the 4bt block. If you want air , have that in place as well.
                        Dan M on "The power wagon page" has done enough of these builds that he has some of it down to a science. A look at his pictures and a review of the mounts on this thread should be of help.

                        Look what almost followed me home. A 4BTA that swallowed a valve , came with the P pump, all assessors and a gasket set. Just needed a new piston and a decent head. Total price was 800 bucks. I have the cash in my pocket. Unfortunately the engine sold today.
                        Attached Files

                        Comment


                        • The pump configuration is different than mine. The shutoff solenoid on my engine is on the other side of the pump, and I want to say the diaphram sticks off the back not the top. It kind of looks like the pump is angled further away from the block too.

                          Strange, wonder what CPL that was. Always have to wonder how expensive it must have been to have all these different configurations.

                          Comment


                          • Originally posted by WC53inTN View Post
                            Do any of the 4bt guys have an opinion on whether or not I'd be good with these front mounts and just a rear trans mount, or do I need another mount around the bellhousing for additional support and to help with torque? Also, I'm about 1.5" off the firewall, is that about what you guys are doing with the 4bt to not crowd the front?
                            That was basically all the original truck my engine came from had, that's all I've used for my truck, so I really hope so.

                            As far as engine placement my situation is a little different but what transfer case are you using? I kept the divorced NP200, which meant pushing the engine forward more to provide enough room for an intermediate shaft. Thouhg it did put the shifter about perfect in the stock opening, other than the GM adapter tilt.

                            If I were using an attached NP205 I could have shifted back which would definitely help the issues I'm having fitting all the cooling parts in place right now, though too far back and the bend coming out of the exhaust side of the turbo can get to be an issue too.

                            I'll also second Bruce's suggestion with the AC. Most of the factory brackets that mount the compressor on that side bolt through the water neck and around the front mount point. Better to build them into your plans now. Otherwise engine angle will be the other important part to account for as you design and build your mounting points.

                            Comment


                            • 4bt

                              Thanks Desoto61, I have rebuilt a divorced NP205 that I plan to use, my NV4500 is a 2wd trans. It's going to get tight between the trans and transfer case, but I figured I had more wiggle room back there than up front. With being 1.5" off the firewall the shifter location looks real good.

                              Good suggestion on getting the AC bolted up before I get much further. I've also got to get my starter on too.

                              Feels good to just be working on it again.

                              Comment


                              • The big issues with the trans->transfer case distance is how short of a driveshaft you can have built. Since the yokes on both my trans and transfer case are fixed, the shaft has to be splined so it can extend and contract. Talking with Paul on his swap with the same drivetrain, 7" was close to minimum for his shop, I'm within a 1/4" of that. The shop I talked to didn't think it would be a problem, and Paul gave me the PN of the pieces his shop used, but I haven't gone to get it built yet.

                                The biggest part of the A/C is where you plan to put the compressor and how. The easiest way will be the Dodge bracket and setup. They are common, and the alternator and compressor are readily available, however it puts the AC low on the passenger side with the water neck pointed straight out, which is not ideal for many configurations, and there may be some non-standard connections to deal with.

                                There is a Cummins/Freightliner bracket that mounts on the same side and sits both parts higher, but it's hard to find used and expensive either way. There is a bracket that runs it on the driver's side on top of the intake using a special idler pully with a second v-belt, it would probably work OK in our application if you're not running any sort of aftercooler, or use some creative plumbing. There is a place on the 4BT swaps forum that was building a custom setup, nice but also $$$.

                                Otherwise you are left trying to build something custom. I ended up going that route since I hadn't planned ahead and didn't want to have to re-build my motor mounts. Pics should be in my thread, it's not ideal either, tight around the upper water neck, and I'm not sure if there's enough wrap around the alternator bracket. Plus I still haven't tested it to verify if it actually works yet.

                                If you're not already there check out the 4BT swaps forum, it's got a ton of info, and will be vital in finding the right parts to do what you're looking for. Good luck and as always keep us posted on what you do, this stuff is like dominoes, every move starts a cascade, you just keep trying to find the one that knocks over the least.

                                Comment

                                Working...
                                X