Announcement

Collapse
No announcement yet.

The WC53 Carryall thread .

Collapse
X
 
  • Filter
  • Time
  • Show
Clear All
new posts

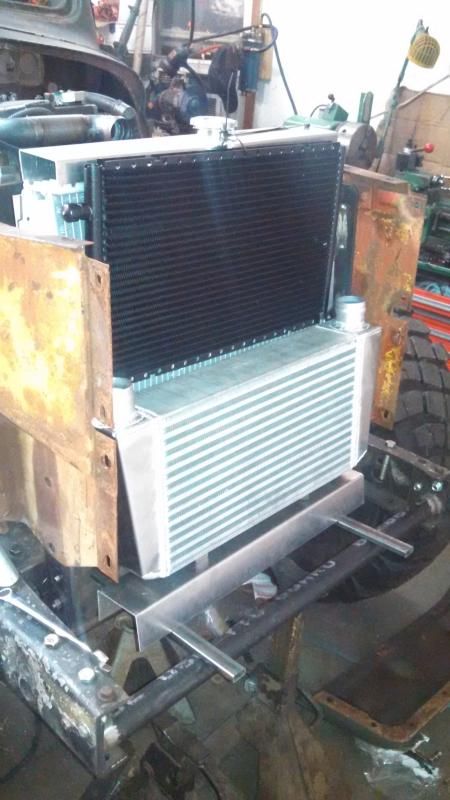
  • You guys and your wiring... man I got a long ways to go before that I fear... Especially if I keep having to wait so long for parts... everything from Vintage Air appears to be a month out of stock right now... uggh. I need my AC condensor so I can measure for my Psteering cooler and Trans cooler, as well as get this intercooler mounted.

    In the meantime, back into the cab so that I can start to get my ergonomic correct, or close to.

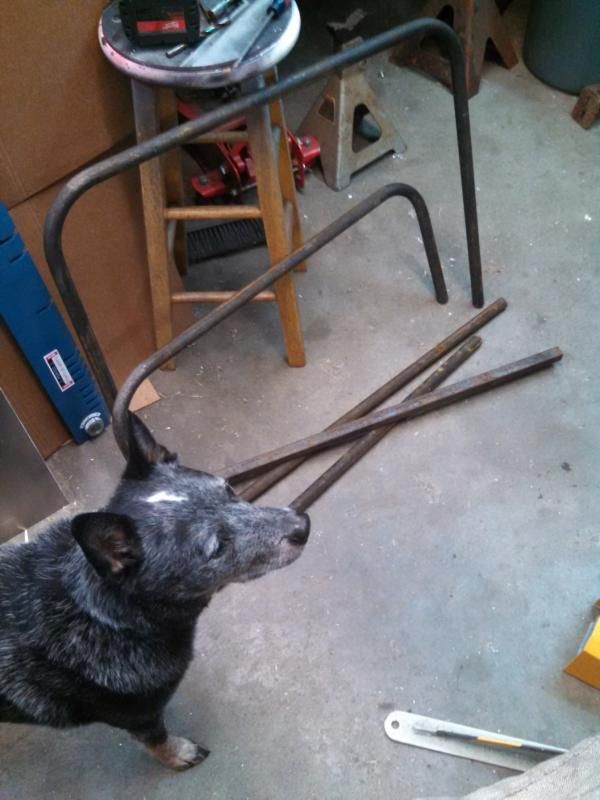
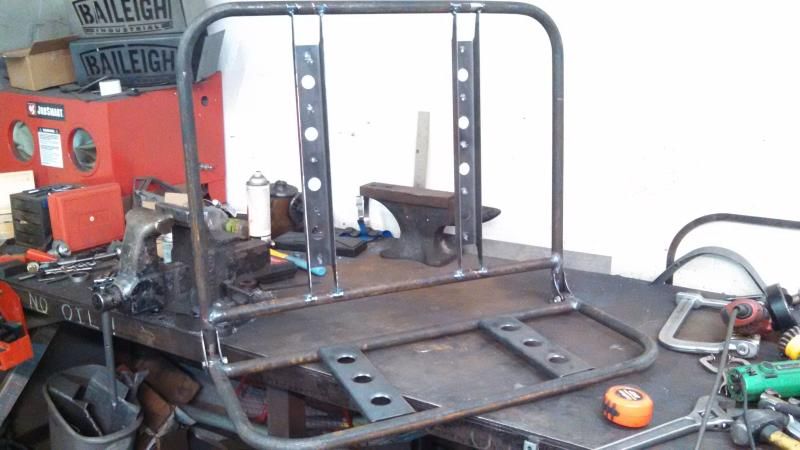
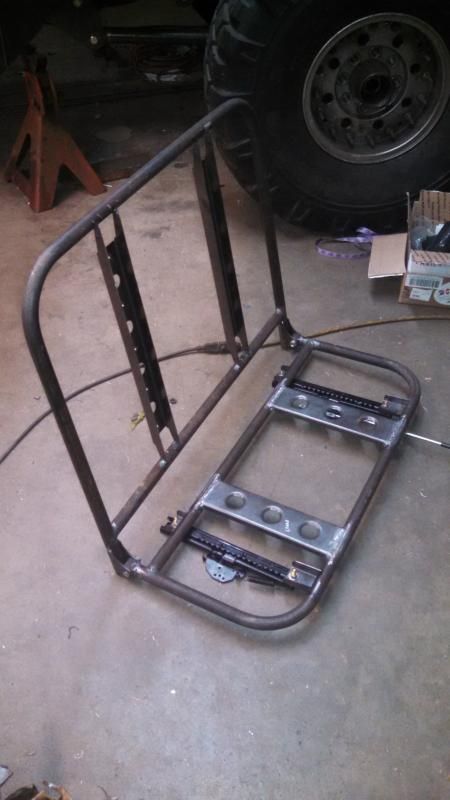
    The driver's seat frame is dimensionally the same as an original one, however mine will be adjustable, somewhat... sliders if I can hide them and the back rest should tilt some as well. I have to work up the details on my tilt frame and then get with my upholstry guy to get some foam samples so that I'll know exactly where I can fit these crazy things. The second row seat will be identical but with hand rails, and then the rear seat will be a nice big full width across the back. There really IS a ton of room inside of this thing!
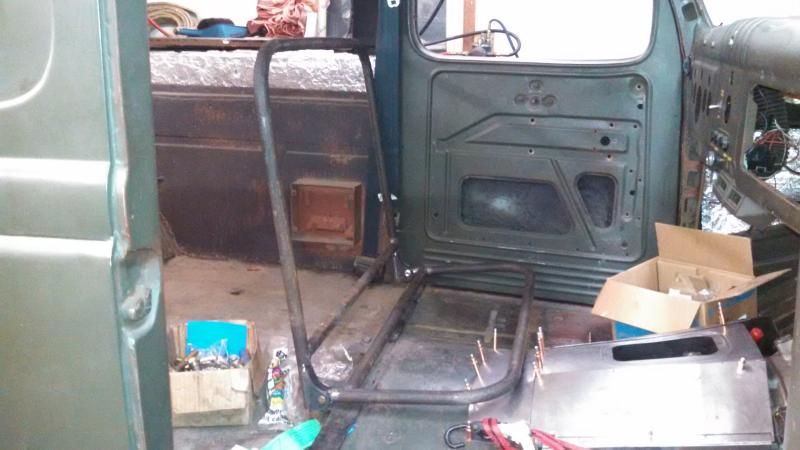
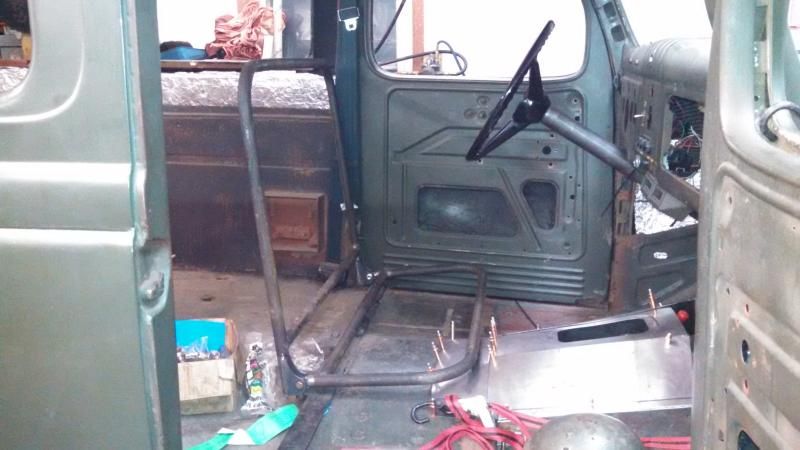


    1942 WC53 Carryall in progress.

    Comment


    • Look good Alex

      Your seat is going to look better than mine. I hope you can nail it when it comes to comfort.
      There is a WC53 tailgate on ebay - $400. I was hoping the hinges would come up on their own.
      The lift gate is listed at $200.

      Picture and prices are posted for future reference.
      Attached Files

      Comment


      • Here are some more parts... Looks like we've got someone doing a re-powering project. I emailed them to try and lure them over here for some info.

        http://lancaster.craigslist.org/pts/4842786852.html
        1942 WC53 Carryall in progress.

        Comment


        • Wiper 42.675% done

          Got the wiper pivots in place. Both are modified to take spherical rod ends. The tie rod shaft that joins the two is straight and clears the valance with room to spare. I am going to place the motor in the kick panel and run a cable. If this proves problematic with use I will not need to modify the upper pivots in any way. Just move the motor to the valance and run an arm to the existing connection.
          Progress is dead slow. I have yet to go to the city and look at suspension seats.
          Attached Files

          Comment


          • Looking good Bruce! I'm interested in seeing how the mechanical stuff all comes together for the wipers. This seems to be a big thing that I hadn't even considered a solution to yet... Dang.

            I've been working on my seat frame some more in the evenings... getting it over to my upholstry guy soonly in order to get him to make me some cushions for it. I figure we can tweak the driver's seat to how we like it and then build the rest of the seats from there.

            I still have to build a back panel for it. The seat cushions will be wood panels and attach through the cross members on the bottom. The seat back will be held in through those vertical ribs with 5 screws in each rib; the screws will also hold on a back panel that I am yet to build but I can do that once the seat comes back. I have an idea in my head of how I want to do it, I just need to figure out the best way of making it happen in my little detached garage.

            1942 WC53 Carryall in progress.

            Comment


            • getting closer

              Man I messed up. Getting the throw at the wiper motor end to correspond with the arm length at the valance end is bass backwards. For any of you who chose to go this route get the throw on the motor end close to 2.5 inches and getting the valance end should be a one step set up. Spherical rod ends change the throw and makes calculations quite challenging.
              Tough to see but the motor fits under the dash quite neatly. Hopefully it is not in the way of anything.
              Attached Files

              Comment


              • Rotating to reciprocating

                The black arm has a pivot at one end that is mounted to the kick panel. Under the heim joint is an attachment for the cable. The felt pen line more or less follows the arc. The round hole in the felt pen line is to help access the nut that holds the heim to the arm.
                This is the back of the panel and these parts are not seen when the kick panel is in place.
                Getting close to 300,000 views. Views have dropped a little this month. Everyone must be hibernating in their shops or napping on the beach someplace.
                Attached Files

                Comment


                • This thread is amazing the density of information in one thread is baffling. All of you keep up the amazing work.

                  Comment


                  • Off in a different direction.

                    Made up some bucks and started pounding on some tin. This is the result . All the corners are radiuses. If I had a bead roller I would create the dash waterfall on the tail of the overhead console. Far from perfect , but it will do and I have more hours in this than I will admit . The tail may end up with some switches in it. The tail has an arc that I hope will follow the roof head liner. You can not see it in the photos but the arc is about 1/2 of an inch over the length of the tail.
                    The mirror bolts will hold the front in place. There will be two screws holding the rear of the tail in place and a couple of tabs at the top of the front.
                    The little dent in the side is for a switch, you get to figure what that is for on your own.
                    The dark line between the console and valance is blueing. I scribed the edge in. The gap is not perfect but not as big as it appears.
                    The black piece of plastic is what holds the screen in place.

                    take care

                    Bruce
                    Attached Files

                    Comment


                    • Wiper switch

                      Ok I tossed the wiper switch in the console. The stock location would not work because the switch and the wiper arms wanted to live in the same space. If the motor drag link tie rod thingie ran to the passenger side then there would be room for the wiper switch.
                      Ok now here is the punch line. The console is covering up the wiper motor. I tore out the wiper from the kick panel location. I had it set up and it worked fine. I hated the noise. I found it too fraggin loud. Now that I have moved the motor up on to the valance and removed several joints from the system it is quieter . Not much but it is a start and I can insulate around the motor which will help drop the decibels a tad more. Got side tracked today working for a neighbour, managed to get the rear screw holes on the console counter sunk and the tabs welded in place. One more tab and 4 nuts to add to the unit and it will be ready to prep for paint. Expect some waves and sand marks. I want it to fit like a stock unit but look like it is a decade or two old. I almost hid the screen behind a little door. If I had access to a spare dash that would have happened.
                      Attached Files

                      Comment


                      • Looks good! Mine started curvy to try and match the dash curve, and I was using a smaller screen, then I got the same one you have and ended up trying to tweak it vice start over. I like the residual curve, but it's not as clean and tight as yours is.

                        Comment


                        • Seat base options. Anyone

                          I am looking at seat base options for the carryall. My wrecker has about 10 vehicles left and heck if two of them are jeeps. There is a TJ and a YJ. Anyone have experience with either of these seat bases? I am wondering which one would fit the carryall with a minimum of work.
                          The YJ are different size because one side bolts to the tunnel on the floor. The TJ seem to be shorter and the same height but the mechanism to operate would need some tweaking because it uses a cable.
                          I am tempted to rip both sets out and go from there. price is decent, $25 bucks a base.
                          I almost made a buck for the over head console and would have then made a negative mold. Then multiple copies could be made. But I elected to bash mine out of tin, because I do not like the smell of fiberglass.

                          Comment


                          • Seat bases

                            Bruce, I have owned both TJ and YJ. I actually have a YJ passenger's seat base and will soon be having a YJ drivers seat base... well not mine but I am helping build a cage with new seats in two friends' Jeeps and they are pulling out the stock stuff; I can see if they are interested in selling if you are interested in buying and can't find anything up there.

                            My seats are just going to be on sliders that attach to fixed pedestals that will attach to the floor. I actually put my deposit down on my seat cushion foam at my upholstery guy's shop just yesterday afternoon.

                            I've not been getting much done on my Carryall lately due to a number of things but everyone here knows how that is, even the retired folks are busy with day to day life and don't play with trucks all day long, even though I like to daydream that eventually I can do that.

                            I've also confirmed recently that this forum and Pirate4x4 are pretty much the only two places on the internet that grown men don't boo-hoo and cry like a bunch of little girls about me not restoring the truck to original. I was tolerant of it for a good while but now personal attacks are occuring again and I simply don't have time for it. I'll just keep the whole project here and on Pirate and the rest of them be ****ed.

                            Here is what I am doing for my seat so far. Its going to recline with a lead screw mechanisim underneat (not installed yet) and the sliders will allow it to slide forward and back. The floor to slider riser brackets are 16Ga, about 5" tall and are at a 5º incline up since usually shorter legs is also a shorter person so seat should probably go up as well when it slides forward. The sliders are made by "MasterCraft" and are for their small Milspec seats. The passenger seat is going to be something totally different but I am planning on stealing the latch mechanisim, similarly to you Bruce, from a Jeep, except I am going to snag the one from a back seat out of a late model TJ since the back seats fold and tumble the way the front seat will need to for entry/exit.

                            Selected seat covering material is 14 oz "Chocolate Denim" colored Cotton Duck/Canvas blend. Its pretty much the same stuff that Carharrt makes their coats and heavy duck pants out of.


                            I'm also still fitting intercooler, condenser, radiator stuff up front.

                            1942 WC53 Carryall in progress.

                            Comment


                            • Impressive work and packaging.
                              I drive a DODGE, not a ram!

                              Thanks,
                              Will
                              WAWII.com

                              1946 WDX Power Wagon - "Missouri Mule"
                              1953 M37 - "Frankenstein"
                              1993 Jeep YJ - "Will Power"
                              1984 Dodge Ramcharger - "2014 Ramcharger"
                              2006 3500 DRW 4WD Mega Cab - "Power Wagon Hauler"

                              Comment


                              • Got some seat bases

                                Pulled a set out of a TJ. Price was good at $25 and it turned out that both the pas and driver base will fold forward. I may grab the YJ bases as spares.

                                I need to pick up some seats, up here the master crafts would end up costing me over a grand. 1300 to 1400 bucks. I am thinking of going with some Corbeaus. The plan is to install them and if they work out , get them recovered in a material that will fit with the vehicle. I like your seat design better than what I am doing. Only add on would be adjustable head rests. The head rests would be removed for shows and what not and installed for driving. Seat spring system might end up suspension.
                                I was doing some research. Ergonomics indicates that 100 to 110 degrees of slope for the back is optimal. For the seat base your knees should end up level or a bit higher than your hips.
                                I need to get the seats so that I can install the bases in the right location. Also I need to check the distance from pedal to the front of the seat and seat height on a few trucks to get a rough idea on seat placement. Things are tight in that cab.
                                I love your seat bases. Beautiful work.
                                As to the whiners most of them are clueless. I have been at this game for close to 45 years. Worked for the hot rodders and restoration crowd. Like any group you got the posers, idiots, wanna bees and the other 50% that get it from one degree to another. Hot rodders used to be thought of as the scum of the earth. I predicted in 1972 that one day there would be hot rods at pebbles beach. I was laughed at but there was a few of the upper crust in both the rod and restoration group who thought it might be possible. Turns out I was right. You are right in what you are doing. 100% right. The second some restoration jihadist nazi opens his yap , you need to turn him off and walk away. Kind of like the television or the internet or a yacking dog. Most is not worthy of your time watching or listening to.
                                You have talent, you are flexible and creative and it is a delight to look at what you are up to. With your build YOU HAVE NAILED IT Keep it up, you are on the right side, you are giving not taking.

                                Comment

                                Working...
                                X