 Tweet
Tweet
Thanks for the derusting advice Bruce. I found I picture of what I started with about 4 months ago. Its wasn't pretty, and still isn't, but its getting better. You will notice the high tech body removal; engine hoist, cinder blocks and 2x4's. Was a little nervous at this point, but with the rear doors, side doors, glass, etc out of the body its wasn't terribly heavy. I guess after looking at this photo I understand why friends seem to disappear when I'm looking for help......
-
-
More high tech action shots of the de rusting process, the radiator support and inner fenders. The sand bag is part of my body straightening tool collection, a rubber mallet beating metal into the sandbags does a decent job of rough straightening things, although the front fenders did put up a significant fight, and are still winning in a couple of areasComment
-
open the door or window in there
You know all those little bubbles that come to the surface when using the derust tank ? That is hydrogen .Comment
-
I have a serious safety concern about the way you are using the concrete blocks. I understand why it is that people stack them that way, but that is not how they are designed to be used. Let's get them turned as they are used in a wall. Also, under the bottom block, and on top of the top block, you need to have a piece of 2 X material as big as the block, so.... roughly a piece of 2X10 measuring 16 inches long. that protects the load surface of the block from steel on top and surface irregularities or small stones on the bottom.Originally posted by TonyKeffaber View Post
Currently the load is being carried by less material than when the block is used correctly. I would rather you not use blocks at all, but if you must, the need to be in excellent condition and oriented properly.
We don't want you killed or injured.Power Wagon Advertiser monthly magazine, editor & publisher.
Why is it that the inside of old truck cabs smell so good?Comment
-
Thanks
Thanks for the advice on the blocks and the ventilation. I have the tops of the windows opened in the garage, and if I'm working in there with chemicals, or running the derusting tank, I open the bottom of the garage doors to get cross flow in there. Its a three car garage with 16ft ceilings, but I treat all fumes and gasses as bad, and they need to vent up or down somehow.
I learned something on the blocks though, I assumed at the midpoint they were as strong in either direction, and that centering the load on the block would be fine, but now I realize I probably forced the block to carry the entire load just at the center rather than distribute it to the entire block.
I'll have to try the molasses. What I did learn is that if I pull the part out of the tank, and let it and dry, the paint seems to lose its bond later. Also, after the part dries I can see any rust that may not have been converted. I then wire wheel the part to remove stubborn rust and paint, and if the paint still adheres, and spray it with remover and set it aside to wire brush later.
Another trip through the tank and the part is almost brand new. I let the part dry again, spray a phos acid solution on it, scrub it with a scotch brite pad, and rinse again. The part will still need a round of prep before painting, but I don't seem to be getting any surface rust (yet).
The grey patina on the body was done like that, but paint removal was a little different. I had wanted to media blast all the parts, but the first two quotes I got were more expensive than the purchase price of the truck.
I found that you can slice old paint off with a razor blade pretty easily on flat surfaces. Its not fast, it took about 30 hrs to get most of the paint off, but clean up is as easy as sweeping the floor. It's also a great way to find any little dings/imperfections in the body to dolly out or mark for later repair.
I was skeptical when a old body man told me to try this, but I have to admit it worked quite well and is cheap, if you have a week of spare time.....Comment
-
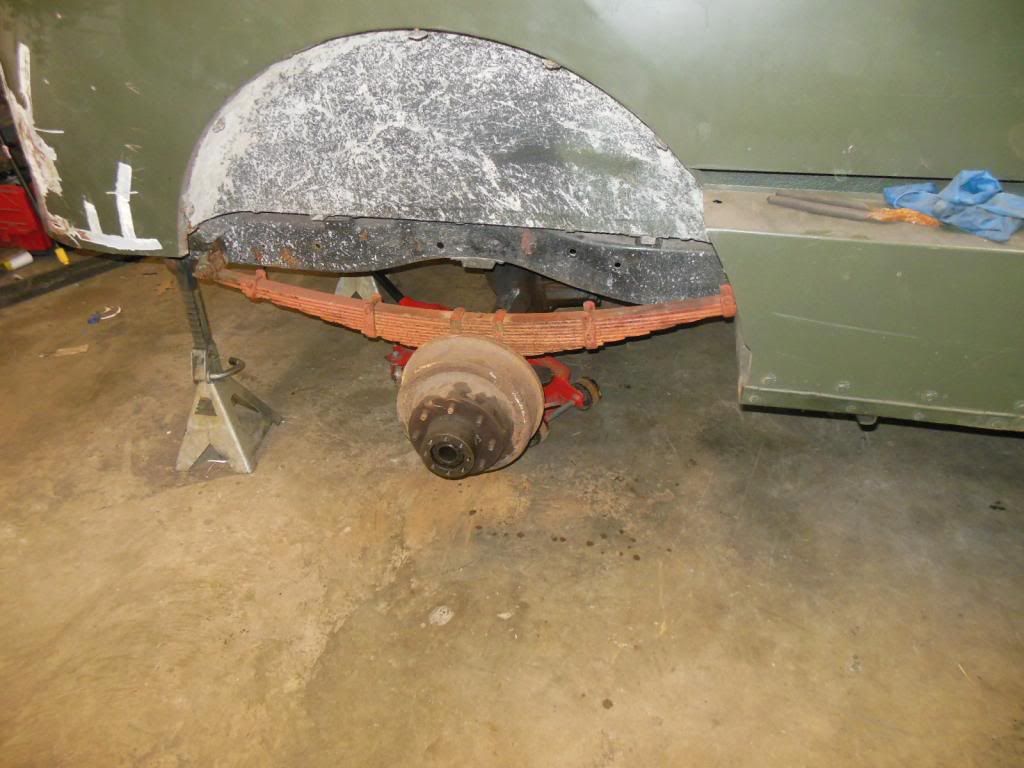
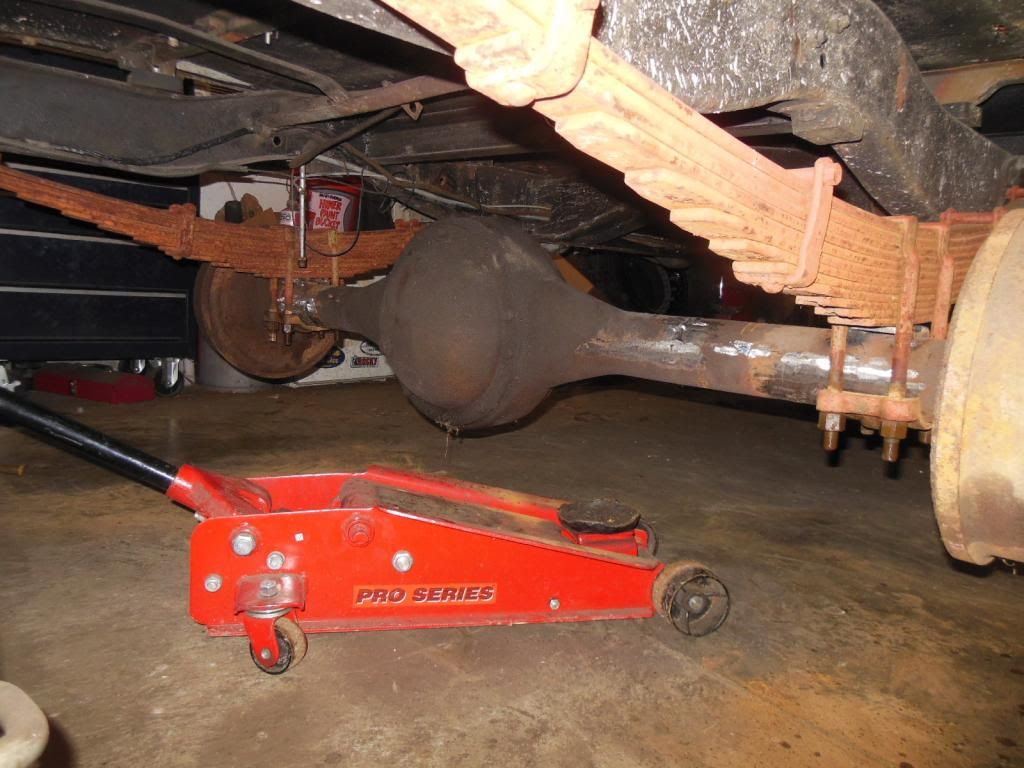
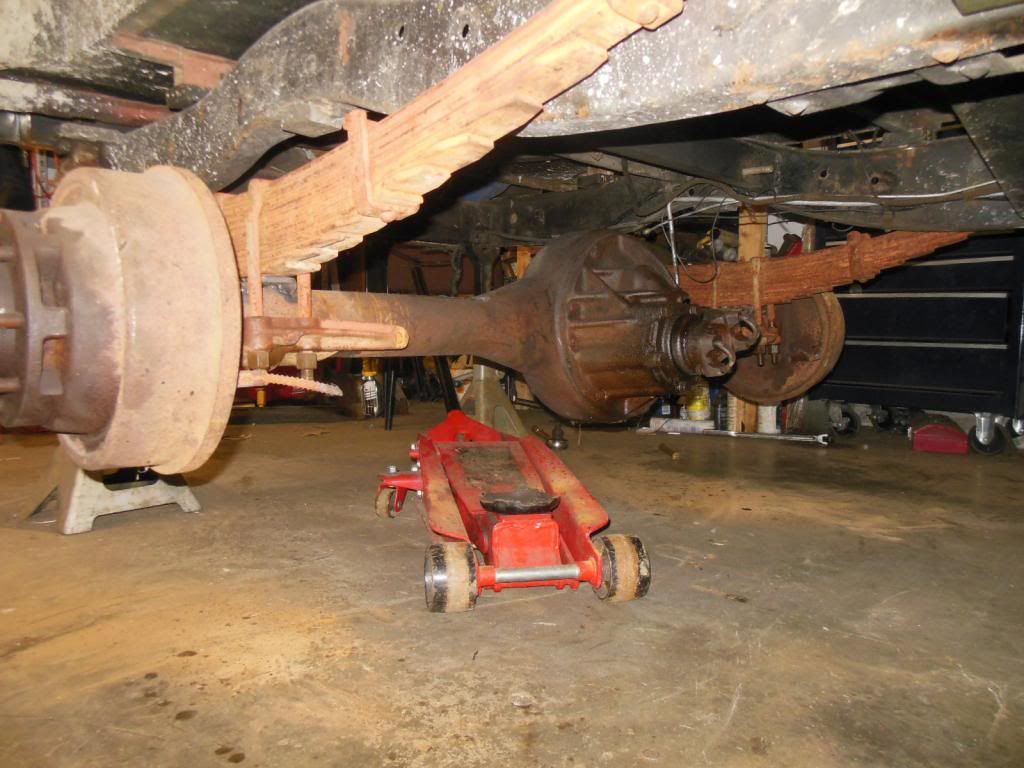
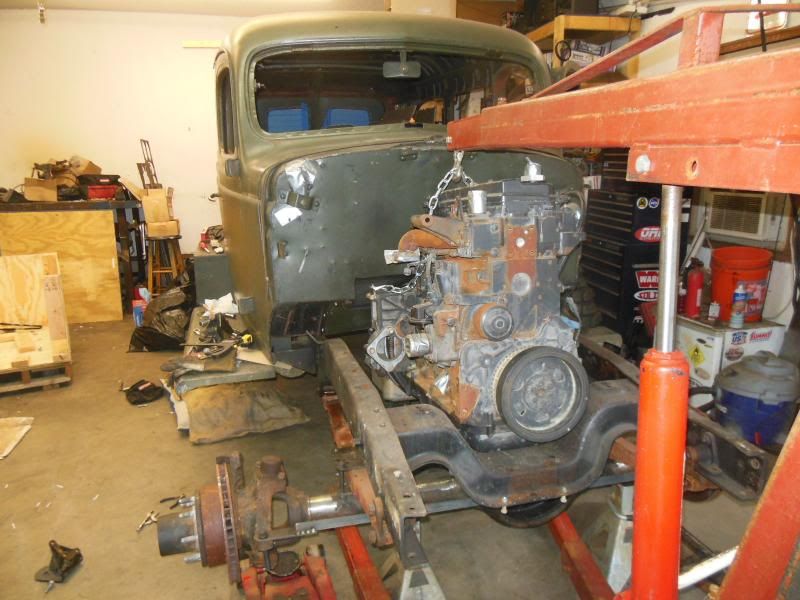
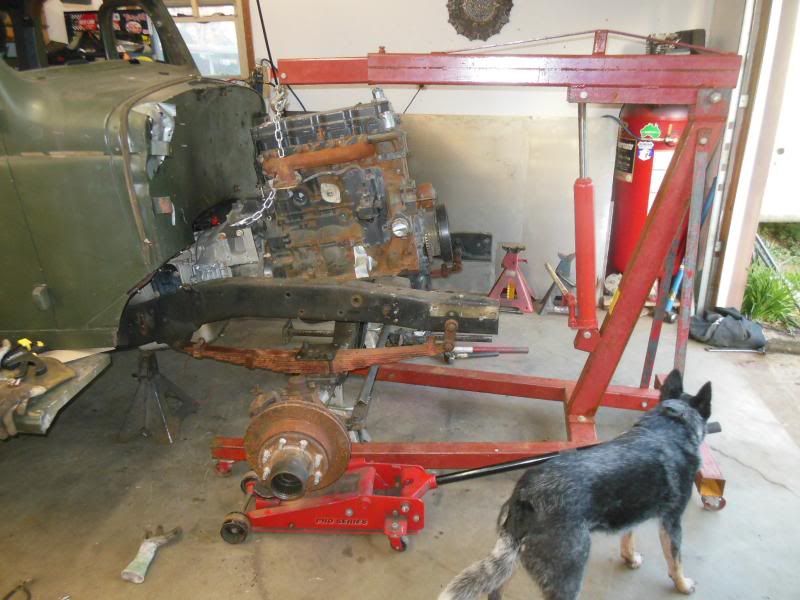
Got the stock rear axle removed, and the "new" rear axle mocked under the truck. I have to make the truck mobile enough to roll it back so I can get the engine and transmission crates into the garage.
Its not the original dodge axle, but its got 4.56 gears, 10.25" dia ring gear, 65" WMS width and looks like it could have originally been under the truck from day 1... to the untrained eye ofcourse. Disc brake upgrade will be nice and easy for this one.
I also finally nailed down two more XMLs for my Hutchinsons... finally that search is over. Probably putting myself in a bad spot by not buying a 5th one for a spare, but it will take one heck of a situation to give one of these tires more than just a nail hole that I can split the rim and just plug or boot or both right on the spot and put the wheel back together.1942 WC53 Carryall in progress.Comment
-
Body Mounts
These might be useful for mounting your body. They were almost identical to the original mounts that came off my truck. They are polyurethane, and were $14 delivered for a pack of 8. I got the 2 x 2 square, although I may have to stack them for them to fit really wellComment
-
Cool deal! I was planning on cutting up some rubber loading dock bumpers and just having them for the body mounts.
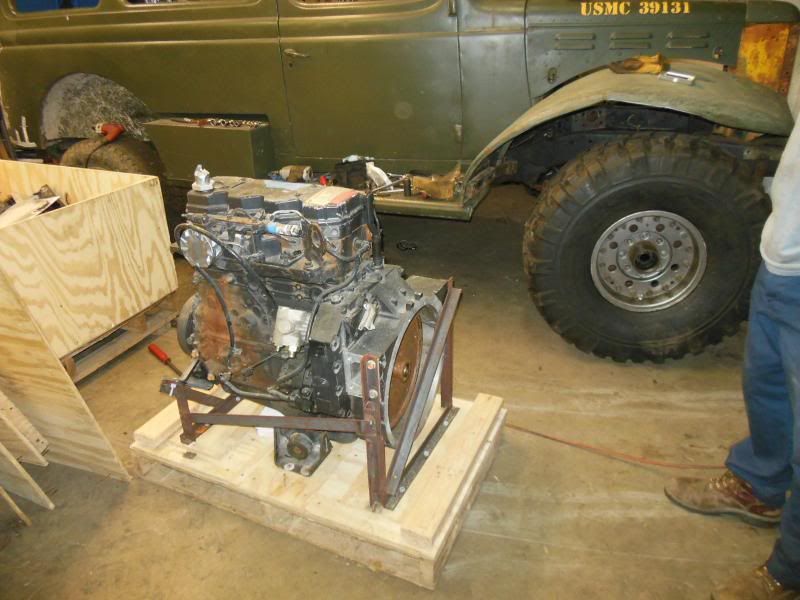
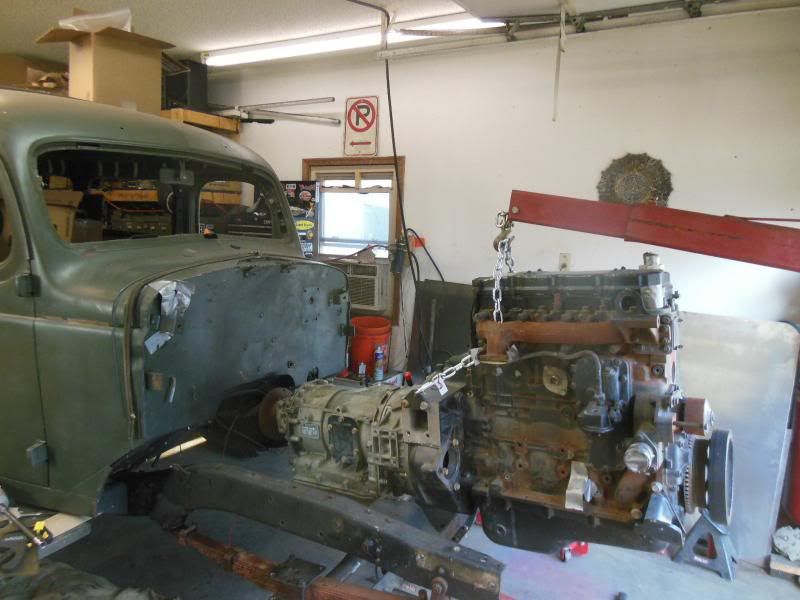
Today I started to dig out the power plant. Can't wait to mess with this thing! Prelim measurements indicate it will be snug but should fit.
 1942 WC53 Carryall in progress.
Comment
-
I have the same body mounts under my cross braces. I believe they have them in thicknesses of 1/4,3/8 and 1/2. Great product.Comment
-
Would someone have a link for those mounts? Thanks DougComment
-
-
Thanks alot! DougComment
-
Started messing with the motor and transmission. This is such a neat little engine.
 1942 WC53 Carryall in progress.
Comment
-
Looking forward to seeing what kind of motor mounts you build.Comment
-
Tailgates and Barn Doors
Motor is looking good Alex!
Slow going on the de-rusting, but I bought some carbon electrodes off of Ebay. These have really picked up the pace over pieces of metal, and they don't need to be cleaned much at all. I can tell I over invested in battery charger, should have put money into the anodes from the start. While I'm waiting on the tank, I figured I would start to tackle the rear dooors
I know you guys all have tailgate stories, barn doors don't seem to be any better. Seems like no one could back up a Dodge 60 years ago without hitting something, so Dodge figured rust control was a waste of money.
One hinge is completely rusted out, and the other one looks bad. I can't think of any good ideas other than pulling the door skin, but if someone has other suggestions I'm all ears.Comment
Comment